Call of Duty: Modern Warfare 4 launches on October 23, and it's Infinity Ward's first new Call of Duty in four years. This time the fight moves to the Korean Peninsula, with a full Campaign, Multiplayer, and a third mode.
That third mode is DMZ, an extraction mode. You drop into a large map alone or with a squad, fight AI soldiers and other players, and collect gear and crafting materials. Then you have to get out alive. Anything you extract with is yours to keep, and anything you die with is lost. That one rule is what gives every fight in DMZ its tension.
This MW4 DMZ guide brings together everything Infinity Ward has officially shared so far, plus a few predictions of our own, clearly marked as speculation. It walks you through how a match works, your home base, your characters and what happens when they die, crafting, weapons, and the dangers on the Hajin map.
Haven't locked in your copy yet? The MW4 pre-order accounts on GamsGo can save you up to 15%, so you're ready to drop in on day one.
🧪 Testing and Update Schedule
Official DMZ intel published
Hands-on testing in Early Access
Guide updated with real data
This version is based on Infinity Ward's official intel.
MW4 DMZ at a Glance
Before we look at how a match plays out, here are the basics: when you can play, what it costs, and who you can play with.
October 23, 2026
October 20 (digital pre-orders)
Included with MW4, not free-to-play
Hajin Exclusion Zone
DMZ Levels 1 to 70
Solo, with friends, or Squad Fill
DMZ comes with every copy of MW4, so there's nothing extra to buy. Digital pre-orders can start a few days early, and our FAQ covers the exact dates, editions, and platforms.
You don't need friends online to play. You can go in alone, invite your own squad, or turn on Squad Fill, which matches you with two other players.
How a DMZ Match Works
With the basics covered, here's what actually happens once you load in. Every DMZ match, which the game calls a deployment, follows the same five steps:
- Get ready at your base, where you pick your character and gear.
- Choose what kind of match you want to play.
- Drop into the Hajin map. The game calls this the "infil."
- Complete objectives, fight enemies, and collect loot.
- Leave the map before time runs out. This is the "exfil," or extraction.
The time limit comes from a radiation storm that spreads and gets stronger as the match goes on. Stay too long and the map becomes too hostile to survive, so every plan you make in Hajin should include a way out.
What You Keep and What You Lose
The keep-what-you-extract rule covers everything you carry, from weapons and armor to crafting materials, valuables, and Keys.
There's one way to protect your best items. Larger backpacks come with Secure Slots, and anything inside them stays with you even if you die. A basic pack has eight slots and no Secure Slots, which is why upgrading your backpack is one of the first goals in DMZ. Once you have Secure Slots, fill them with whatever is hardest to replace, such as a Weapon Manual or a rare crafting ingredient, not with ammo or common resources.
Getting downed doesn't have to end your run. A squadmate can revive you, or you can use self-revive gear if you carry it. Without either, there's a new Tourniquet that gets you out of the downed state, which the game calls Last Stand, and back to a wounded state. It only buys you a little time, so follow it up with other medical items to get back to full health.
One thing always carries over, even when a match goes wrong: the XP you earn always counts. Your DMZ level keeps rising after a death, and that's what unlocks most new features.
Packing for a Match: Your Loadout
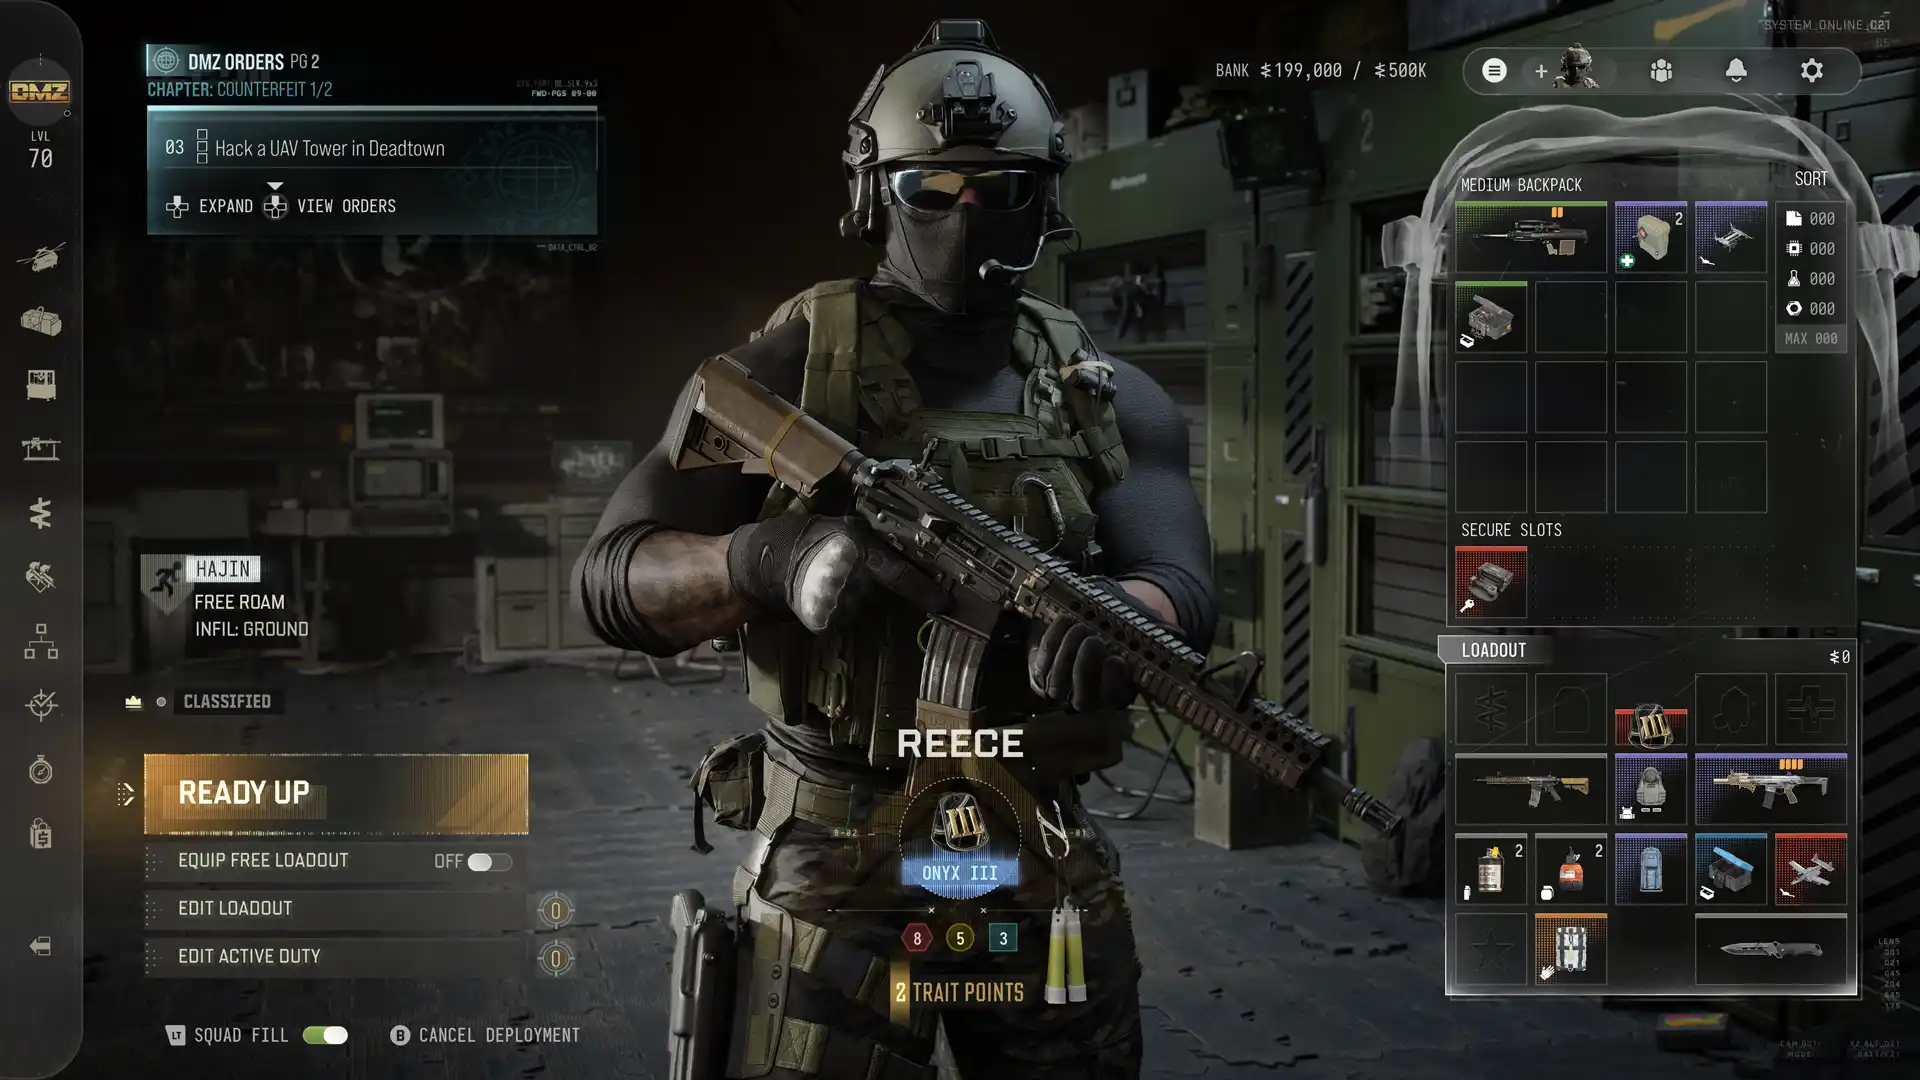
Before each match, you choose what your Operator carries in. Your Loadout is the gear you use directly, and your Backpack holds everything else. If your Stash, the storage at your base, is empty or you just want to jump in, pick the Free Loadout, a basic kit you get for nothing. It's a low-risk way to build up your Stash while you learn.
Infinity Ward recommends never going in without four things: a Plate Carrier, a Backpack, a weapon, and a Medkit. Everything else depends on where you're headed.
Reading the DMZ Screen
The DMZ screen, or HUD, shares a few basics with Multiplayer, like the ammo counter and compass. Much of it is new, though. It answers the questions you'll ask most in Hajin: how much time is left, how dangerous this area is, and what you still need to do. The numbers below match the official screenshot.
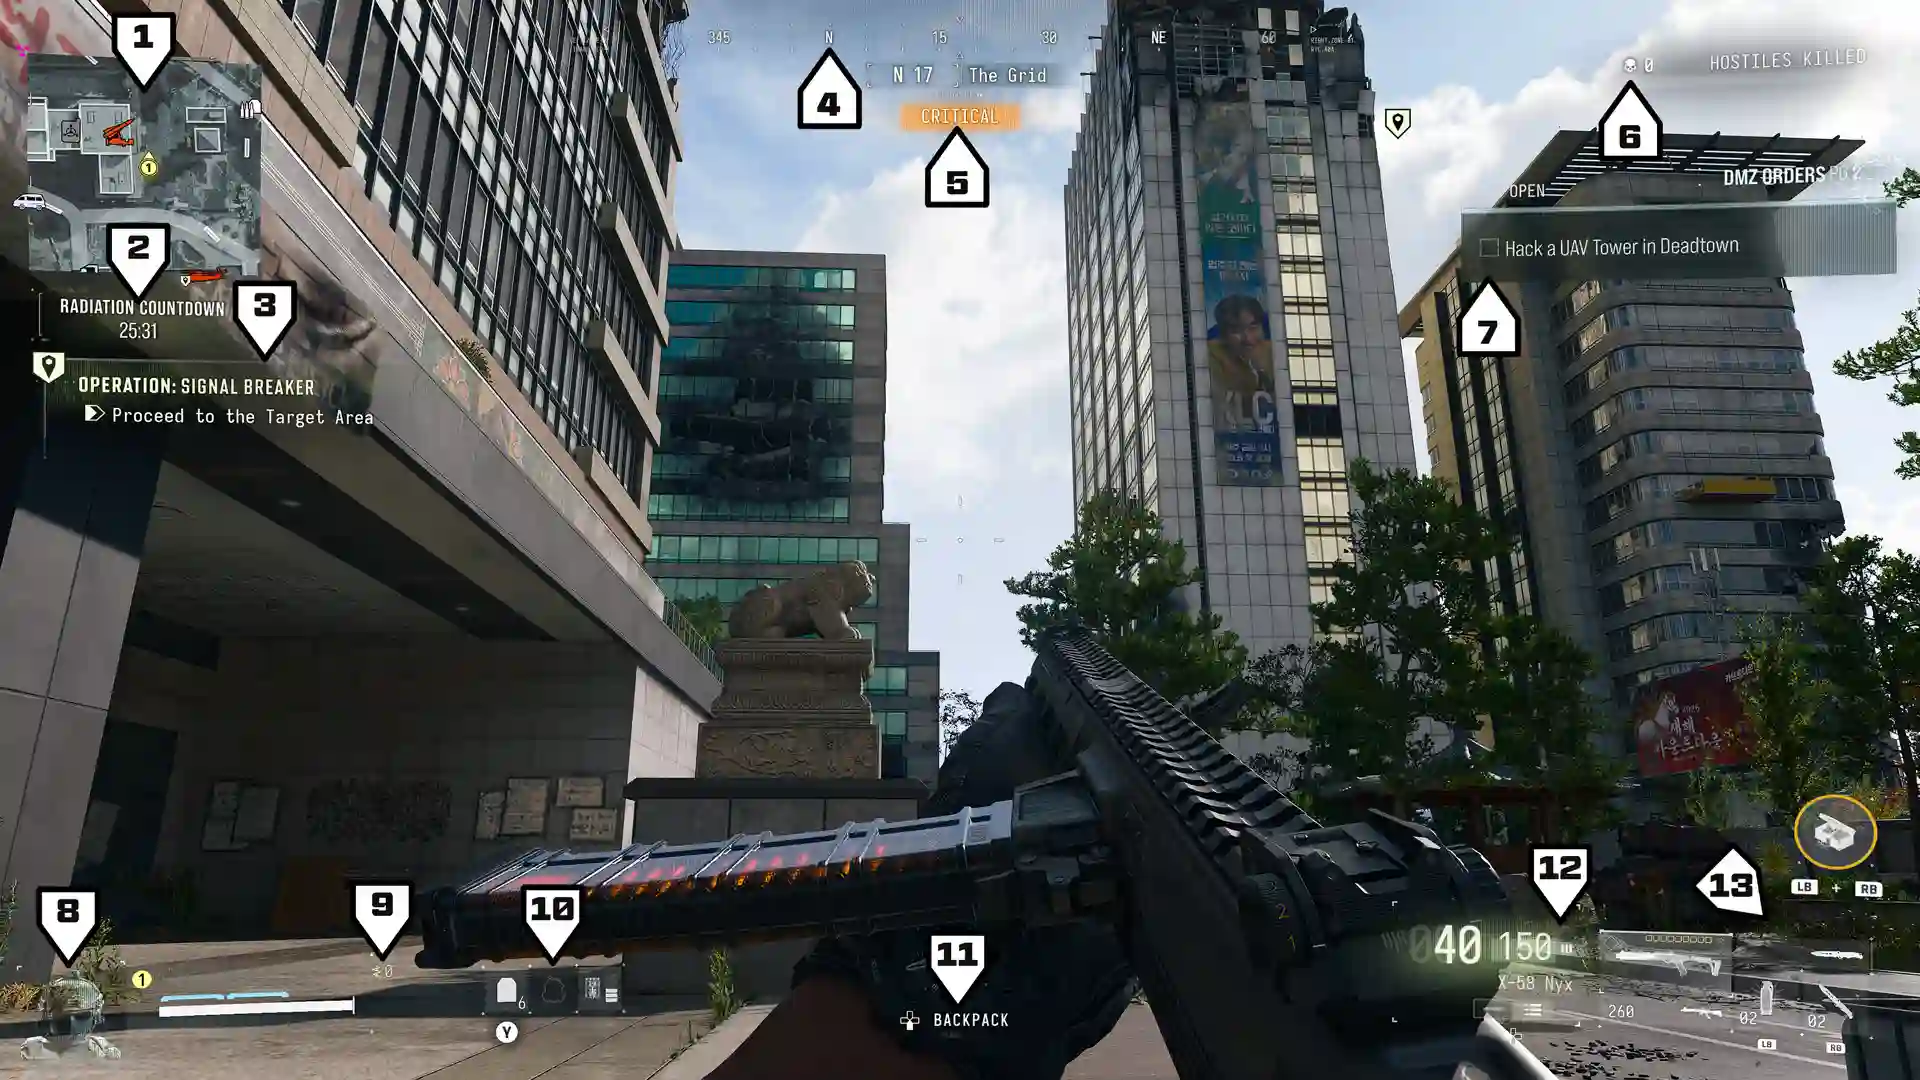
Two more HUD items aren't numbered in the screenshot. The equipment row shows your melee weapon, tactical, and lethal equipment with how many you have left. Your Field Upgrade and any Fire Support killstreaks also appear near the weapon display.
Choosing a Match Type
When you're ready to play, you pick one of three match types. They all take place on the same map, but each one gives you a different goal.
If you're new, start with Story Missions, because the briefing tells you where to go and what you'll earn. Once you know the map, Dynamic Operations become the best source of steady Cash. Free Roam suits players who already know exactly what they're looking for, such as a specific ingredient or a Lieutenant.
Side Ops: Extra Rewards Along the Way
Whatever match type you pick, you'll pass smaller optional tasks called Side Ops. They're quicker than a full Op, earn DMZ XP, and often give you something useful for the rest of the match. You can also start a Dynamic Op mid-match by finding a Dynamic Ops phone in Hajin.
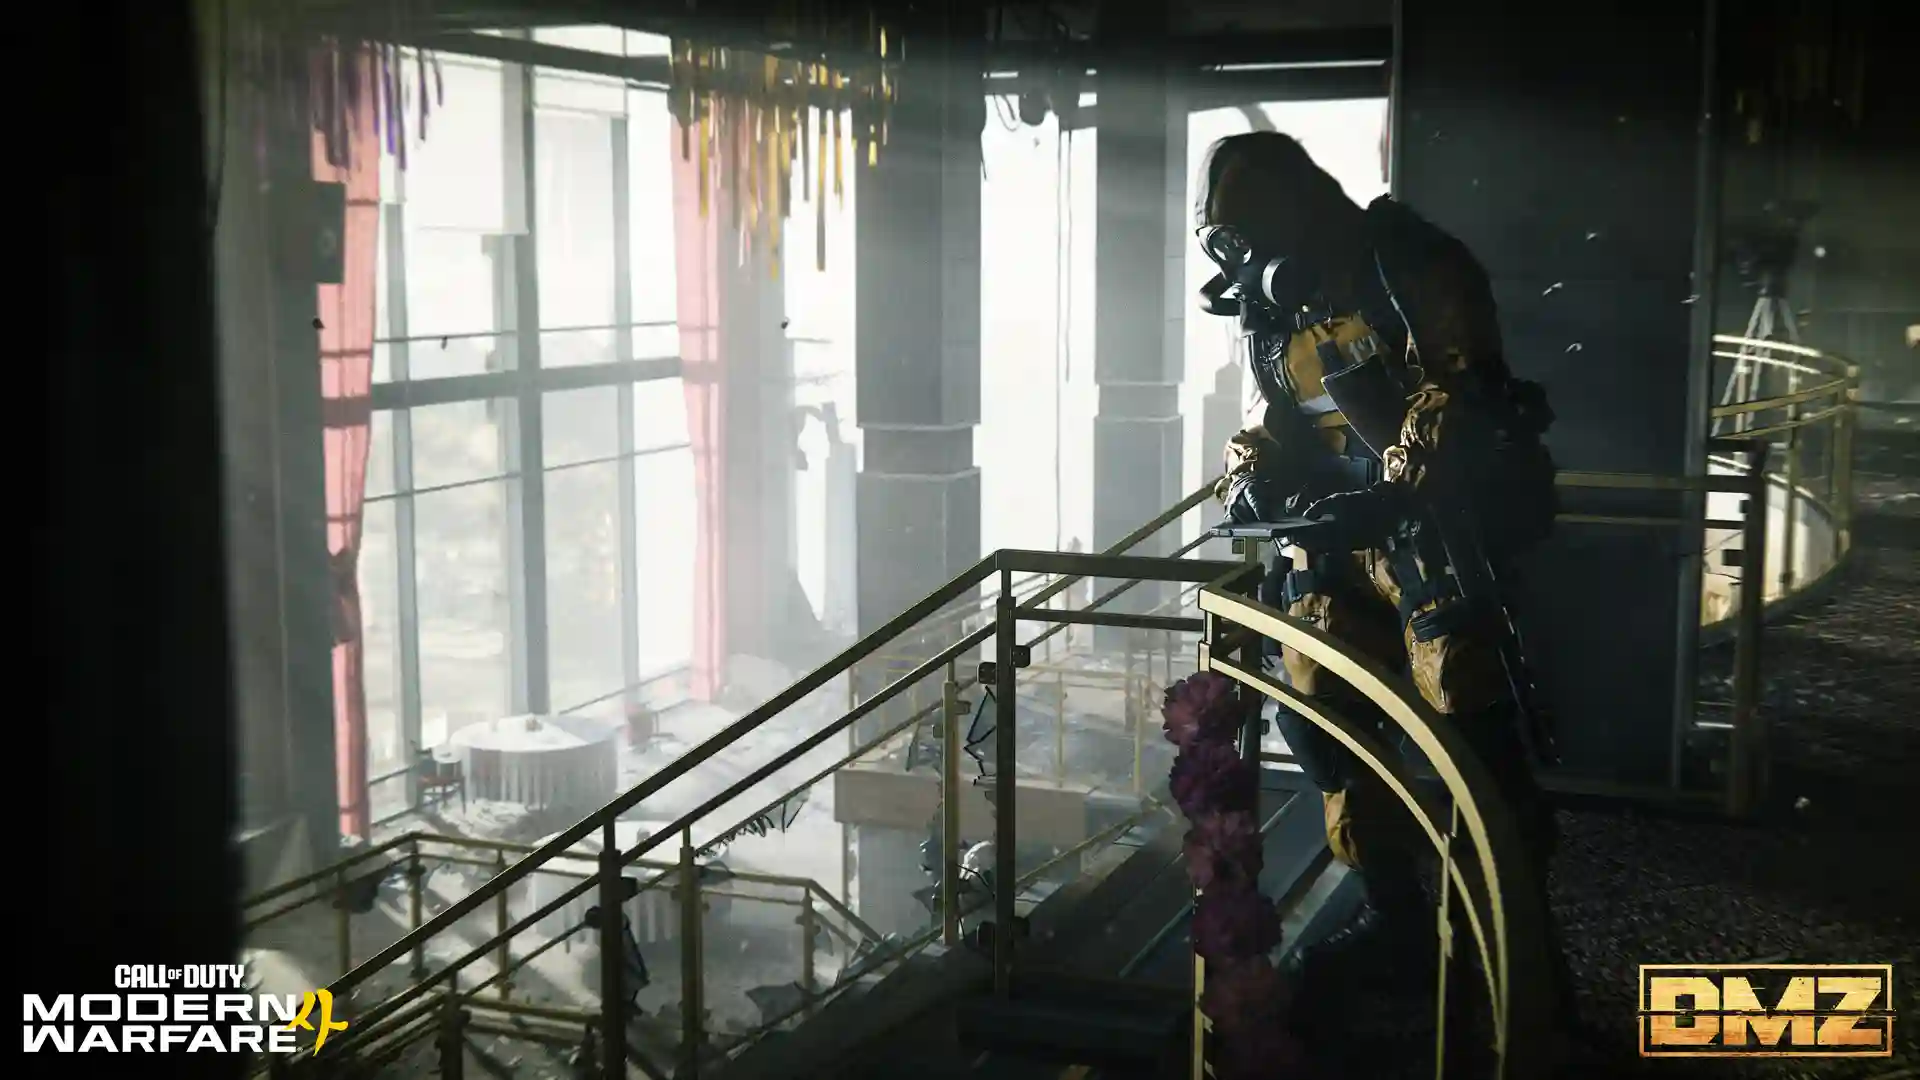
How You Enter the Map (and What It Costs)
In Dynamic Operations and Free Roam, you can also choose how you arrive. Walking in is free. The other options cost DMZ Cash, the money you earn inside DMZ and keep in your Bank at the base. Some of them unlock as your DMZ level rises.
Our read (speculation): Walking in is the right choice for most early matches, because you'll need your money for weapons and for bringing back characters who die. The Cargo Plane is the option to save up for. Once you know where a rare item or a boss's loot room is, landing right next to it saves a long walk across the map.
Whichever way you enter, take a few seconds after landing to open your map, find the closest exfil points, and plan a route that ends near one. With a random starting point, knowing your way out matters more than knowing where the loot is.
How to Get Out Safely
Getting out is the step that decides whether a match counts. The standard way is an exfil site, marked on your map with green smoke. Sites rotate from a pool of locations, so they change from match to match. There are also a few other ways out, each with its own trade-off.
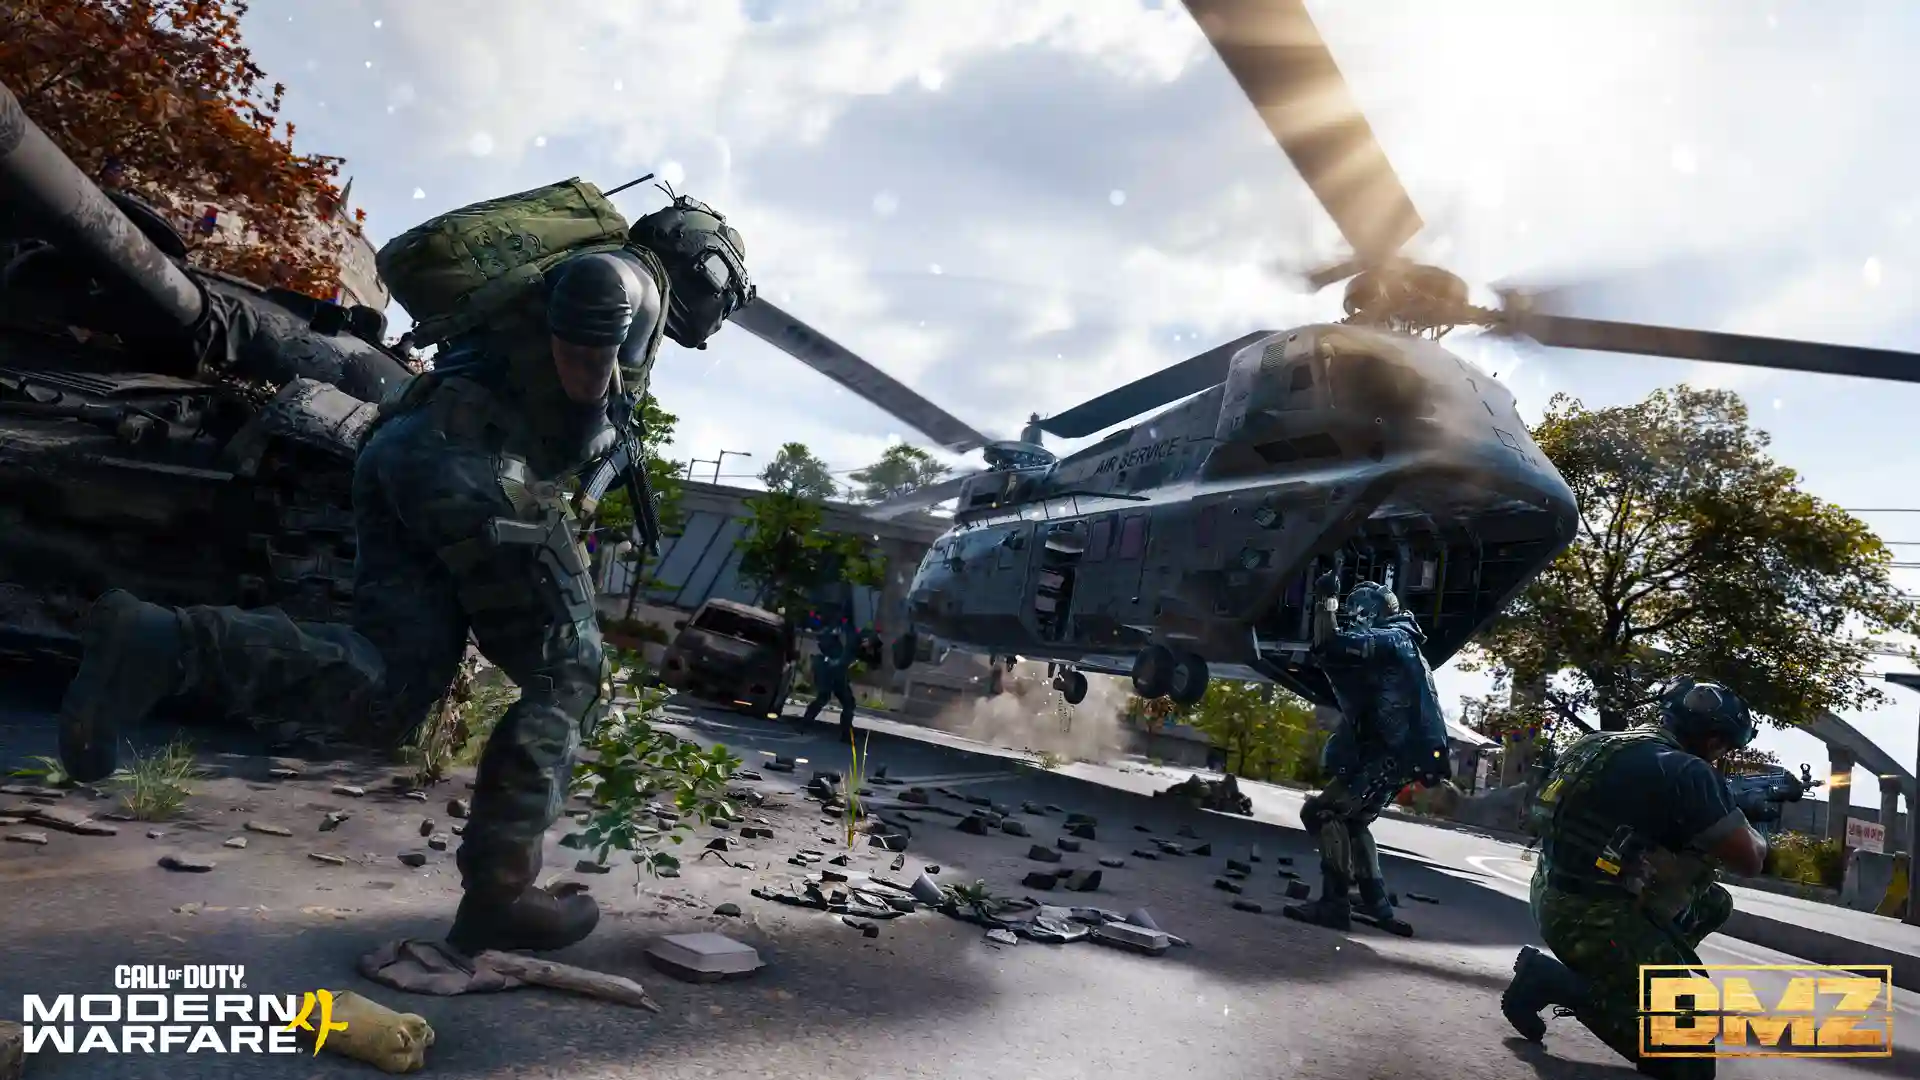
Whichever method you use, the moment you try to leave is when other players are most likely to find you. These are the dangers to plan for.
When the match ends, you get a grade from F to S++ based on three things: objectives, combat, and looting. Any Recipe or Weapon Manual you carried out is unlocked permanently, and each one also pays 5,000 DMZ Cash. We'll explain what those two items do in the crafting and weapons sections.
DMZ FOB: Your Base Between Matches
Between matches, you return to your Forward Operating Base, or FOB. It's a camp you walk around in, a bit like a lobby, and each building in it is a station with its own job. One station stores your loot, another builds weapons, another starts the next match.
You start with a small camp. As your DMZ level goes up, new stations open and the base grows to more than a dozen. Here's what each one does and when you get it.
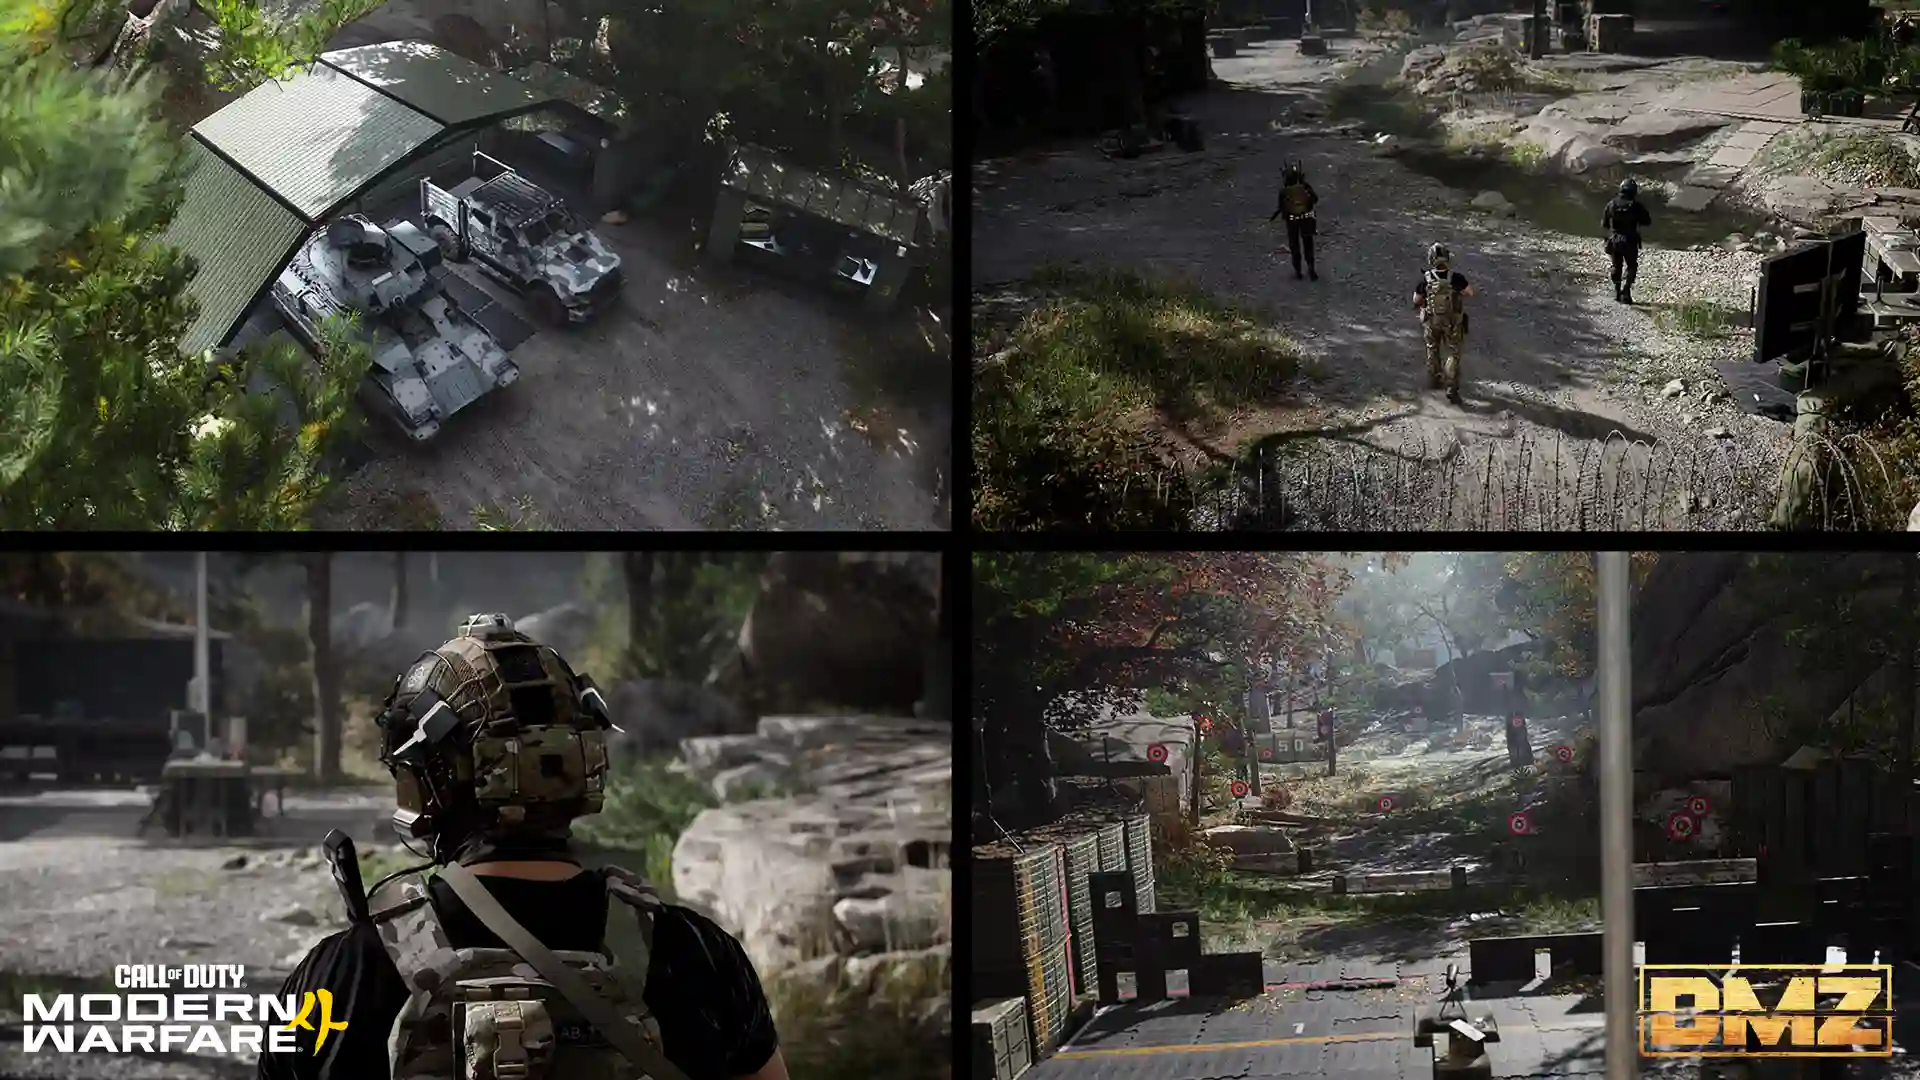
Three more stations are open from the start: Events, Deploy (where you start a match), and DMZ Progression. Progression is worth checking every few matches, because each of the 70 levels gives a reward, such as a new crafting recipe, more storage, a bigger Cash limit, a Gunsmith discount, or an extra character slot.
New weapons are worth a quick stop at the Firing Range, too. A few minutes there teaches you a gun's recoil before you have to rely on it in Hajin.
Our read (speculation): Based on the unlock levels Infinity Ward has shared, I expect Level 10 to be the first big milestone. Before the Gunsmith opens, you depend on the free starter gear, weapons you find, and whatever the Vendor sells that day. After Level 10, you can buy back a favorite weapon whenever you lose one. Most players will push DMZ Orders in the first days to get there quickly.
DMZ Operators and Traits
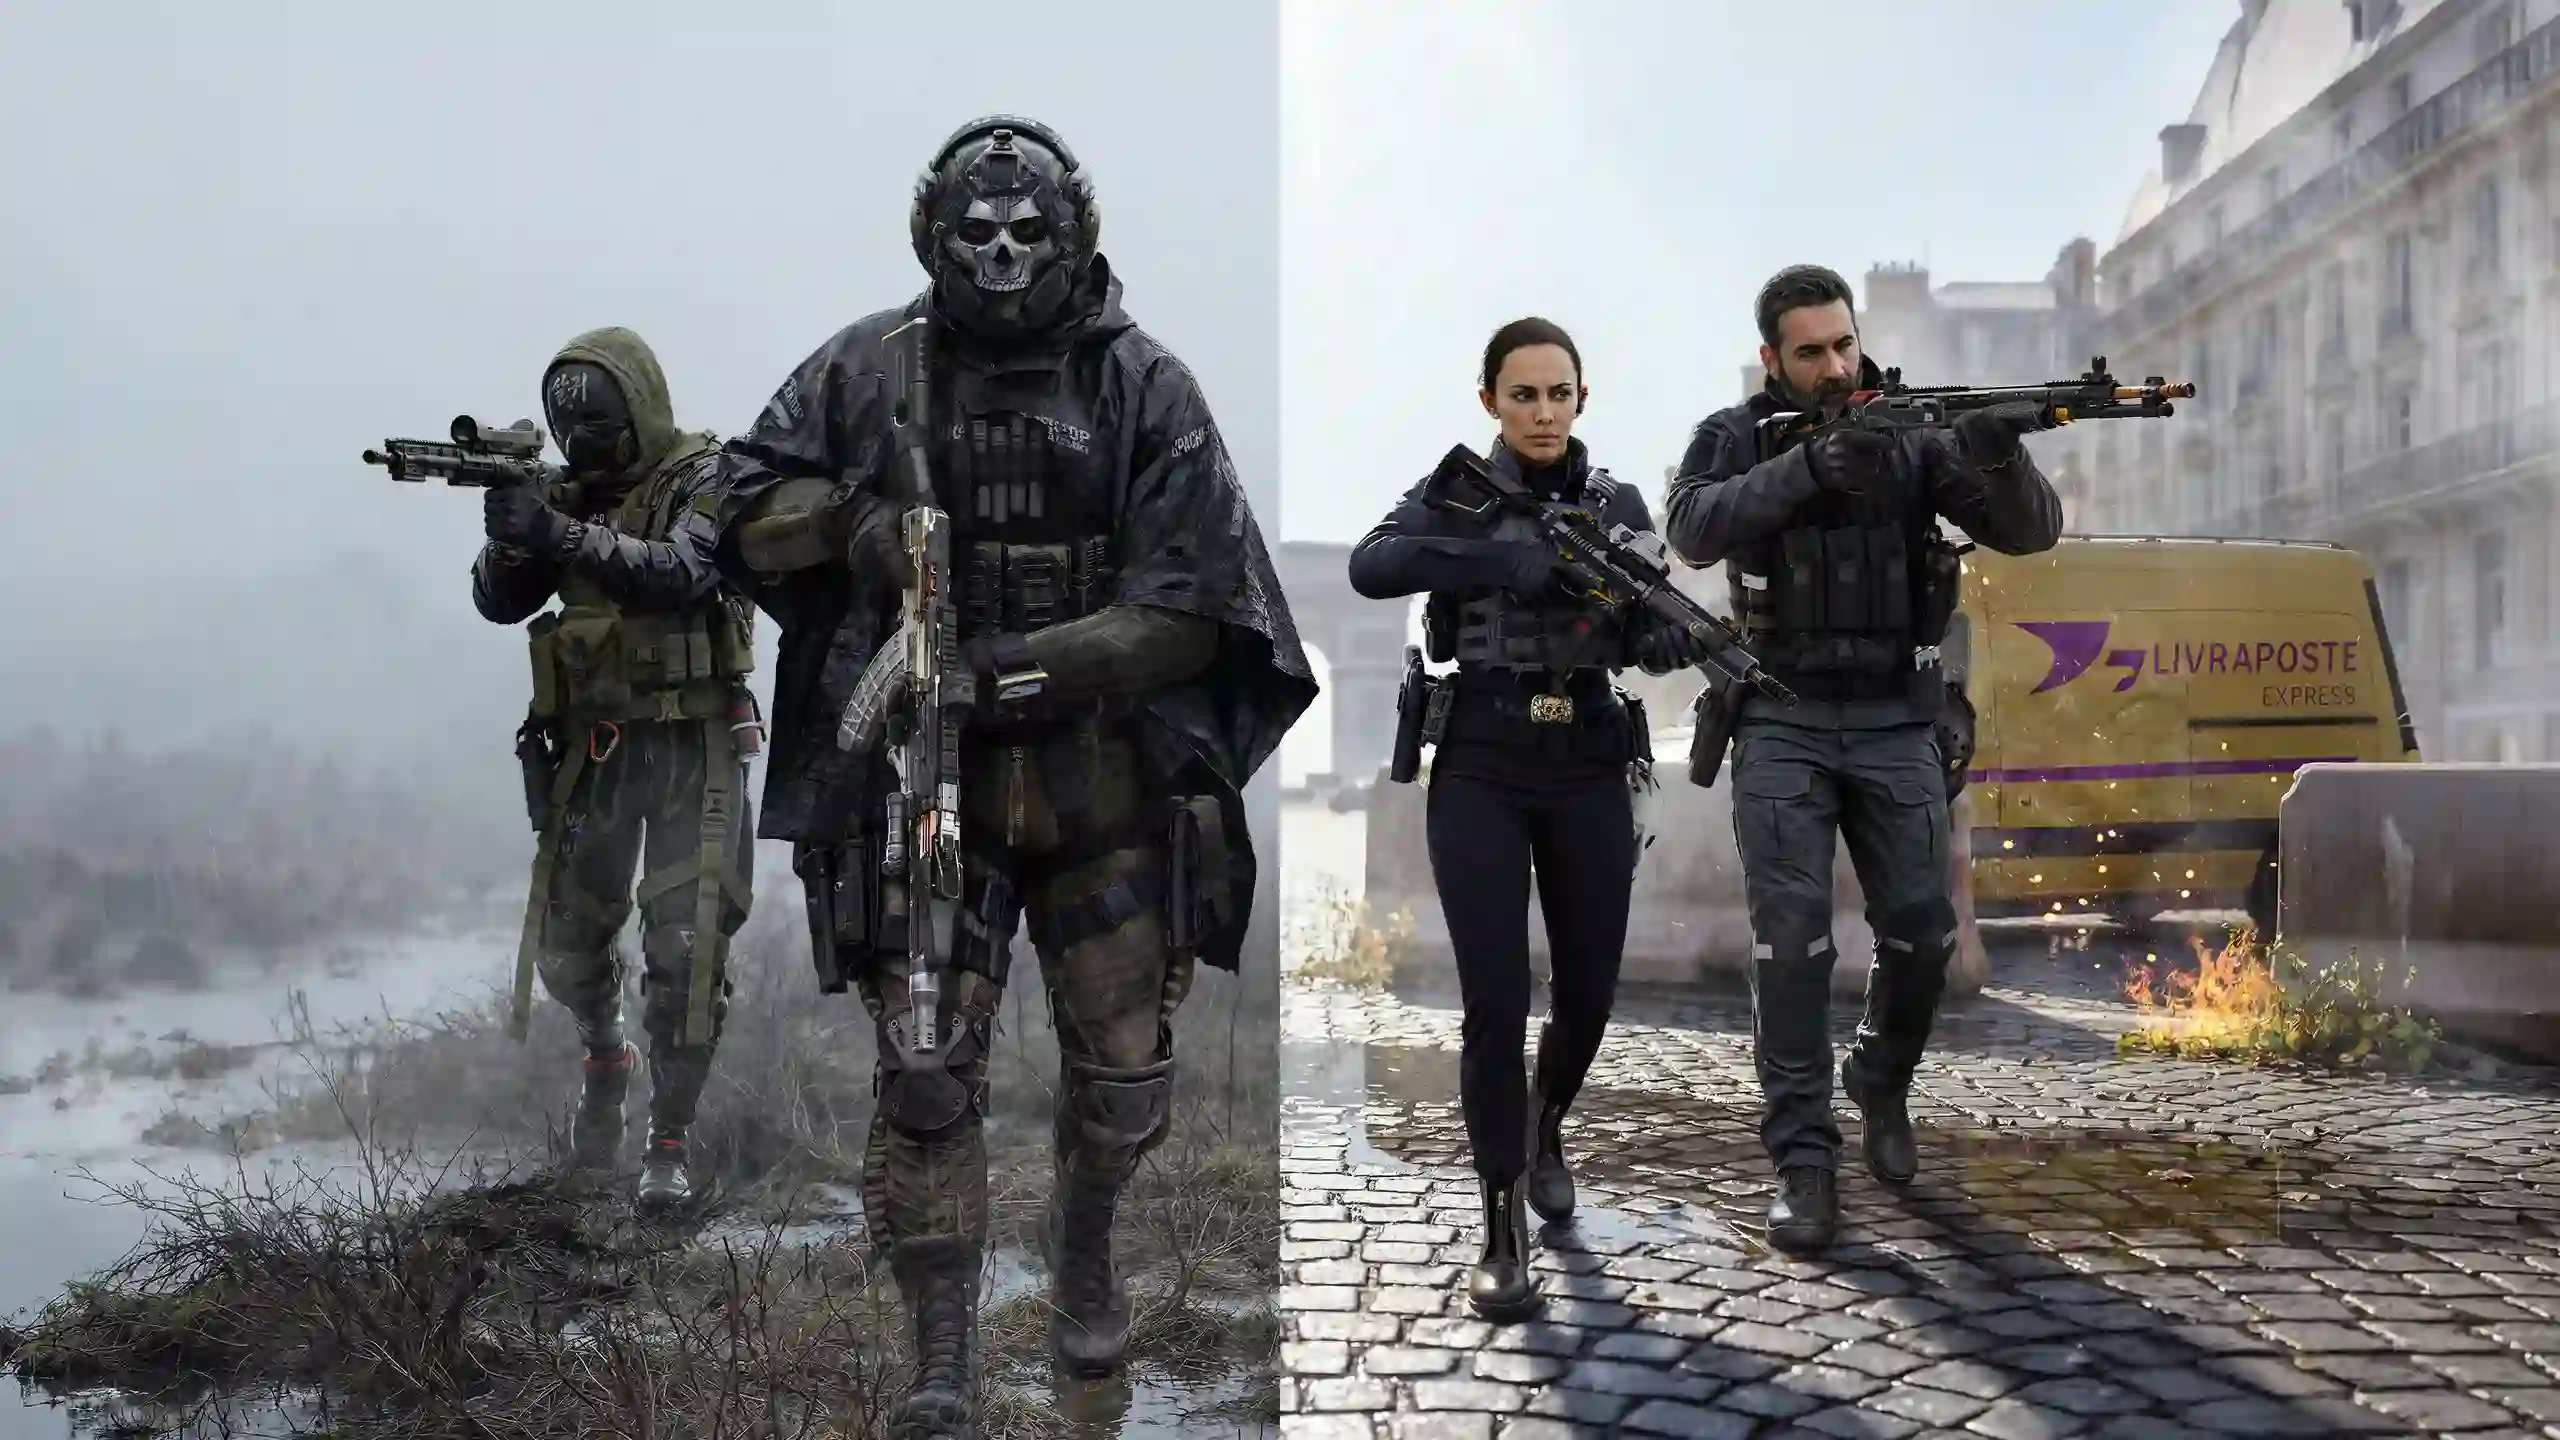
The first station you'll use at the FOB is Operators. In DMZ, the character you play as is called an Operator. In most Call of Duty modes, an Operator is only a skin. In MW4 DMZ, each Operator is a character that improves the more you play, so it's worth getting to know the system early.
How Many Operators You Can Use
You start with two Operator slots, so you can have two characters ready to play. You can unlock a third slot by leveling up DMZ, and Vault Edition owners have three from the start. You can change an Operator's look at any time.
Each Operator keeps their own Backpack and Loadout between matches, so you can leave one kitted for quiet looting and another for heavy fights. Your Stash, DMZ Cash, and crafting materials, on the other hand, are shared by all your Operators. Infinity Ward even suggests using one Operator as a "cash mule" that earns money for the rest of your roster.
Which Operators You Can Play at Launch
Your Operator's look comes from the same roster used in Multiplayer. In DMZ, the look is cosmetic. Infinity Ward hasn't announced any character-specific abilities, so what makes one Operator stronger than another is the traits you give it, which we cover next.
These are the Operators Infinity Ward has officially confirmed for launch, along with how to get each one.
Every player also gets a base roster for free. Infinity Ward hasn't published the full list yet. Named characters seen in the Beta and the Campaign include Coffey, Blackwell, Reece, Park, Kal, Dallas, Dunn, Zimo, Minhee, West, and Jae. There are also soldier-style Operators such as CTSFO, UCTF, MilSim KSK Arctic, and MilSim US SF. We'll confirm the final roster at launch.
Traits: How Operators Get Stronger
Each Operator has a Dog Tag, a rank that rises as that Operator earns XP. It has 18 levels across six tiers: Steel, Bronze, Silver, Gold, Damascus, and Onyx, each with three steps. Every new level gives one Trait Point, which you spend on traits, permanent bonuses for that Operator. A strong match can level the tag more than once, and an Operator's tag level is separate from your overall DMZ level.
Traits are split into three groups, called trait trees, with 22 traits each. Your first point in a tree unlocks a random Minor Trait. After that, the tree branches into pairs of Major Traits and groups of three Minor Traits, and you pick one per branch to move up. A tree holds up to nine of your traits, so 18 points can complete two trees or spread across all three.
One rule shapes every choice: once you pick a trait, you can't swap it out. It's worth deciding what each Operator is for before you spend the first point.
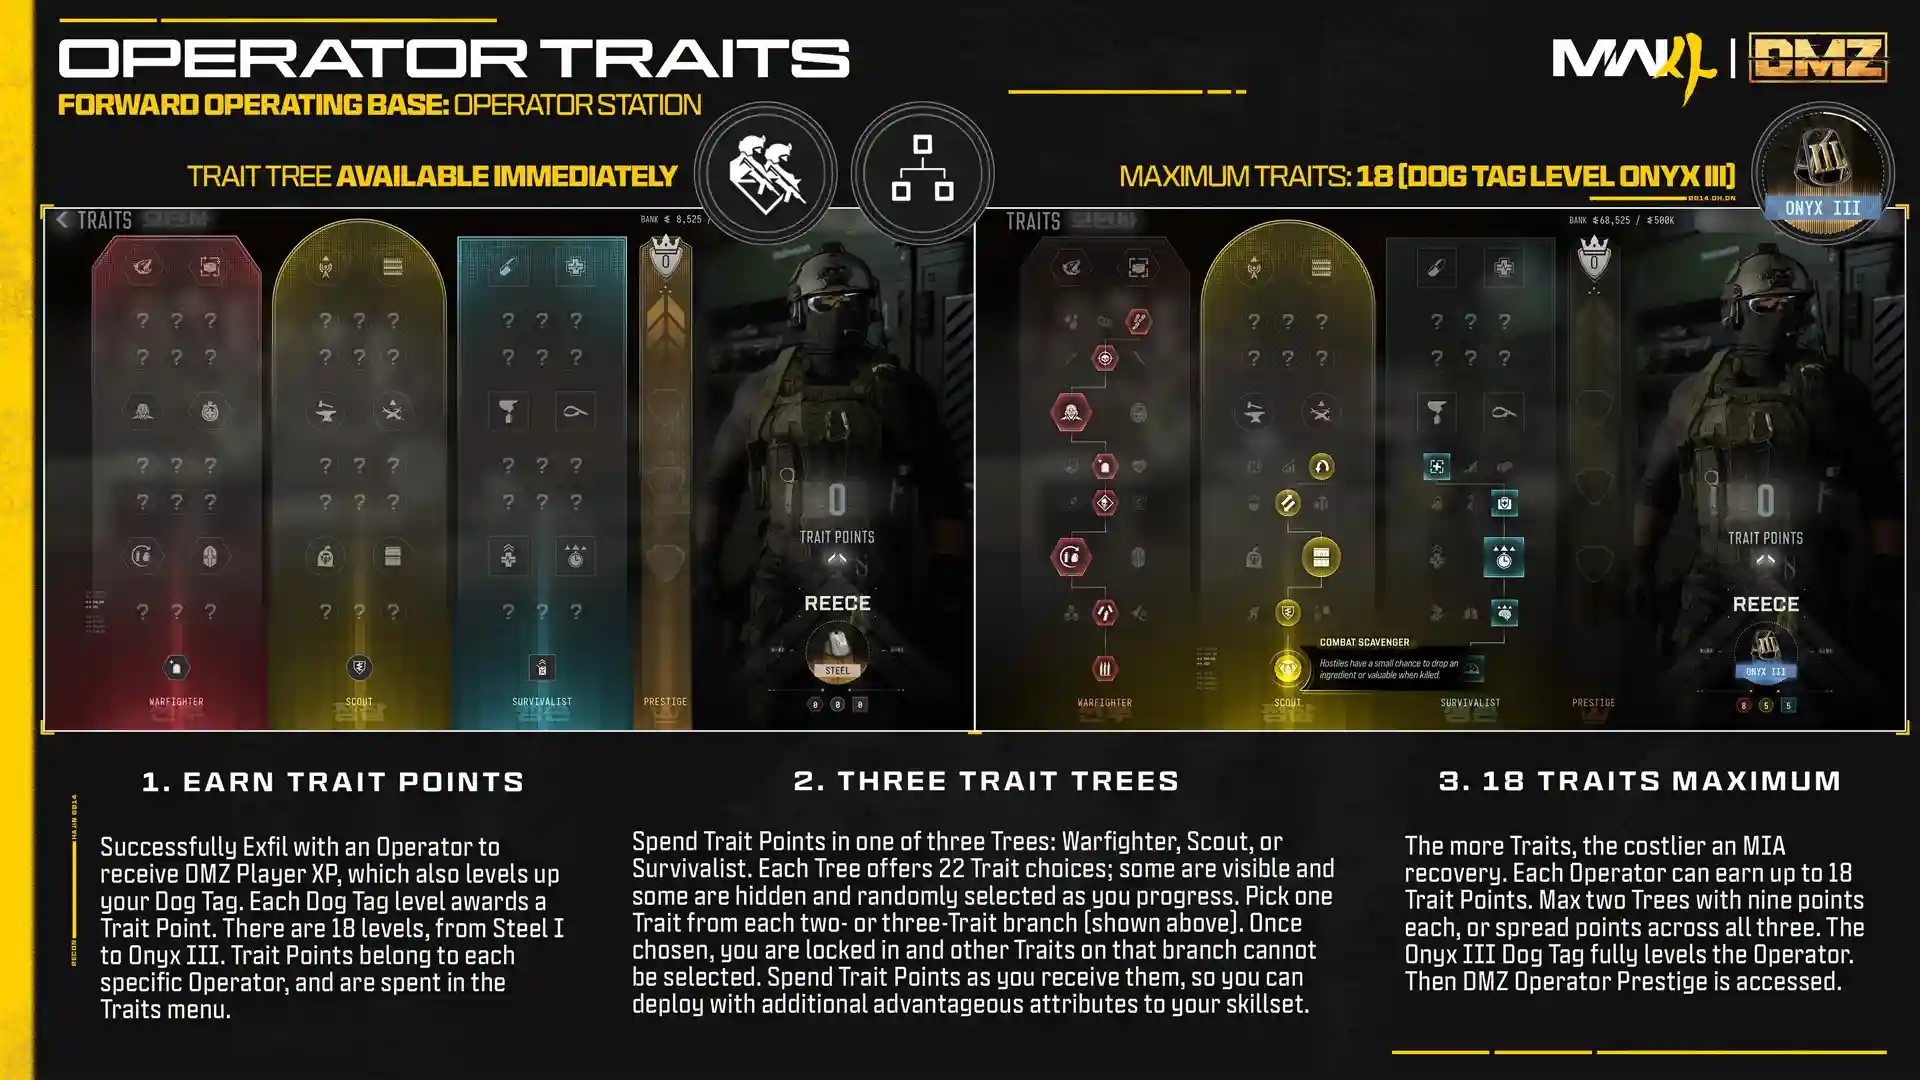
Here are the Major Traits Infinity Ward has revealed for each tree. Minor Traits are randomized, so they vary from Operator to Operator.
Our read (speculation): For your first Operator, Possum and Free Revive are the safest picks, because both help you keep your gear after a bad fight. Scout traits like Investor and Container Looter pay off more on a second Operator that you use mainly for collecting resources. That second slot also suits risky matches, since the next section explains why a low-level Operator costs little to lose.
When an Operator Dies
If your Operator dies, they go MIA (missing in action) and can't be used until you bring them back. Bringing them back costs DMZ Cash. They keep all their traits, but they return without any gear.
The cost depends on how many Trait Points the Operator has. A new Operator is cheap to bring back, while a fully leveled one costs much more. If the price is too high, you can dismiss that Operator and start a new one in the same slot.
Infinity Ward hasn't published exact prices yet. Two things are confirmed: the 3D Printer can craft permanent discounts on these costs, and some Survival Kits, called SERE Kits, are built for high-risk recoveries.
Our read (speculation): Since there's both a discount upgrade and rescue items for this system, recovery will likely be a regular expense. Keeping enough Cash for at least one recovery before taking a well-leveled Operator into a dangerous area is a simple way to avoid being stuck without your best character.
Prestige: Resetting an Operator for Permanent Perks
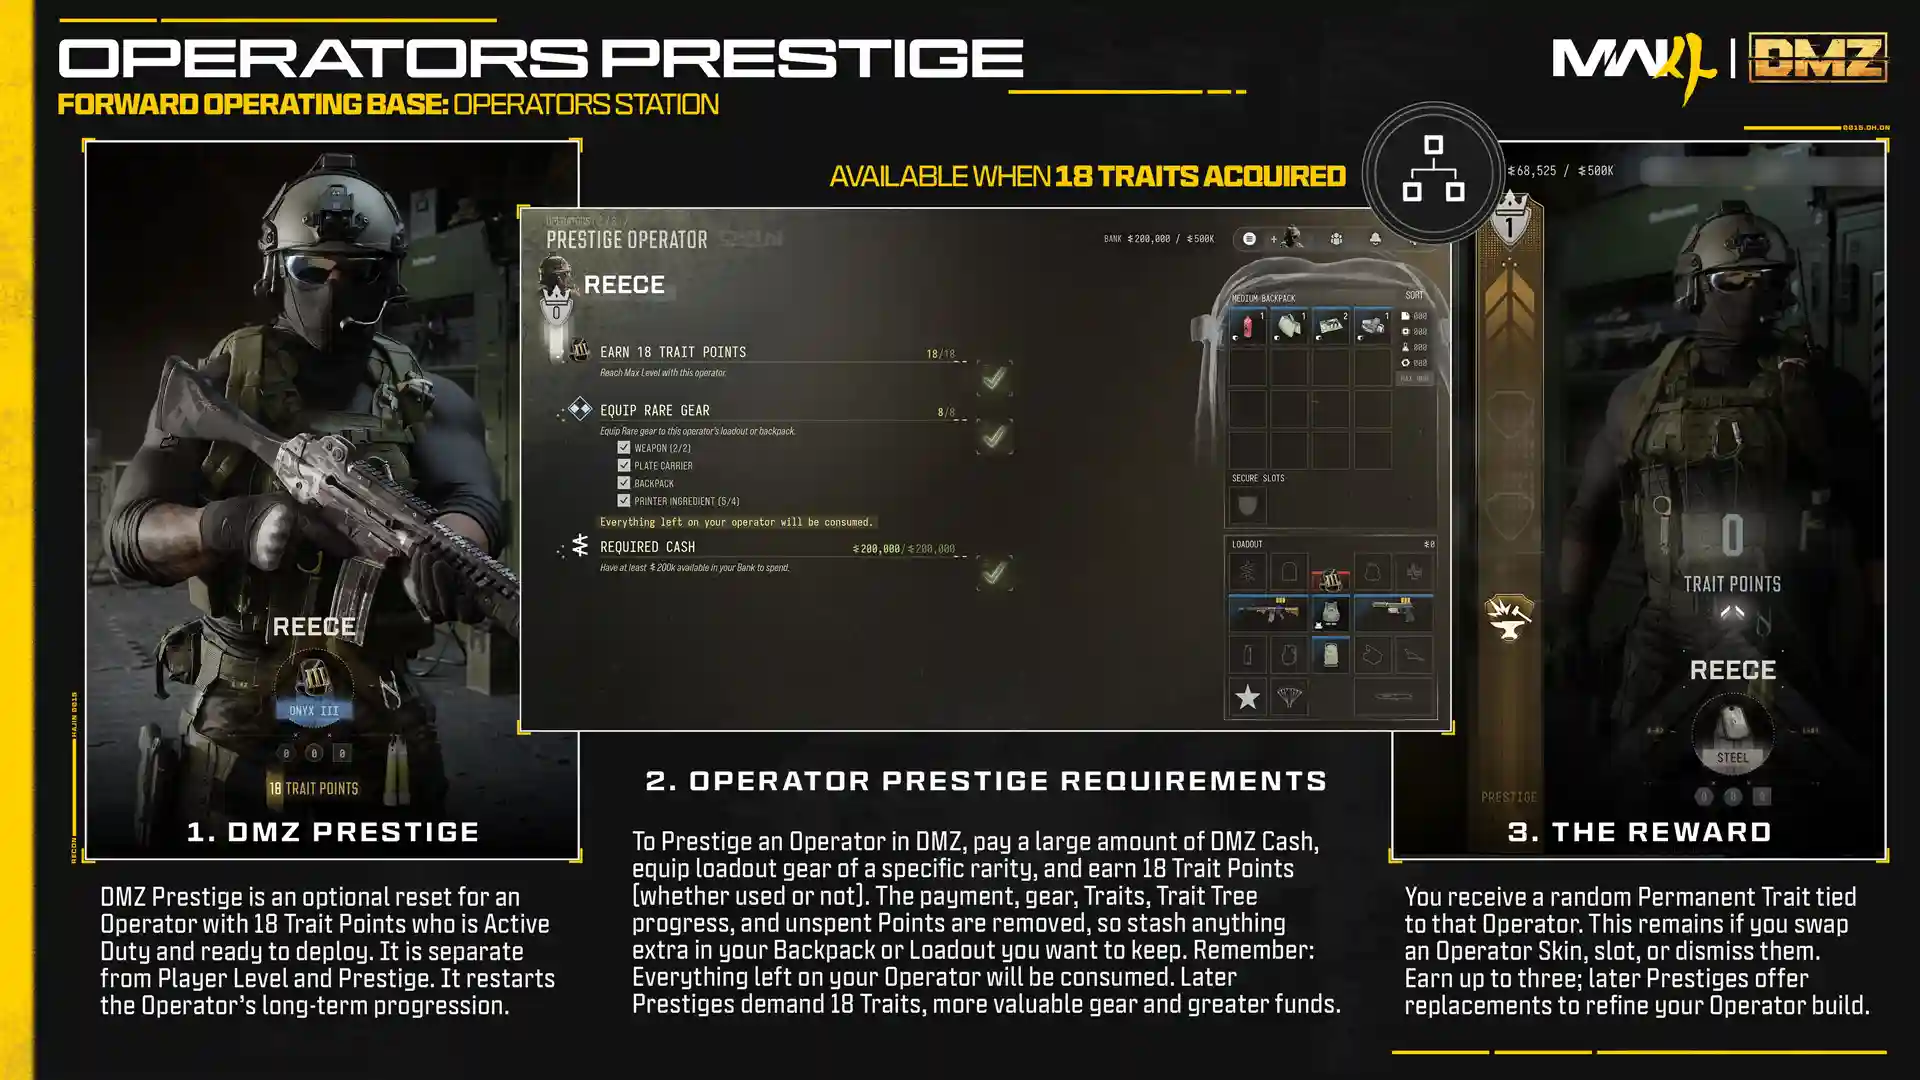
Prestige is a long-term goal. Once an Operator has all 18 Trait Points, you can prestige them. This resets their traits, but it also gives them a random Permanent Prestige Trait that stays forever, even after the reset.
Prestige isn't free. Each time, you give up a set of high-quality gear and pay a large amount of DMZ Cash.
Each Operator can hold up to three Permanent Prestige Traits. From the fourth prestige on, you're offered a new trait and choose whether to replace one of your three or turn it down. Two practical notes: an MIA Operator can't prestige, and Trait Points don't have to be spent first. Prestiging several Operators also earns Calling Cards and other rewards Infinity Ward hasn't revealed yet.
Our read (speculation): Going by the published prestige costs, I'd guess the first prestige is a mid-game goal, not something for launch week. The gear is the hard part, because you have to extract with each required item first. A practical approach is to store the items over several matches and prestige once you have everything.
DMZ Crafting: Using the 3D Printer
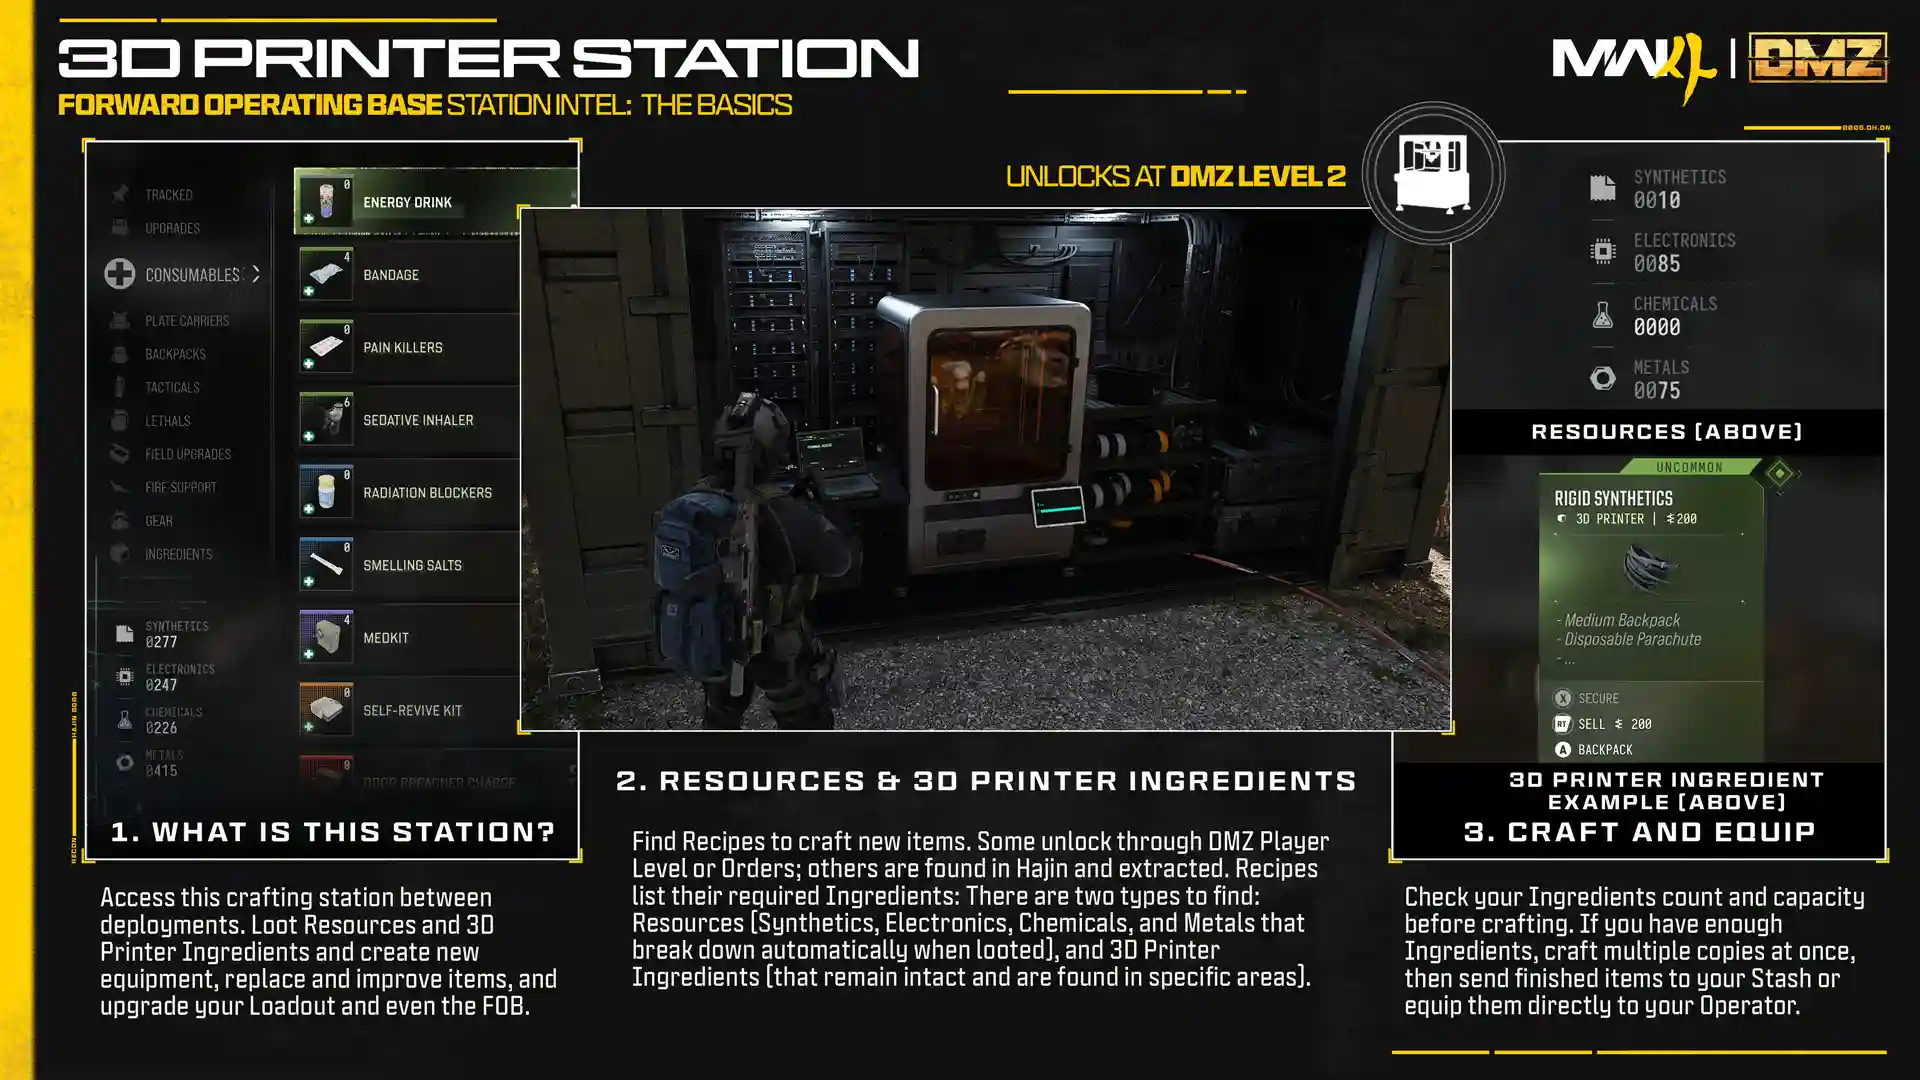
Once your Operator is set up, the next thing that shapes your runs is gear. The 3D Printer, which opens at DMZ Level 2, is the FOB station where you make your own instead of hoping to find it. It can print armor vests, backpacks, night vision goggles, and parachutes. It also makes grenades and other equipment, consumables from painkillers to radiation blockers, and killstreaks, which are call-in rewards like a UAV radar sweep.
One difference from Multiplayer is worth knowing early: Field Upgrades don't recharge in DMZ. Once you use one, it's gone, so treat them like any other item you craft or find.
What You Need to Craft
Each craft needs a Recipe, which works like a blueprint. You earn Recipes by leveling up, completing DMZ Orders, or finding one in Hajin and extracting with it.
The Recipe then asks for materials. Resources are the basic ones, in four types: Synthetics, Electronics, Chemicals, and Metals. They're added to your total automatically when you loot, so they never take up backpack space.
Better items also need 3D Printer Ingredients, specific parts like Binding Catalyst, Biomaterials, Detonators, and Control Units. These do take up backpack space, so you only keep them if you extract.
The First Recipes You Get
These recipes unlock at Level 2. The vests and backpacks matter most, because better armor keeps you alive and a bigger backpack lets you carry more out.
If you need a specific ingredient, you can pin it in the printer menu. Pinned items are marked when you see them in Hajin, and the menu also shows where each ingredient usually appears. It's worth pinning the two "Always keep" ingredients from the table below as soon as the printer opens.
The printer is quick to use once you know it. Ingredient counts turn green when you have enough, and you can craft several copies of an item at once. Finished gear can go straight to your Operator or into your Stash. Later recipes go well beyond the basics, including vests that can stop one-shot kills and consumables that breach locked doors.
What to Collect and Keep Early
In your first few hours, almost everything you craft draws from the same small pool of materials. This table shows which ones matter most and whether to keep them or sell them.
Looting Resources costs you nothing, so grab them whenever you can. Ingredients are where the real choices start. When your backpack fills up, drop common gear before you drop an ingredient you'll need for your next craft.
Upgrading Your Base
The printer's Upgrades tab improves the FOB itself. These upgrades are permanent. They raise your Cash limit, add storage for items and weapons, and make Operator recovery and Gunsmith builds cheaper. Others add more Vendor stock or let you print rarer ingredients, like Rigid Synthetics and Alloyed Plating, yourself.
Each upgrade takes several prints to finish, and many of them use valuables, which is why the table above suggests keeping your first few instead of selling them.
Getting Weapons in DMZ
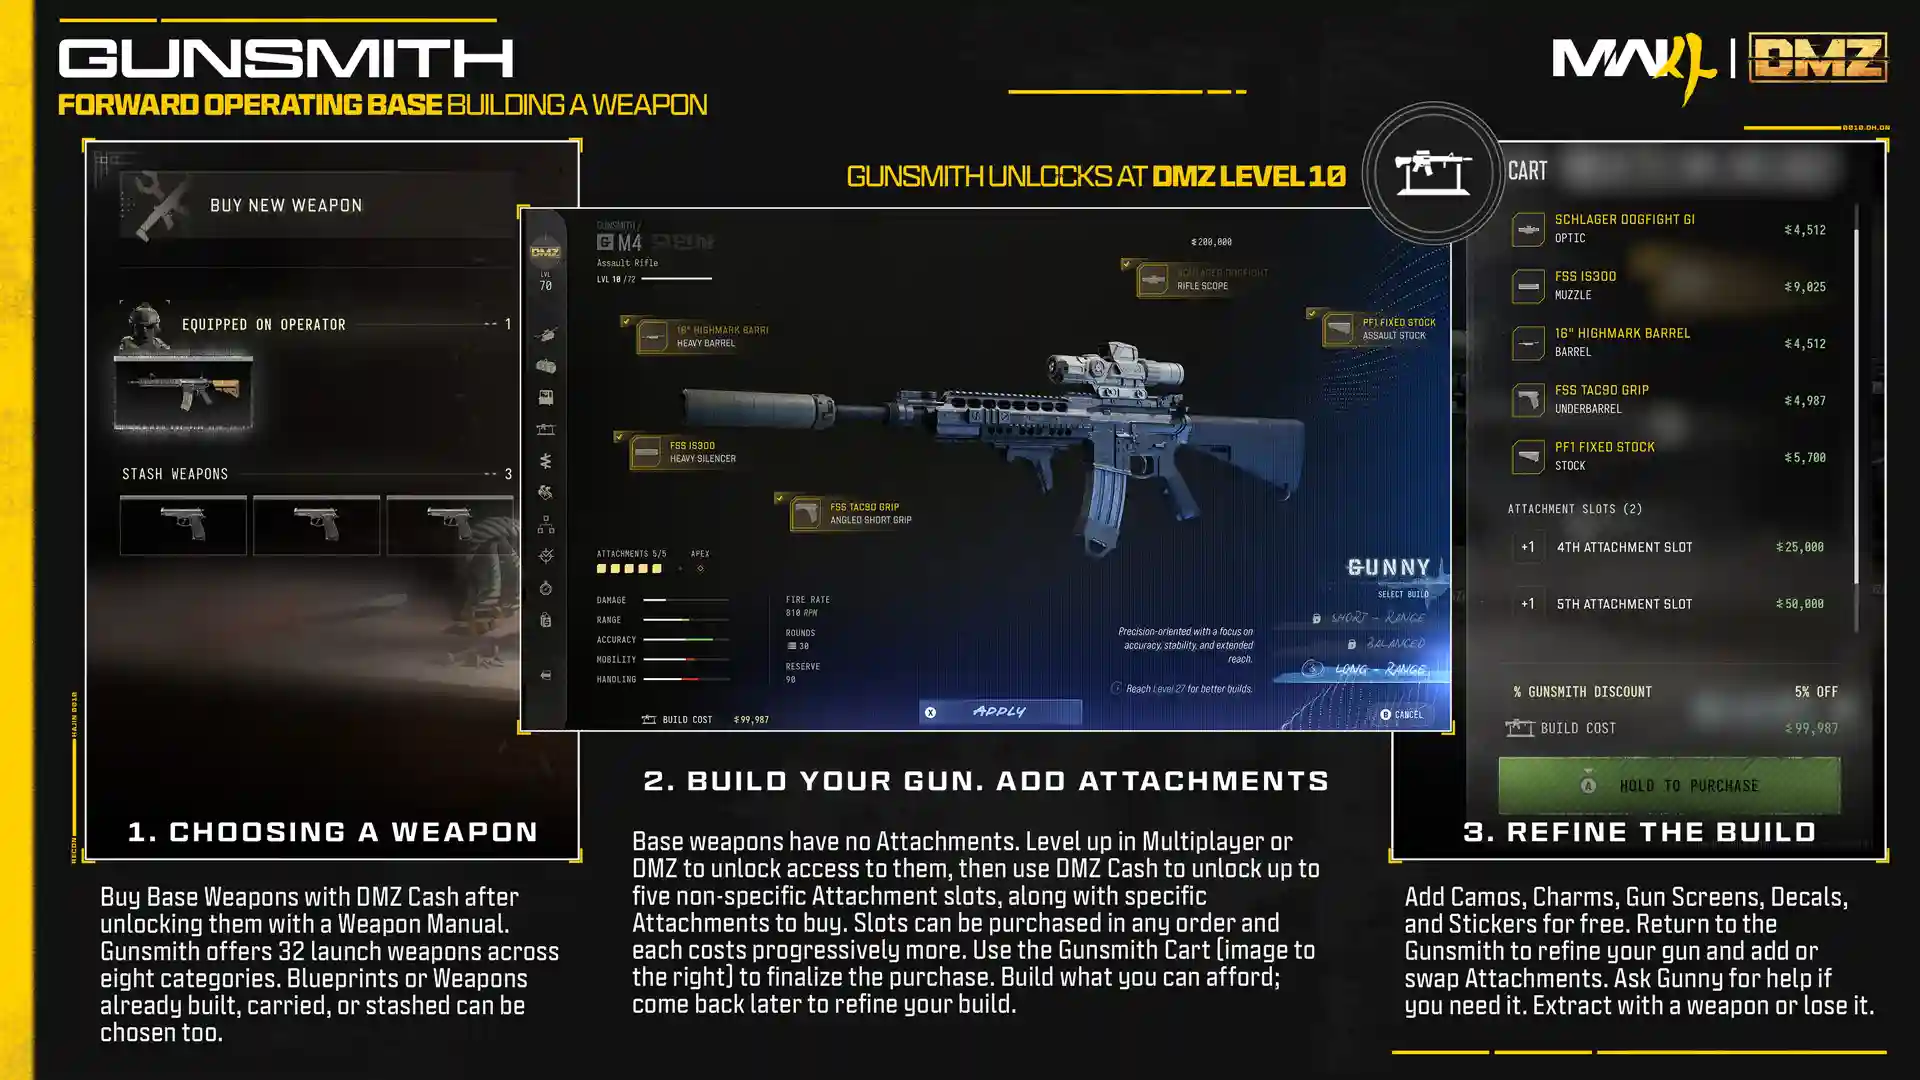
The printer covers armor and equipment, but not guns. You can get weapons in three ways: pick them up in Hajin, buy them from the Vendor, or build them at the Gunsmith once you reach DMZ Level 10. The Gunsmith is the most reliable option, and it works much like the one in Multiplayer. The difference is that everything in DMZ costs DMZ Cash.
Weapon levels and unlocked attachments are shared with Multiplayer, so leveling a gun there helps you in DMZ too. If you're not sure which guns to level first, our MW4 best guns tier list covers the strongest picks from the Beta.
How the Gunsmith Works
- Weapon Manuals: Before the Gunsmith can sell you a weapon, you have to find its Weapon Manual in Hajin and extract with it. After that, you can buy that weapon as many times as you like. A basic M4, for example, costs about 5,000 DMZ Cash.
- Attachments: Weapons you build can hold up to five attachments, and each extra slot costs more than the one before. Weapons you find in Hajin can have up to eight.
- Apex slot: In MW4, a weapon you've fully leveled gets a special Apex slot for a unique upgrade. In DMZ, this slot costs nothing.
- Weapons you find: Guns dropped in Hajin can come with damaged optics, broken attachments, or rough field repairs that affect how they handle. Lieutenants carry custom weapons with their own attachments and camos. Any gun you extract can be upgraded at the Gunsmith, but only as that single copy.
- Blueprints: Blueprints are pre-made weapon versions with their own look and attachments. You can use each one you own once for free, including the Beta Forged Han 86 from the MW4 Beta. After that, you can buy it again at a discount.
At launch, the Gunsmith has 32 weapons: 8 assault rifles, 5 SMGs, 2 shotguns, 3 LMGs, 3 marksman rifles, 3 sniper rifles, 4 pistols, and 4 launchers. Launchers can't take attachments, and cosmetics like camos are always free.
If you're not sure how to build a gun, Gunny, the Gunsmith's build helper, can put one together for you. Squads can also share the work. An experienced player can build a weapon at the Gunsmith and carry it in a Weapon Backpack, a pack with an extra weapon slot. Once the match starts, they drop it for a squadmate.
Our read (speculation): Expect Weapon Manuals to be the most hunted loot in the first week, with Weapon Backpacks close behind. Every extra gun you bring out is one less you have to buy.
The Hajin Map: Danger Zones and Bosses
Now that you know how a match works, here's where it happens. Hajin is a closed-off zone where Russia, North Korea, and South Korea meet, set after the events of the MW4 Campaign. It has 13 major locations and more than 60 smaller named spots, from rice fields and small villages to a walled city center and a damaged nuclear reactor.
Your role there is a shadow CIA asset sent to recover weapons and military technology left behind after the Campaign. The weather changes from match to match, too. Sudden rain cuts visibility, and fog or overcast skies can turn a familiar route into guesswork, so a plan that worked last match may need adjusting.
Threat Levels: How Dangerous Each Area Is
Each area has a Threat Level that tells you how strong the AI enemies are. It appears under your compass when you enter, and it runs from Low through Medium, High, and Critical up to Extreme.
The level also changes during a match. Noise and fighting push it up, and the enemy responds with stronger reinforcements: attack helicopters, heavily armored troops, and eventually Deathstalker drones sent to chase you down. Moving away and staying quiet brings the level back down. Threat Level only measures AI enemies, not other players.
To help you stay hidden, DMZ has a Stealth Meter. When an AI enemy is close to spotting you, you'll hear an audio cue and see an indicator that shifts from white to yellow to orange. Drop prone or get back into cover before it fills, and the enemy won't raise the alarm. Infinity Ward says this is especially useful for solo players.
A second meter, the Hostiles Kill Count, tracks how many AI enemies you kill in one match. If it fills up, the game sends an enemy Hunt Squad after you. To keep both meters low, Infinity Ward suggests breaking line of sight, moving to quieter rural areas, and using melee attacks, throwing knives, or suppressed weapons.
Major Locations: Danger and Loot at a Glance
Hajin's 13 major locations each have a starting Threat Level and a few spots where the better loot tends to be. As a rule, the more dangerous the area, the better the rewards. Here's what Infinity Ward's field intel says about each one.
Where to Find High-Value Loot
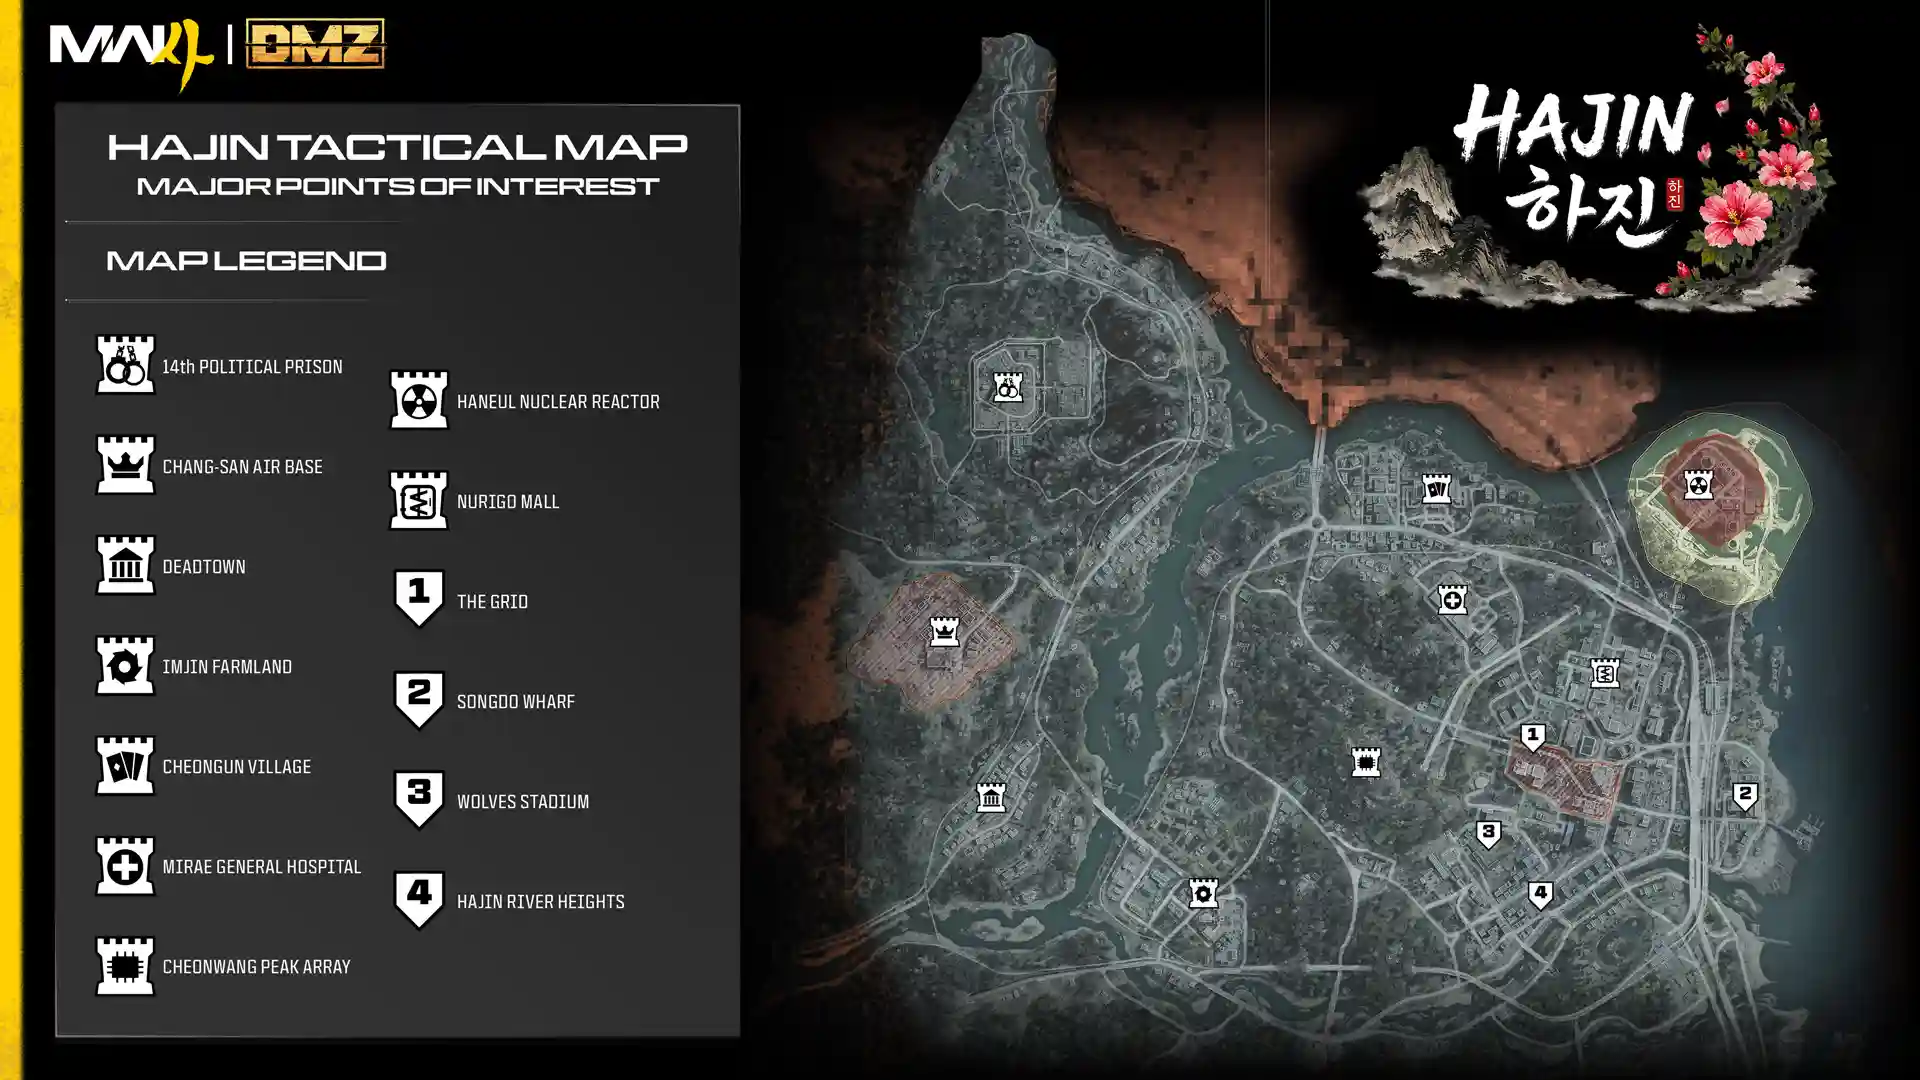
Beyond the major locations, certain types of buildings and sites across Hajin are marked on your Tac-Map because they're more likely to hold specific gear. Learning them helps you shop for what you need instead of searching every house.
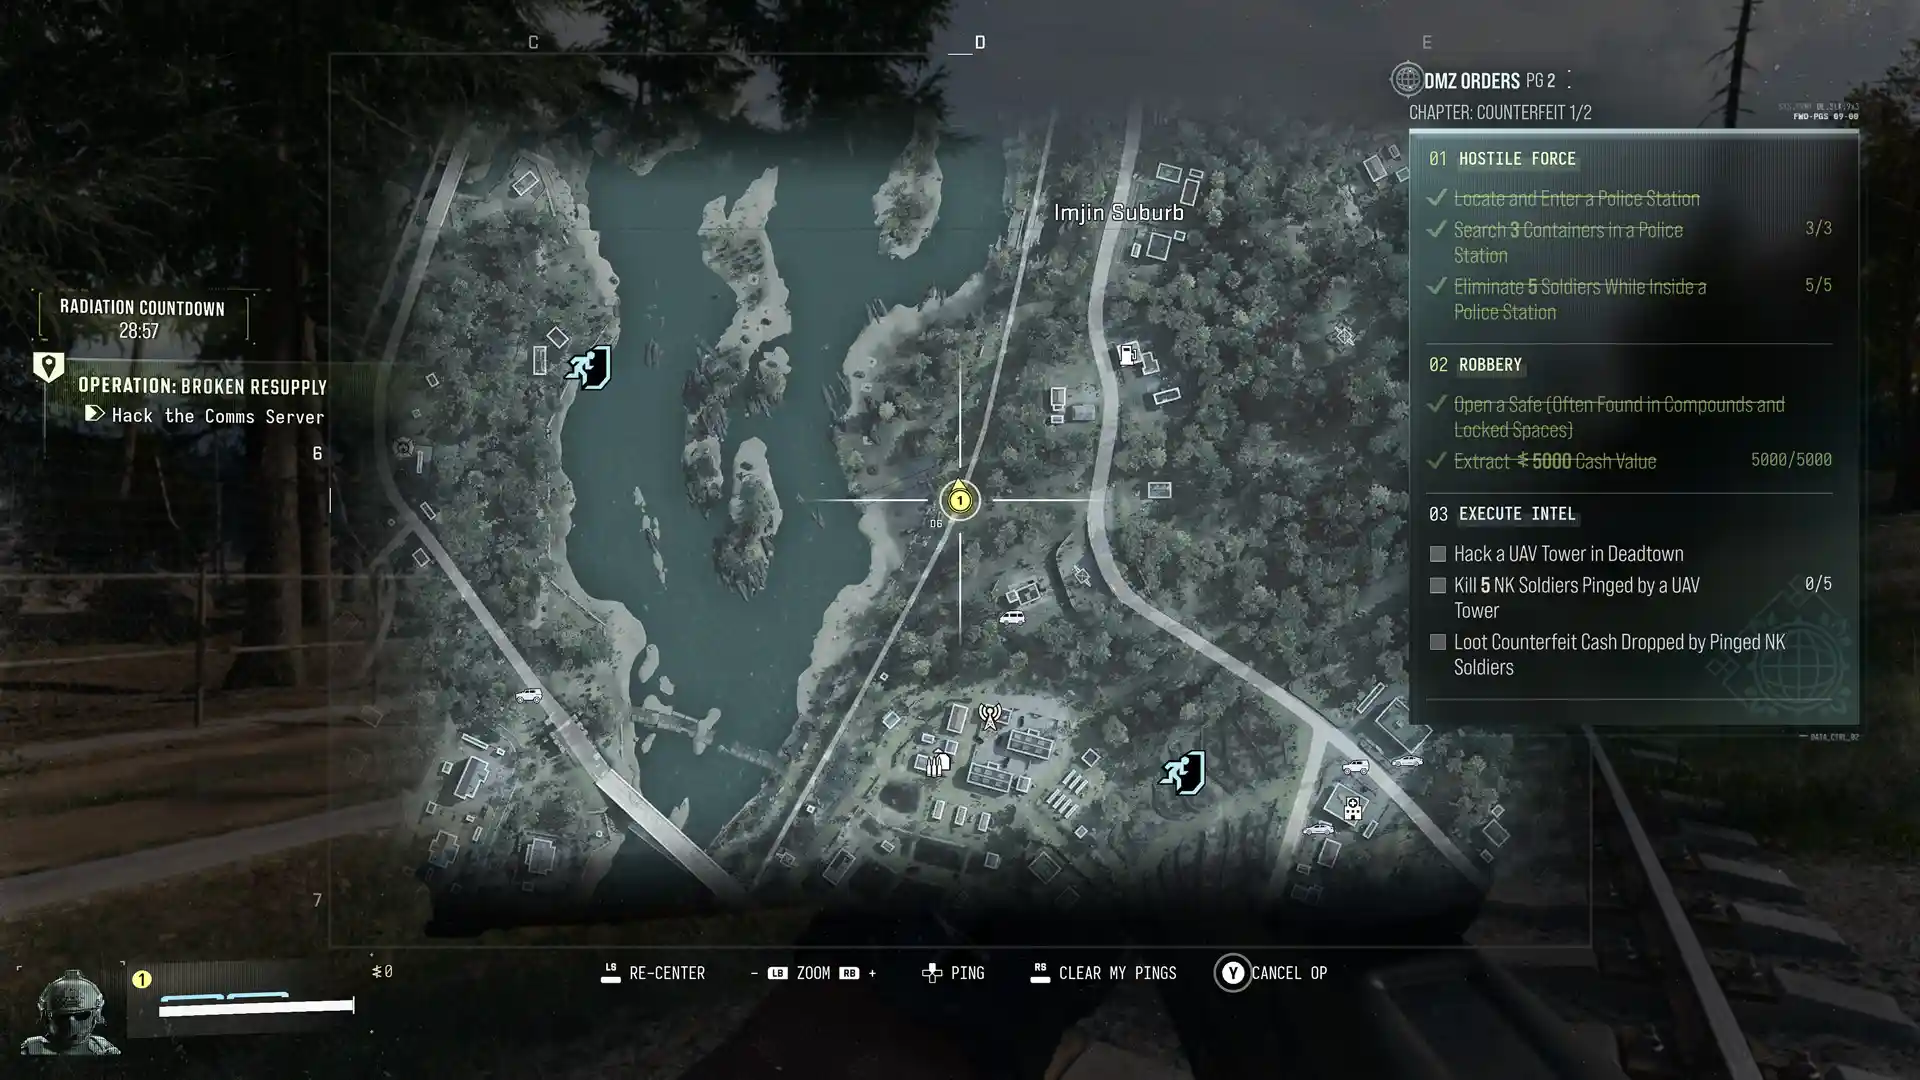
Keys are the most direct route to high-value loot. You find them while looting or as drops from Lieutenants, and each Key's description lists the grid square of the room it opens. The Tac-Map grid uses letters from west to east and numbers from north to south, so D7, for example, points to Imjin Farmland.
Infinity Ward's own field report shows what a loot room can hold. In it, a Key taken from a Lieutenant opened a sealed room beneath NuriGO Mall. Inside were a high-value Plate Carrier recipe, rare components, and a Weapon Manual. The same report warns that the tunnels leading there were guarded by robot dogs and traps.
A few more habits help you find the good stuff. If a door is locked from the inside, there's another way in. In rural and wooded areas, watch for underground entrances. Before you deploy, check the 3D Printer, which shows where each ingredient is most likely to drop, and plan your route around it.
Our read (speculation): While you're still learning, stick to the Low-threat areas in the south and north, such as Deadtown, Imjin Farmland, Cheongun Village, and the hospital. They're the best places to see how the AI reacts while you collect basic resources. The Grid and Chang-san Air Base will hold the best loot, but they're better saved for when you have a Medium Backpack and a 2-Plate Vest.
The Enemies You'll Face
The AI soldiers belong to a secretive North Korean group, and they work as coordinated squads rather than lone targets. If you stay hidden, they may ignore you. If they notice something, they search. If you start a fight, they engage. A lone soldier under fire will take cover, hold position, freeze, or try to break your line of sight.
Bosses: Lieutenants and Commanders
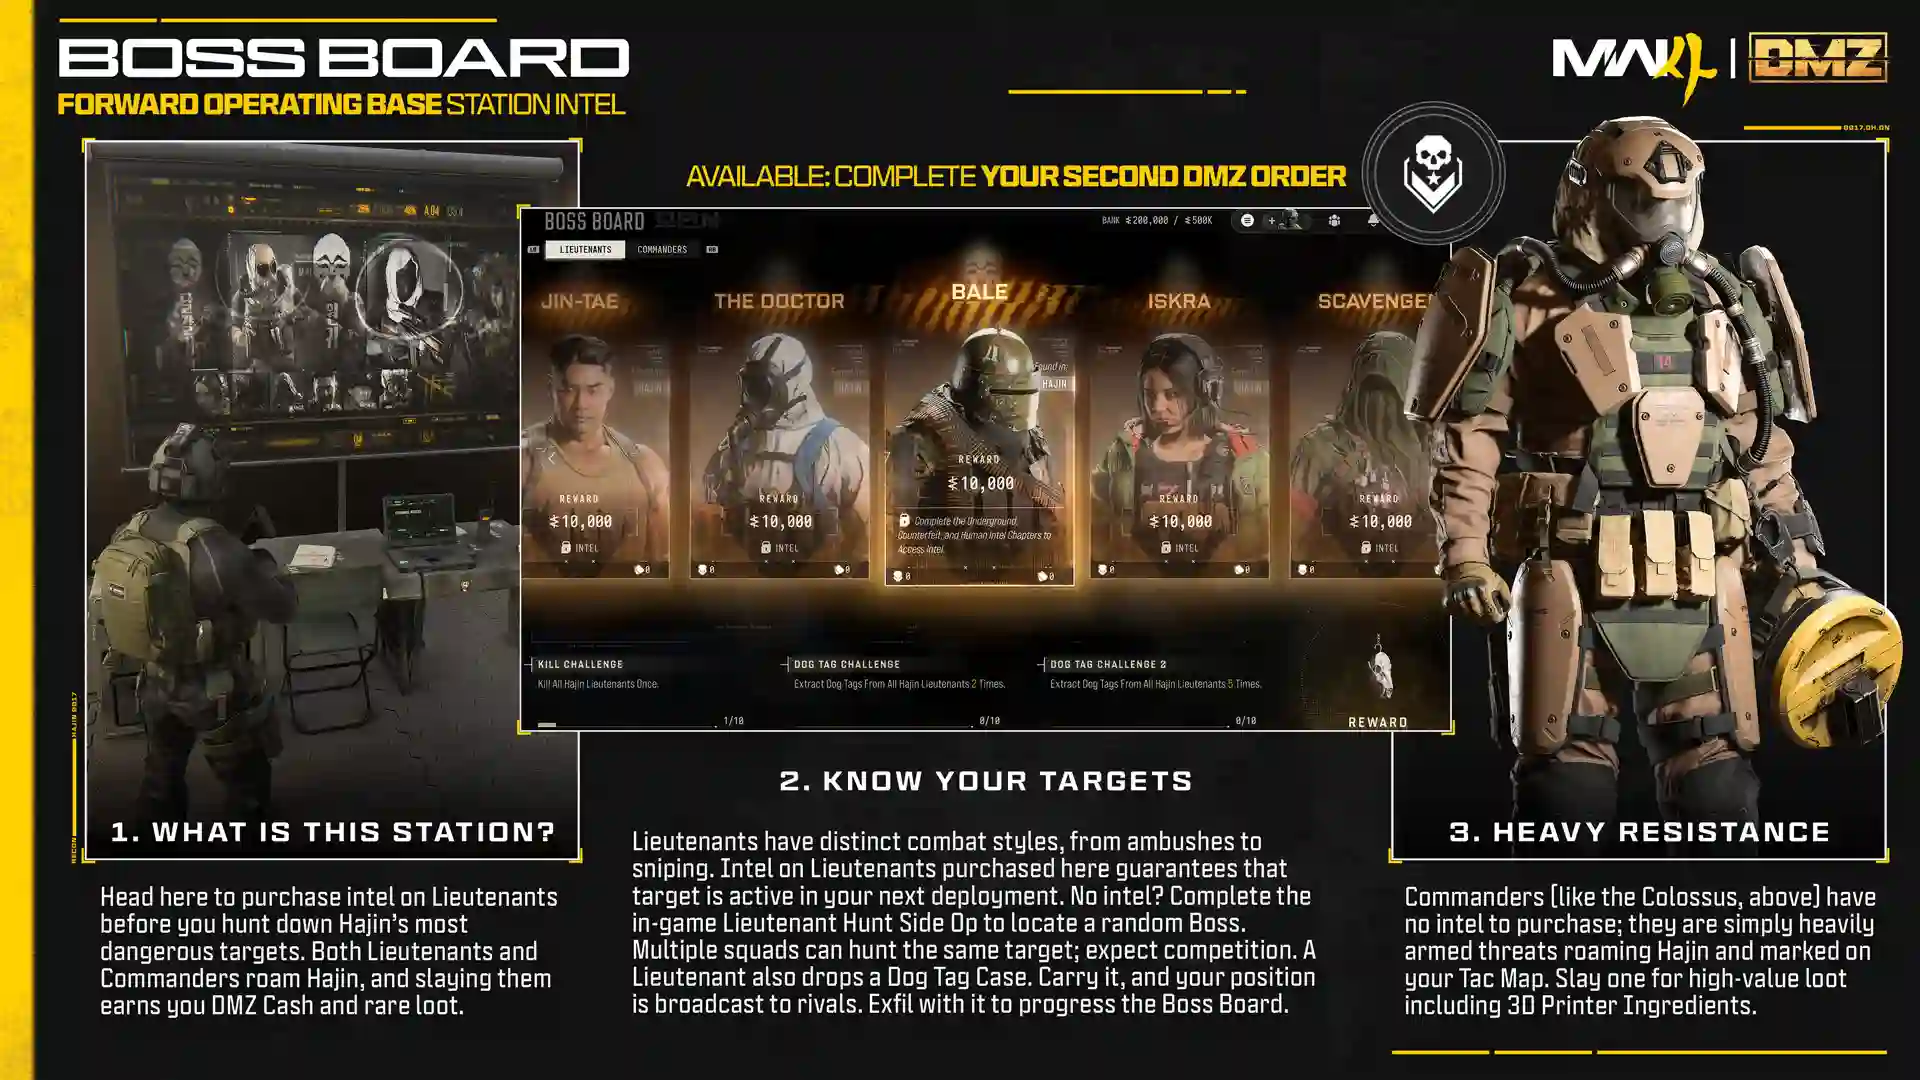
Hajin also has two types of bosses. Lieutenants are elite soldiers you can track down on purpose. Before the Boss Board lets you buy intel on a specific Lieutenant, you need to complete a set of challenges in earlier matches. Commanders are huge enemies that are always somewhere on the map, and the Team Leader, the voice on your radio, warns you when one is close.
Infinity Ward has also introduced a few Lieutenants by name in its field reports. Here's what's known so far.
Lieutenant fights take longer than regular firefights, because they have extra health and their own combat behavior. Even if you leave the Dog Tag Case behind, you still get everything else the kill drops. The Case only matters for progressing the Boss Board, and a Case taken from another player counts too.
The Colossus is a seven-foot armored soldier with a minigun. The Deathstalker is a helicopter-sized drone with two machine guns. Infinity Ward also points to the SAM sites from the Side Ops section. Once you take one over, it shoots at enemy aircraft on its own, which makes it especially useful against the Deathstalker.
Our read (speculation): Infinity Ward describes Commanders as "seemingly impervious to many standard weapons," so I suspect they're meant to be fought with launchers and explosives rather than rifles. Bring at least one launcher before taking on the Colossus or the tank. For a Lieutenant, plan your exfil route before the fight starts, not after.
Getting Around: Vehicles
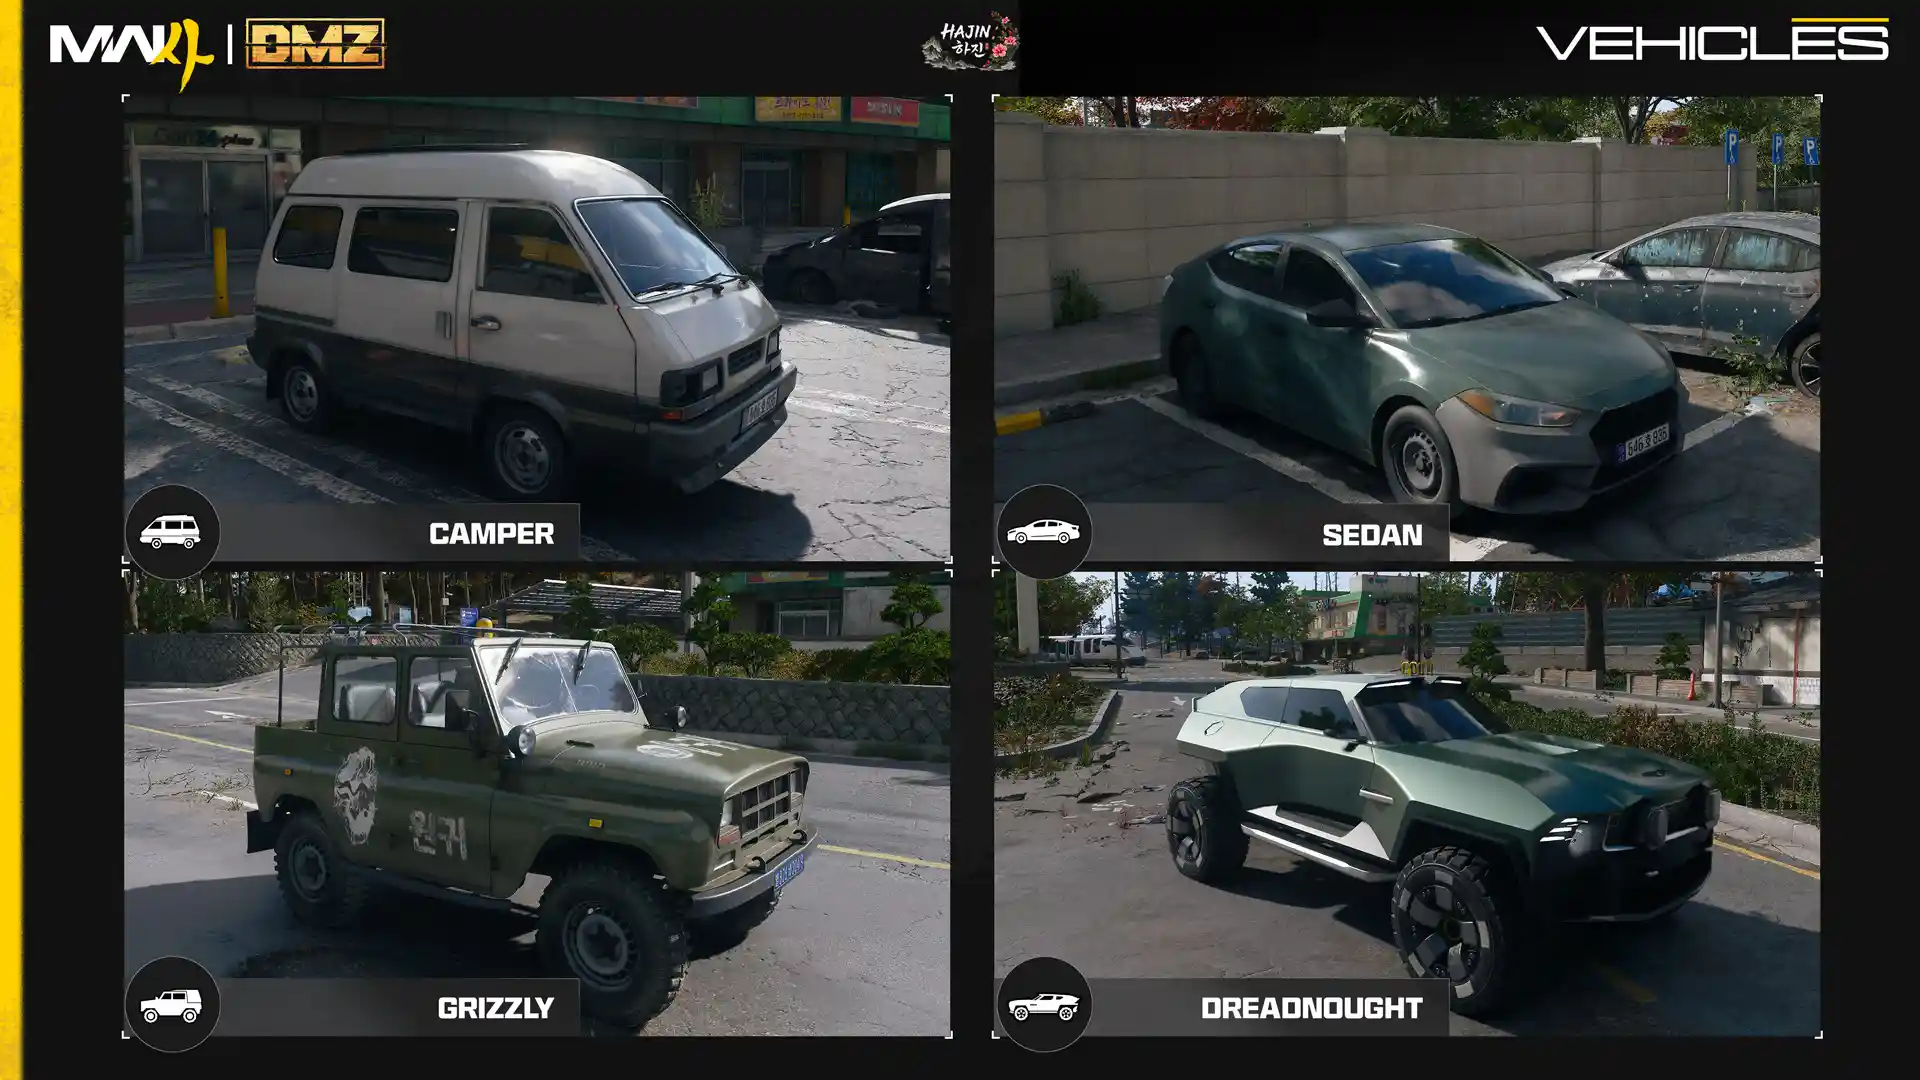
Hajin is too big to cross on foot every match, so vehicles matter. There are four ways to travel: ground vehicles, rail lines, boats, and aircraft. Unlike Warzone, every DMZ vehicle has limited fuel and armor, so a damaged or empty vehicle can strand you far from an exfil.
The train and tram can't be driven. You simply ride them along their fixed routes. The train covers many of the South Korean locations. The tram circles the outskirts of Hajin City on a raised track, with stops such as the monorail station at NuriGO Mall.
To keep vehicles running, use Gas Stations to repair and refuel cars and aircraft. Marine Gas Stations, a small jetty with two pumps, do the same for RHIBs and armored patrol boats. Both can also refill the Gas Cans you carry. Some traits help too, such as one that lets you jump out and fix a punctured tire on the spot.
DMZ Bounties: Fighting Other Players
You don't have to fight other players in DMZ. Some squads will want to fight you, though, and many encounters end in a firefight. To make player kills matter, MW4 adds a bounty system.
How a Bounty Builds
Every player you kill raises your Bounty, and it stays with you from one match to the next. After four player kills, you become Wanted. Nearby players get an alert when you come close, and at the highest Wanted level, your rough location can appear for everyone in the match.
Other players can then hunt you. Any Bounty Station in Hajin shows a free list of Wanted players in the match, and buying intel marks a circle around a target's area on the map. The more Wanted the target, the more that intel costs, and the faster the circle shrinks and updates. To collect, a hunter has to kill the target and extract with their Dog Tag, and the reward grows with the target's bounty.
Player kills also pay more XP than AI kills, which is part of why some squads go looking for fights. If you're mainly here for loot, that's worth keeping in mind when you hear gunfire nearby.
How to Clear a Bounty
You can clear your bounty in three ways: die without extracting, let another player extract with your Dog Tag, or pay it off yourself at a Bounty Station. Paying it off early keeps you from ever becoming Wanted, which other players have pointed out as an easy way to avoid attention. It's also worth doing before you head to exfil with good loot.
There's also an option for aggressive players: hunting other bounty targets lowers the bounty on your own head. That turns Wanted players into targets for each other, not just for regular squads.
The system also checks how a fight started. Your bounty grows more slowly if you were outnumbered or didn't shoot first. And not every meeting has to turn into a fight. Proximity voice chat and the ping wheel let you offer a truce or team up with another squad.
Proximity chat is also more useful than before. Voices get quieter with distance, come from the direction of the speaker, and echo differently indoors and outdoors, so listening carefully can tell you where a rival squad is. You can also mute nearby players if you'd rather not hear them.
Not everyone likes this direction. Players who mainly want to fight AI worry that bounties and leaderboards will make the mode more about PvP (player versus player). There's no PvE-only option, so if that's you, Story Missions and keeping your bounty low are the best ways to avoid other squads.
Your First Days in DMZ: A Roadmap
Each part of this guide covers one system. This roadmap shows how they line up in your first days, using the unlock points Infinity Ward has shared. Treat it as a suggested route, not a fixed rule.
What's New for 2022 DMZ Players
If you played the first DMZ in Modern Warfare II, the basic idea is the same: drop in, loot, and get out. Infinity Ward says MW4 DMZ was rebuilt around player feedback from that version, which launched in 2022 as a free beta alongside Warzone 2.0. Most of the systems around the core idea are new.
Returning players have mixed views so far. On big gaming forums, many like the deeper progression and the new bounty rules. The main complaint is that DMZ is no longer free, alongside the PvP concerns covered in the bounty section.
What We'll Test When DMZ Goes Live
A few important numbers haven't been released yet. These are the first things we'll check when Early Access opens on October 20, and we'll add the results to this guide after launch week.
- Operator recovery prices at different trait levels, and how much the printer discounts save.
- Where key ingredients appear, especially Binding Catalyst, Reactive Metals, and Rigid Synthetics for the first crafts.
- How to beat each Commander, including which weapons and tools work against the Colossus, Deathstalker, and tank.
- The best first traits for solo players and squads.
- How much Cash a typical match earns, so you can judge when paid entries and prestige are worth it.
Final Thoughts
What makes MW4 DMZ different from other Call of Duty modes is that nothing resets between matches. Your base, Operators, traits, and stored loot all carry over, so the mode rewards patience more than any single great fight. A careful player who extracts often will usually progress faster than one who wins big fights and then dies on the way out.
Everything in this guide comes from Infinity Ward's official information, with our predictions marked separately. For the complete list of base stations, see the official DMZ FOB guide. We'll update this page with real numbers after testing Early Access.
MW4 DMZ FAQ
Is MW4 DMZ Free to Play?
No. DMZ is only available inside Call of Duty: Modern Warfare 4, so you need to own the game on your platform. There's no standalone free version this time. Every edition of MW4 includes it, so you don't need the Vault Edition just to play.
How Do I Get MW4 DMZ Early Access?
Digitally pre-order or pre-purchase the Standard Digital Edition or the Vault Edition. DMZ Early Access opens on October 20, three days before launch, on Xbox Series X|S, Xbox on PC, PlayStation 5, Battle.net, Steam, and Nintendo Switch 2. The same purchase also unlocks Campaign Early Access from October 16. It's a digital pre-order bonus, so check that your purchase is digital.
Can You Play MW4 DMZ Solo?
Yes. You can deploy alone, bring your own squad, or use Squad Fill to join two other players. Solo play has one big catch: there's nobody to revive you. That makes the Possum trait, which gives you one self-revive per match, and the Stealth Meter much more valuable when you play alone. Until you know the map, Squad Fill is the safer way to learn.
What Is the Fastest Way to Level Up in DMZ?
Infinity Ward points to a balanced approach. Opening containers is one of the most reliable sources of XP, DMZ Orders pay out XP and loot together, and each Dynamic Op adds XP plus a Supply Drop. Infinity Ward recommends mixing all of these in one match and aiming for an S rating, rather than focusing on just one.
How Long Does It Take to Unlock the Gunsmith?
The Gunsmith opens at DMZ Level 10. Infinity Ward hasn't shared how much XP each level needs, so the exact time is still unknown. Focusing on DMZ Orders and Story Missions early is the most direct path, and we'll share real leveling times after testing.
Does DMZ Progress Count Toward Multiplayer?
Partly. Weapon levels and attachment unlocks are shared, so leveling a gun in either mode helps in the other. DMZ XP also counts toward your main Player Level, which goes from 1 to 55. It doesn't work the other way: XP from Multiplayer and Warzone won't raise your DMZ level, and things like traits, recipes, and FOB stations stay inside DMZ.
Where Does Your DMZ Cash Go After a Match?
Cash you find during a match only moves to your Bank back at the FOB after a successful exfil. That's the money you spend on paid infils, Operator recovery, Gunsmith builds, and prestige, which costs 200,000 for the first one. Your Bank has a limit, and both DMZ levels and 3D Printer upgrades raise it, so it's worth upgrading before you start saving for big purchases.
What Does the Vault Edition Add to DMZ?
Besides a third Operator slot from the start, Vault owners get a Deployment Kit. It holds two each of Weapon Insurance Contracts, Operator Rescue Beacons, Fulton Drop Markers, Medium Backpacks, and 2-Plate Carriers. They also get one-time use of the Signature Weapon Collection Blueprints: the Kastov 762, ISO Nightshade, Rezi 12, Oris 8.6, and a Combat Knife. Lost Blueprints can be rebought at a discount.
Will DMZ Progress Reset Between Seasons?
Infinity Ward hasn't announced how DMZ progress will be handled when new seasons arrive. The 2022 version reset some progress between seasons, which many players disliked, so this is one of the first things we'll look for once Season 1 details are out. We'll update this answer as soon as there's official word.
Recommended Reading
MW4 Best Guns and Loadouts From the Beta