Anime Expeditions is a Roblox tower-defense game developed by Expeditions Entertainment. Players recruit, upgrade, and evolve anime-inspired units before placing them along enemy paths to defend against waves and Bosses. By September 2026, the game had surpassed 760 million visits and reached an all-time peak of 342,296 concurrent players.
However, its roster continues to expand, and new units can quickly change which carries, supports, and control options are worth using. With evolution materials and Trait Crystals in limited supply, investing in the wrong unit can significantly slow an account's progression.
This guide has been updated for Update 2: Summer Siege using currently available unit data and combat testing. It provides a complete tier list, practical team templates, and investment priorities based on each unit's performance across Boss fights, long-wave modes, and general progression. Because balance changes can alter individual stats and abilities, the latest in-game descriptions should always take priority.

Quick Answer: Best Units in Anime Expeditions Update 2
In Update 2 Summer Siege, Sovereign (Djinn) is the strongest overall unit, particularly for Boss-focused content. Its chain attacks handle regular waves, while a Boss entering its range activates additional damage, automatic Boss targeting, Freeze, and a permanent non-stacking Slow. Lightning God and Kitsune are the other priority investments for long-wave damage and universal offensive support, while Shadow remains an elite Magical carry with valuable team utility.
This ranking separates units by their actual roles instead of judging them by raw DPS alone. Sovereign and Lightning God excel in different modes, Puppet amplifies damage taken rather than directly buffing allies, and Head Captain adds anti-shield pressure without fully replacing Crow. For a quick team-building answer, use the role-by-role picks below.
| Role | Best Pick | Alternative |
|---|---|---|
| Boss Carry | Sovereign (Djinn) | Prodigy (Rage) / 8th Sword |
| Wave / Long-Mode Carry | Lightning God (Overcharged) | Shadow (Divine) / 8th Sword |
| Shield Break | Crow (Black Fire) | Head Captain (secondary pressure) |
| Crowd Control | Rainman (Forecast) | Water Mage / Sand |
| Universal Team Buff | Kitsune | No direct replacement |
| Boss Amplification | Puppet (Telekinetic) | No true replacement |
| Burn Core | Head Captain (Char) | Sharkfang (secondary Burn) |
| Economy | Ramen Guy | Stone Alchemist |
How This Anime Expeditions Tier List Is Ranked
This tier list does not rank units by rarity or displayed DPS alone. Each placement considers sustained damage, placement limit, upgrade cost, setup time, range, status effects, team support, and performance across Boss fights, long-wave modes, and general progression.
Rankings assume the listed form of each unit, useful upgrades, and a Trait that matches its role. S Tier contains the strongest overall carries and high-impact support units, while A Tier includes powerful specialists that depend more heavily on the right mode, team, or positioning.
Units within the same tier are not strictly ordered. A specialist can outperform a higher-ranked unit when a stage requires shield breaking, crowd control, economy, or a particular attack type. The latest in-game values should always take priority after a balance patch.
Anime Expeditions Full Tier List (S to D)

Sovereign (Djinn)

Lightning God (Overcharged)
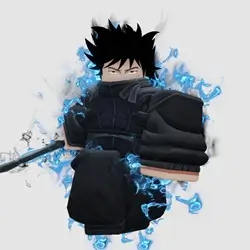
Shadow (Divine)

Kitsune
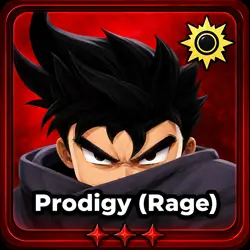
Prodigy (Rage)
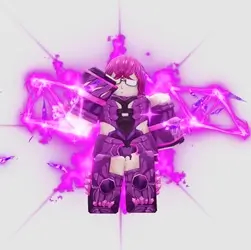
Puppet (Telekinetic)
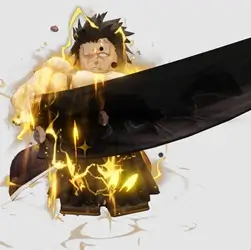
8th Sword (Berserk)

Crow (Black Fire)

Vegetable (Prince)
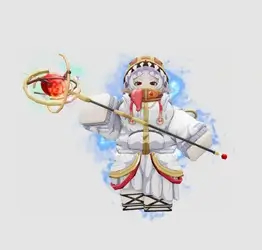
Elf Mage (Unleashed)
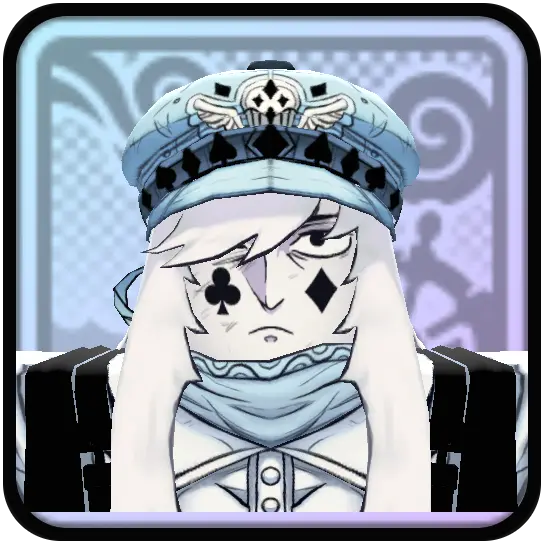
Jester

Head Captain (Char)

Rainman (Forecast)

Water Mage (Scholar)

Sharkfang (Abyssal)

Sand (Alligator)

Carrot (Unleashed)
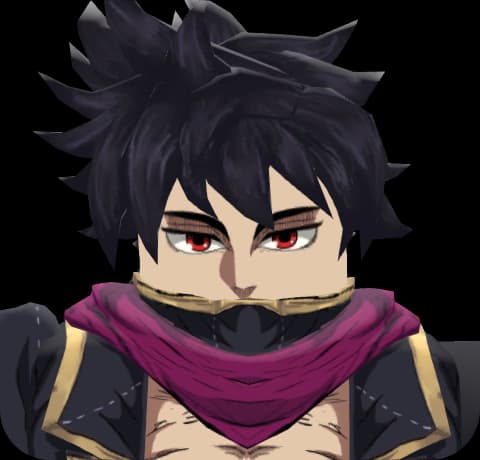
Dark Mage (Sovereign)
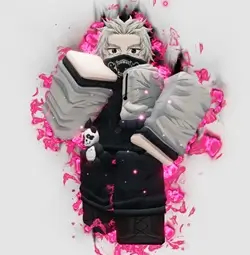
Salmon Sorcerer (Grade 1)
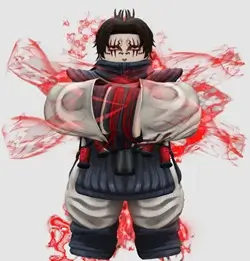
Crimson (Brother)

Cubert

The Drink (Juicebox)
Razorjaw (Hunter)
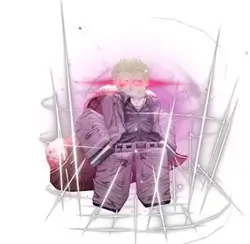
String Demon (Awakened)
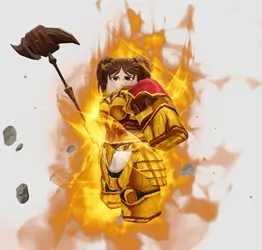
Lady Giant (Envy)
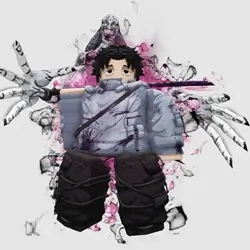
Cursed Student (True Love)
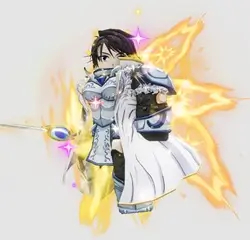
True Saint (Holy)
Water Princess
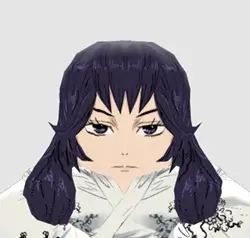
Forbidden Teacher

The Hero

Ramen Guy

Stone Alchemist
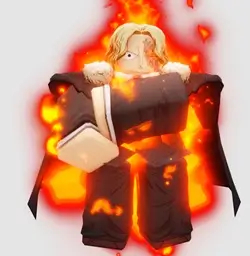
Flame Emperor (Reincarnate)
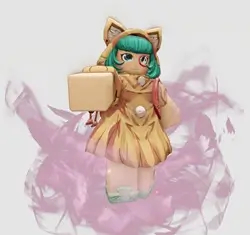
Toy Maker
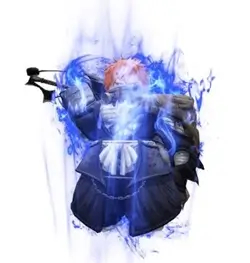
Reaper (Released)
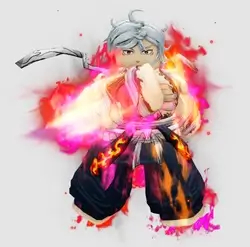
Hollow (Blaze)
Greed

Ice Queen
Scissor
Cursed Immortal (Black Sun)
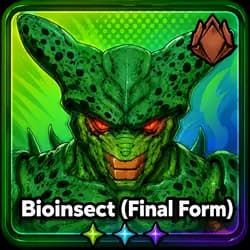
Bioinsect (Final Form)
Bounty Hunter

Corps Captain

Demon Cyborg
Ice Mage
Nen Hunter

Curly Brow
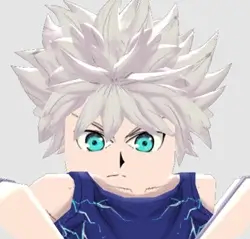
Kid Assassin

Reishi Archer
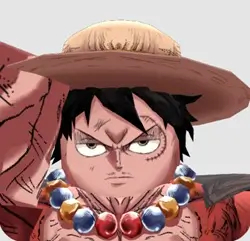
Rubber Boy
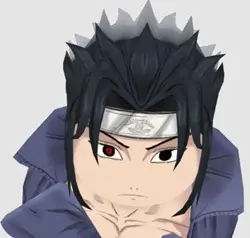
Thunder Shinobi
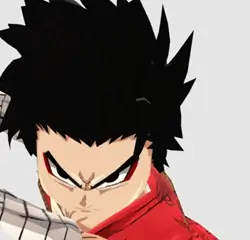
Carrot
S Tier Units Explained
S Tier Units - Meta-Defining Picks
| Unit | Rarity | Role | Summary |
|---|---|---|---|
Sovereign (Djinn) | Secret | Boss Carry + Control | Combines chain attacks with exceptional Boss damage, Freeze, and a permanent Slow after Freeze expires, making it the strongest overall Update 2 unit. |
Lightning God (Overcharged) | Secret | Long-Mode Carry | Builds Voltage through Electricity Stuns, gaining enormous scaling damage and repeatable crowd control once long stages give it time to ramp. |
Shadow (Divine) | Secret | Carry + Magical Support | Compresses damage, permanent summons, Stun, Rewind, and a global Magical damage buff into one highly flexible roster slot. |
Kitsune | Exclusive | Universal Team Buff | Improves the attack speed of priority allies and buffs the damage of every attack type, making it the safest support for mixed teams. |
Prodigy (Rage) | Secret | Status-Scaling Carry | Converts status effects into additional damage and combines repeated AoE attacks with a powerful transformation and concentrated burst. |
Puppet (Telekinetic) | Mythic | Boss Amplification | Marks priority enemies to increase all incoming damage while also providing Rewind and temporary blockers for emergency control. |
8th Sword (Berserk) | Secret | Kill-Scaling Carry | Gains permanent damage from takedowns and becomes one of the strongest physical carries when Infinite or Raid stages provide enough ramp time. |
Crow (Black Fire) | Secret | DPS + Anti-Shield | Combines delayed Illusion damage with Black Fire pressure, preserving its value as the primary specialist for shield-heavy stages. |
Vegetable (Prince) | Mythic | Team-Scaling Carry | Builds damage, Critical Chance, and Critical Damage from nearby allied attacks, giving it an exceptional ceiling in coordinated long fights. |
Elf Mage (Unleashed) | Mythic | Magical Wave Carry | Converts repeated attacks into additional Arcane hits with multiple AoE patterns and permanent long-stage scaling. |
Jester | Exclusive | Flexible DPS | Rotates between Scythe, Rifle, and Mace kits that provide AoE, Bleed, or clone pressure, giving every weapon roll a useful purpose. |
Head Captain (Char) | Mythic | Burn + Shield Pressure | Builds stacking Burn, adds piercing Burn against shielded enemies, and creates traps, making it the centerpiece of Update 2 Burn teams. |
Rainman (Forecast) | Mythic | DPS + Crowd Control | Uses Rain Clouds, stopping effects, and Poison Frog traps to control lanes while maintaining strong sustained area damage. |
Water Mage (Scholar) | Mythic | Control + Defense | Automatically freezes priority targets and follows with Slow, splash damage, and scalable Ice Traps for reliable defensive coverage. |
Sharkfang (Abyssal) | Mythic | Control DPS | Combines Slow, Rewind, Vapor Cloud damage, and stacking Burn, providing strong lane pressure between regular attacks. |
Update 2 changes the first major investment decision. Sovereign (Djinn) is the better choice when progression is blocked by powerful Bosses, while Lightning God becomes more valuable in Infinite and other long modes where its Voltage system has time to reach full strength. Players who already own one should usually complete its support structure before committing everything to the other.
Kitsune is the safest new investment for an account that already has a strong carry. Its buffs work across Physical, Magical, and Psychic teams, while Puppet increases the damage received by priority enemies. Shadow remains especially valuable in Magical teams because it adds damage, control, summons, and a temporary global Magical buff without using several separate roster slots.
Prodigy, Vegetable, and Elf Mage earn S Tier for different reasons. Prodigy converts status-heavy teams into stronger burst damage, Vegetable has an exceptional ceiling when nearby allies attack frequently, and Elf Mage provides reliable long-stage Magical scaling. Vegetable is the most team-dependent of the three, so it may feel closer to A Tier in short stages or poorly coordinated lineups.
Among the new Mythics, Head Captain should be the priority for Burn teams, while Rainman and Water Mage are safer choices for players struggling with fast or leak-prone waves. Sharkfang supplies a broader mix of damage, Slow, Rewind, and Burn, but its value depends more heavily on lane shape and ability placement.
Jester is a strong general attacker rather than a dependable answer to one specific mechanic. All three weapon rolls have useful damage applications, but the changing attack pattern makes it less predictable than Sovereign or Lightning God. It is worth building when you need flexible Physical damage, not when your team still lacks economy, control, or Boss amplification.
Crow and 8th Sword remain important despite the Update 2 power increase. Crow is still the preferred anti-shield specialist, while 8th Sword remains a premium long-mode carry once it has enough takedowns to scale. Forbidden Teacher, Ramen Guy, and Toy Maker can still fill valuable roles, but their narrower overall impact places them in A or B Tier rather than among the meta-defining S Tier units.
A Tier Units & Their Trade-Offs
A Tier Units - Strong Specialists With Trade-Offs
| Unit | Rarity | Role | Summary / Drawback |
|---|---|---|---|
Sand (Alligator) | Mythic | Control + Burst | Builds an expanding Desert Storm with Poison amplification, Slow, and Stun, but its active stops regular attacks while charging and needs enemies to remain inside the area. |
Carrot (Unleashed) | Mythic | Crit + Follow-Up Carry | Produces strong transformation bursts, Stagger, and Follow-Up Attacks, but requires Fighting Spirit buildup and active manual targeting to reach its full value. |
Dark Mage (Sovereign) | Mythic | Magical Carry + Control | Alternates between Ice control and Lightning lane damage, but its eight-attack form cycle, two-placement limit, and high upgrade cost reduce its consistency. |
Salmon Sorcerer (Grade 1) | Mythic | Crowd Control | Provides powerful Slow and Stagger at a manageable cost, but Update 2 controllers such as Rainman and Water Mage combine similar control with more personal damage and utility. |
Crimson (Brother) | Exclusive | Magical Carry + DoT | Comes online quickly with delayed explosions, damaging zones, and strong straight-lane pressure, but its overall ceiling is lower than the current S Tier carries. |
Cubert | Exclusive | Buff + Control | Attaches Cubes that improve allied damage and range while adding extra attacks and Stun, but its ceiling depends on preserving multiple placements and attaching Cubes to the right allies. |
The Drink (Juicebox) | Mythic | Follow-Up Support | Marks enemies to increase Follow-Up Attack damage and apply Physical weakness, but it needs teammates that already trigger frequent Follow-Up Attacks. |
Razorjaw (Hunter) | Mythic | Wave Clear + Stagger | Offers cost-efficient damage, Full AoE Stagger, and a path-wide sweep, but its active does not unlock until Upgrade 8 and performs better against dense waves than isolated Bosses. |
String Demon (Awakened) | Mythic | DPS + Follow-Up Control | Combines strong raw damage with Cocoon control and allied Follow-Up Attacks, but its best results require fast multi-hit teammates to break Cocoons efficiently. |
Lady Giant (Envy) | Mythic | Physical Carry + Block | Offers four placements, bonus rock attacks, and automatically refreshed Stone Walls at a low cost, but Giant Form has downtime and makes its regular attacks slower. |
Cursed Student (True Love) | Mythic | Copy DPS + Bleed | Copies part of the closest ally's damage through Cursed Mimicry, but every placement needs careful positioning and its secondary summons depend on building Bleed stacks. |
True Saint (Holy) | Exclusive | Crit DPS + Mark | Detonates marks through Critical Hits and can temporarily become a stronger carry, but its active steals damage from the team's strongest nearby allies. |
Water Princess | Legendary | Defensive Support | Protects nearby priority allies from a Debuff or Enemy Attack, but its low personal damage makes it valuable mainly on stages that threaten your carries directly. |
Forbidden Teacher | Legendary | Magical Buff | Efficiently buffs Magical units within range at a low upgrade cost, but provides almost no value in Physical-heavy teams. |
The Hero | Legendary | Physical Buff | Efficiently buffs Physical units within range at a low upgrade cost, but becomes a dead roster slot in Magical or Psychic teams. |
Ramen Guy | Legendary | Economy | Generates substantial Yen and increases Yen earned from kills by 50%, but short stages may end before the investment repays its roster slot. |
Stone Alchemist | Epic | Economy | Provides an accessible and inexpensive source of Yen for newer accounts, but its income ceiling is lower than Ramen Guy and it deals no damage. |
New Update 2 Units — Roles and Investment Priority
Summer Siege is a limited-time event currently scheduled to end on September 11, 2026. Players still missing event units or evolution materials should prioritize those rewards first and confirm the exact remaining time through the in-game event timer.
Update 2.0 Summer Siege added nine units built around Electricity scaling, stacking Burn, Freeze, Rewind, traps, and new support mechanics. With their complete upgrade data now available, Sovereign, Lightning God, and Kitsune remain the safest general investments, while the other units are stronger in particular teams or game modes.
Do not build all nine units at once. Complete one main carry first, then invest in the support or control unit that fixes a weakness in your existing team. This creates a functional lineup faster and prevents evolution materials and Trait Crystals from being divided between overlapping roles.
Sovereign (Djinn) — The Best Boss Carry
Sovereign changes behavior when a Boss enters its range. Lightning Djinn remains active for chain damage, while Nine Tailed Fox Djinn adds 50% Damage, automatically targets the Boss, applies Freeze, and leaves a permanent 15% Slow after Freeze expires.
This combination gives Sovereign the highest immediate Boss-killing value in Update 2 without making it ineffective against ordinary waves. It is the best first target for players whose progression is blocked by Raids, Secret Portals, or other high-HP Boss encounters.
Most of this value comes from the evolved Djinn form, so securing its evolution should be the priority after obtaining the base unit. Evolution does not replace an existing Trait or Stat Potential roll, so keep a strong base copy instead of rerolling it unnecessarily.
Lightning God (Overcharged) — Best Long-Mode Scaler
Lightning God gains one Voltage whenever its Electricity effect causes a Stun. Each stack increases Electricity damage, while later thresholds unlock additional Storm Clouds and a large discharge that damages enemies and keeps Electricity active within its area.
The main weakness is ramp time. Short stages may end before Voltage reaches its strongest phase, but Infinite, long Raids, and other high-wave modes give Lightning God enough time to become one of the strongest wave carries in the game.
Deploy Lightning God early and position it over a busy section of the route so its own Electricity Stuns can build Voltage consistently. Generic Freeze, Slow, or Stun effects from other units do not automatically add Voltage unless they specifically trigger Lightning God's Electricity mechanic.
Kitsune — Best New Universal Support
Kitsune provides two different forms of support. Dreamdiver targets the strongest eligible ally and temporarily reduces its SPA while increasing its Attack Speed. Its active ability separately increases the Damage of every allied unit within range.
Unlike Forbidden Teacher and The Hero, Kitsune's team buff is not restricted to Magical or Physical units. It can support Sovereign, Lightning God, Shadow, Puppet, and other carries in the same mixed lineup, including Psychic units.
Kitsune also contributes respectable personal damage, but universal support is the main reason to build it. If you already own a developed carry, Kitsune will usually improve the account more than another DPS unit that fills the same role.
Jester — Powerful but Unpredictable
Jester rotates between three useful weapons. Scythe adds a Damage bonus, Full AoE coverage, and extended slashes; Rifle attacks faster and adds Bleed pressure; Mace creates a temporary clone before allowing Jester to roll again.
None of the three weapons is a failed roll, so Jester remains a strong S Tier attacker across both waves and Bosses. The drawback is timing: players cannot always guarantee the exact attack pattern they want when a difficult wave or burst window begins.
Jester is worth building when you need flexible Physical damage without creating a specialized team. For stages that demand a specific form of control or precisely timed Boss damage, Sovereign, Lightning God, or a dedicated controller is more predictable.
Head Captain (Char) — The New Burn-Team Core
Head Captain's Burn can stack without a fixed stack limit. Every active Burn stack on enemies within range further increases its Burn damage, while its East passive Burns enemies entering the area and adds another shield-piercing Burn against shielded targets.
Takedowns also create Skeleton traps that damage later enemies, apply another Burn, and increase Head Captain's damage while active. This combination makes it the defining core of Update 2 Burn teams rather than a conventional raw-DPS carry.
Place Head Captain around a long choke point where enemies remain inside its Burn range and repeatedly cross its traps. It is still useful without dedicated partners, but its highest value comes from Burn and status teams rather than an unrelated general-purpose lineup.
Rainman and Water Mage — Two Different Control Options
Rainman's Rain Clouds repeatedly damage enemies and generate Climate when their attacks connect. At maximum Climate, Frog Storm stops enemies entering its area, while enemies defeated inside it become Poison Frog traps that explode and apply Poison.
Water Mage offers cheaper and more automatic defense. Each placement periodically Freezes the strongest enemy in range, follows the Freeze with Slow or splash damage, and creates Ice Traps that function as path blockers and gain Health while they remain active.
Choose Rainman when you want stronger sustained damage and are willing to position its clouds manually. Choose Water Mage when you need inexpensive, consistent control against priority targets. Running both is effective in control-heavy content but unnecessary for most standard teams.
Sharkfang and Sand — Flexible Control vs. Area Setup
Sharkfang periodically sends a Waterfall toward the spawn point, damaging and Slowing enemies before leaving a Vapor Cloud. Tidal Wave adds more lane damage, Rewinds affected enemies, creates additional clouds, and contributes stacking Burn.
Its combination of regular damage, Slow, Rewind, Vapor Clouds, and Burn makes Sharkfang flexible enough for S Tier. Lane shape still matters, but it can support control, mixed-damage, and Burn teams without depending on only one mechanic.
Sand creates an expanding Desert Storm that strengthens its Poison output and controls a fixed area. Ground Eruption can be released early for damage and a 65% Slow or fully charged for stronger area damage and a five-second Stun, but Sand stops making regular attacks while charging.
Sand performs best on compact maps and in Poison or control teams that can keep enemies inside its storm. It remains a strong A Tier specialist, but Sharkfang is the more flexible general investment after Sovereign, Lightning God, and Kitsune.
Explore More Game Tier Lists
Find more rankings and investment guides on GamsGo: Blox Fruits Tier List and Uma Racing Tier List.
Best Team Comps by Content Type
Below are five Update 2 team templates covering magical damage, physical Boss fights, Burn synergy, crowd control, and free-to-play progression.
Each setup uses six units. Keep the core combination intact, then change the final one or two positions for shields, control immunity, short stages, or difficult upgrade costs.
Magical Burst Team
Magical Burst Team - Update 2 Magic Setup
| Role | Unit | Purpose |
|---|---|---|
| Main Carry | Lightning God (Overcharged) | Builds Voltage through Electricity Stuns and becomes the team's strongest long-mode wave carry. |
| Carry + Support | Shadow (Divine) | Adds summons, Stun, Rewind, and a global buff for the Magical members of the team. |
| Control DPS | Rainman (Forecast) | Uses Rain Clouds, Frog Storm, and Poison Frog traps to hold dense waves inside the kill zone. |
| Magic Buff | Forbidden Teacher | Continuously buffs the three Magical damage dealers when their ranges overlap. |
| Damage Amp | Puppet (Telekinetic) | Marks the strongest enemy for increased incoming damage and provides another Rewind option. |
| Economy | Ramen Guy | Funds three expensive upgrade paths during long stages. |
Place Lightning God, Shadow, and Rainman inside Forbidden Teacher's range. Give Lightning God early wave coverage so it can build Voltage, then use Puppet's mark before Shadow Realm and the team's main damage window.
Water Mage can replace Rainman when automatic Freeze and Ice Traps are more valuable than manual weather control. On short stages, replace Ramen Guy with Kitsune for stronger immediate damage support.
Physical Raid Team
Physical Raid Team - Sovereign Boss Setup
| Role | Unit | Purpose |
|---|---|---|
| Boss Carry | Sovereign (Djinn) | Concentrates chain attacks on Bosses while adding Freeze and permanent Slow. |
| Status Carry | Prodigy (Rage) | Converts the team's Freeze, Slow, and Burn effects into higher Boss damage. |
| Scaling Carry | 8th Sword (Berserk) | Uses early takedowns to build permanent damage before the Boss arrives. |
| Burn + Traps | Head Captain (Char) | Supplies stacking Burn and Skeleton Traps for Prodigy's status scaling. |
| Universal Buff | Kitsune | Improves the strongest carry and provides a teamwide damage window. |
| Damage Amp | Puppet (Telekinetic) | Marks and Rewinds the Boss through the team's shared damage area. |
Apply Puppet's mark as the Boss enters Sovereign's range, then activate Kitsune's team buff before Prodigy's burst and Head Captain's North attack. Let 8th Sword cover early waves so it can secure the takedowns needed for permanent scaling.
This lineup has no economy and is expensive to finish. On stages with few enemies before the Boss, replace 8th Sword with The Hero; on very long maps with limited Yen, replace Prodigy with Ramen Guy.
Burn Engine Team
Burn Engine Team - Update 2 Burn Setup
| Role | Unit | Purpose |
|---|---|---|
| Burn Engine | Head Captain (Char) | Stacks Burn, increases its damage, and establishes Skeleton Traps around the choke. |
| Burn + Control | Sharkfang (Abyssal) | Adds Slow, Tidal Wave Rewind, and damaging Vapor Clouds with Burn pressure. |
| Shield Break | Crow (Black Fire) | Prevents shields from stopping the Burn engine and contributes Black Fire damage. |
| Burn Conversion | Hollow (Blaze) | Converts active or expiring Burn effects into additional damage. |
| Universal Buff | Kitsune | Buffs the mixed Physical and Magical lineup without an attack-type restriction. |
| Damage Amp | Puppet (Telekinetic) | Amplifies the strongest survivor and Rewinds it through the shared Burn zone. |
Cluster Head Captain, Sharkfang, and Hollow around one long choke. Place the Skeleton Traps where Rewind and Slow will keep enemies inside Sharkfang's Vapor Cloud and Hollow's conversion range.
Split-path maps reduce the value of this setup. On shieldless stages, Flame Emperor can replace Crow for wider Burn coverage; on long farming maps, Ramen Guy can replace Puppet when upgrade cost becomes the main problem.
Control Team
Control Team - Update 2 Lockdown Setup
| Role | Unit | Purpose |
|---|---|---|
| Stop + Traps | Rainman (Forecast) | Stops grouped enemies with Frog Storm and creates Poison Frog traps from defeated targets. |
| Freeze + Block | Water Mage (Scholar) | Freezes the strongest target, applies Slow afterward, and deploys scaling Ice Traps. |
| Slow + Stun | Sand (Alligator) | Provides an emergency Slow when released early or a stronger Stun after a full charge. |
| Slow + Rewind | Sharkfang (Abyssal) | Sends Tidal Waves through the lane and Rewinds surviving enemies back into the kill zone into the kill zone. |
| Main Carry + Stun | Lightning God (Overcharged) | Turns repeated Electricity Stuns into Voltage and supplies the team's main damage. |
| Universal Buff | Kitsune | Buffs both Physical and Magical controllers and accelerates Lightning God's damage cycle. |
Do not activate every control ability at once. Do not overlap every control effect at the same time. Time Sand's Ground Eruption and Sharkfang's Tidal Wave around Rainman's Frog Storm and Water Mage's automatic Freeze, extending the total delay instead of wasting several effects on the same control window. so each effect extends the time enemies remain under attack.
This team is strongest against fast waves and leak-prone maps, but excessive against slow enemies and weaker against control-immune Bosses. Replace Sand with Sovereign when single-target damage matters more than another control layer.
No-Secret Physical Progression Team
No-Secret Physical Progression Team - No-Secret Physical Setup
| Role | Unit | Purpose |
|---|---|---|
| Main Carry | Head Captain (Char) | Provides the team's main damage through stacking Burn, burst, and Skeleton Traps. |
| Control DPS | Sand (Alligator) | Adds a growing attack area, emergency Slow, and charged Stun. |
| Lane Control | Sharkfang (Abyssal) | Keeps enemies inside Burn and Sandstorm zones with Slow and Tidal Wave Rewind. |
| Physical Buff | The Hero | Buffs all three Update 2 Physical damage dealers inside its range. |
| Damage Amp | Puppet (Telekinetic) | Marks the strongest enemy and adds Rewind for Boss control. |
| Economy | Ramen Guy | Funds three evolved Mythics during longer Story, Expedition, and Raid stages. |
This lineup does not require a Secret or Battle Pass Exclusive unit, but it is not a starter team. Head Captain, Sand, and Sharkfang still require Update 2 event farming and evolution materials before the setup reaches its intended strength.
Keep all three Physical carries inside The Hero's range and build Head Captain first. If you later obtain Kitsune, replace The Hero for stronger universal support; Sovereign can replace Sand when Boss damage becomes more important than control.
Placement & Attack-Type Rules That Change Your Damage
Attack Types Gate Your Buffers (Magical / Physical / Psychic)
Anime Expeditions uses three attack types: Magical, Physical, and Psychic. Type-specific buffers only affect matching units. Forbidden Teacher buffs Magical units, while The Hero buffs Physical units. Kitsune is the main exception because its teamwide damage buff works with every attack type.
Burn teams require special attention. Flame Emperor and Crow are Magical, while Head Captain, Sharkfang, and Hollow are Physical. Kitsune is therefore the most efficient buffer for mixed Burn teams. Without Kitsune, separate your Magical and Physical carries so each group stays inside the correct buff range.
Puppet attacks as Psychic, so Forbidden Teacher and The Hero do not increase its damage. It can still benefit from Kitsune's universal buff, but Puppet's real job is to keep Puppet Mark on the strongest enemy, so prioritize Boss coverage over forcing it into a type-specific buff range.
Positioning-Dependent Units and Update 2 Mechanics
Cursed Student copies the closest teammate. Place it directly beside your highest-damage carry and keep farm units, buffers, and low-damage supports farther away, or it may copy the wrong target.
Cubert's cubes should be attached to units with high attack speed.Cubert gains the most value from preserving all three placements and distributing up to six Cubes across developed carries. Each Cube increases the attached unit's Damage and Range, while overlapping Cubes stack additively. Use Primordial for a support-focused build, since Unbound reduces Cubert to one placement and limits the team to only two Cubes., while attaching them to a slow attacker wastes much of their value.
Bioinsect should be placed early and close to your strongest unit. This gives it enough time to progress through its takedown requirements while consistently copying damage from the correct target.
Update 2 adds several more positioning checks. Sovereign must cover the Boss lane to activate its boss-focused form, while Lightning God needs early wave coverage to build Voltage through Electricity Stuns. Kitsune should cover your main carries, and Rainman's clouds, Water Mage's Ice Traps, Sand's storm, and Sharkfang's Tidal Wave should be concentrated around choke points where enemies remain exposed for longer.
Which Units to Invest in First
Early-Game Investment Order
At the start, upgrade your temporary Story units only as much as needed to keep progressing. Do not spend rare evolution materials or large numbers of Trait Crystals on units you already expect to replace.
Your first major investment should be one carry that matches the content you play most. Sovereign is the priority for Boss-focused stages, while Lightning God is stronger in Infinite and other long modes. Without a Secret unit, Head Captain provides an excellent Physical and Burn core, while Rainman or Water Mage can anchor a Magical control team.
After securing one carry, add the correct support. Kitsune is the best universal option, Forbidden Teacher supports Magical teams, and The Hero supports Physical teams. Puppet should be added when Boss amplification and Rewind are more important than another direct damage dealer.
Add an economy unit once your damage and control are stable. Ramen Guy is the stronger long-term option, while Stone Alchemist remains a usable transition pick. Do not try to build every Update 2 unit at once; one completed carry and one properly built support will improve your account more than several unfinished projects.
Best Traits for Top Units
Traits are attached to individual unit copies and are not limited to evolved units. Evolution does not replace the unit's existing Trait or Stat Potential, so check both before committing expensive materials.
Unbound provides +350% Damage, -5% SPA, and +10% Range, but restricts the unit to one placement. It is best reserved for premium carries such as Sovereign or Lightning God that can justify Unbound provides +350% Damage, -5% SPA, and +10% Range, but reduces that unit's placement limit to one. It works best on carries such as Sovereign or Lightning God whose single-placement output can justify losing additional copies.
Primordial is the safer flexible option for multi-placement carries, controllers, and supports such as Kitsune. Draconic directly improves damage-over-time and is especially valuable on Burn-focused units such as Head Captain and Sharkfang, while Forsaken is better for units built around critical hits. Investor should be kept on economy units instead of being replaced with a combat Trait.
Do not reroll a strong role-matching Trait simply because Unbound is rarer. Primordial, Draconic, and Forsaken can outperform it when their bonuses match the unit's kit, especially when multiple placements are important.
Don't Waste Resources On
Avoid spending evolution materials and rare rerolls on temporary Story units, duplicate roles, or units that do not solve a problem in your current team. A lower-ranked control or economy unit can still be worth building, but only when it fills a role your roster is missing.
Do not chase Unbound on every carry or build several expensive damage dealers before finishing your support structure. Complete one main carry, one matching buffer, and one control or economy option before starting another major investment.
Final Thoughts
Update 2 Summer Siege rewards building around the game mode rather than simply stacking the rarest units. Sovereign is the premier Boss carry, Lightning God dominates long-wave scaling, and Kitsune is the most flexible new support because it works across all three attack types.
The older meta units are not obsolete. Shadow still compresses damage, control, summons, and Magical support into one slot, while Crow remains important when shield breaking is required. Head Captain strengthens Burn teams, and Rainman, Water Mage, Sand, and Sharkfang give players several new ways to control difficult lanes.
Start with one reliable carry, surround it with the correct buffer and utility units, and then add specialists based on the stage. Reassess your investments after major balance patches, but do not abandon a completed team just because a newly released unit has higher theoretical damage.
If you want to speed up progression and keep Robux available when you need it, consider using GamsGo's Buy Robux service for your top-ups, then spend the time you save on real progression.
Save More on Your Roblox Top-Up
Top up Robux at a lower price on GamsGo and enter code SAVE60 at checkout to receive an extra 1% discount.
FAQ
What’s the Best Unit in Anime Expeditions?
Sovereign (Djinn) is the best overall unit in Update 2, especially for Boss-focused content. Once a Boss enters its range, it gains additional damage, targets the Boss automatically, applies Freeze, and leaves a permanent Slow after the Freeze ends. Lightning God is stronger in long-wave modes, but Sovereign has the highest immediate Boss-killing value.
Is Sovereign Better Than Lightning God?
It depends on the mode. Sovereign is better for Raids and stages decided by one powerful Boss, while Lightning God is better in Infinite and other long modes where it has enough time to build Voltage. If you can only invest in one, choose Sovereign for Boss progression and Lightning God for wave clearing and long-term scaling.
Is Kitsune Worth Building?
Yes. Kitsune is one of the safest investments in Update 2 because its buffs work with Physical, Magical, and Psychic units. It improves the strongest eligible ally's attack speed and can increase the damage of every allied unit within range, allowing it to fit into almost any current or future team.
Ramen Guy or Stone Alchemist for Farming?
Ramen Guy is the better long-term economy unit because it generates more Yen and increases the Yen earned from kills. Stone Alchemist is the better early-game option because it is guaranteed through the Beginner's Path and is easier to obtain. Use Stone Alchemist while progressing, then replace it with Ramen Guy when available.
Should I Ever Run a Full-DPS Team?
Only for easy farming stages where your units already defeat every wave immediately. In Raids, Infinite, Portals, and difficult Challenges, a full-DPS team usually performs worse than a balanced lineup. One main carry supported by a buffer, control unit, Boss amplifier, and economy unit will normally deal more effective damage over the entire run.
Related Articles