Sandrone, codenamed "Marionette," is the Seventh of the Eleven Fatui Harbingers and arrives in Genshin Impact Version 6.7 as a 5-star Cryo Claymore main DPS.Her biggest hook is that she rewrites the long-neglected Superconduct reaction into a brand-new reaction called Stellar-Conduct — giving Cryo/Electro teams a true reaction-focused carry for the first time.
Her gameplay revolves around her mechanical companion Fagio and its Decoding Power meter: you hold Charged Attacks to keep Fagio firing, use her Elemental Skill to reset Decoding Power, then cap the rotation with a high-multiplier Elemental Burst. The core loop isn't complicated, but the Stellar-Conduct system underneath it is worth understanding before you invest.
This guide breaks down Sandrone's core kit, best weapon, artifacts and stats, top teams and rotation, ascension/talent materials, and pull advice so you can decide whether to pull her and how to build her once you do.
Want to hit full pity (and constellations/refinements) on Sandrone during Phase 1, or stockpile Primogems for the Snezhnaya characters coming in 7.0? Check out GamsGo for discounted Genshin Impact top-ups — they regularly update Sandrone packages so saving up is easier 👉 Top up on GamsGo.

Sandrone Character Overview
Sandrone is a classic on-field reaction carry: she eats up most of the team's field time, using Charged Attacks to continuously trigger Stellar-Conduct and maintain the Radiance: Stellar-Conduct state that powers her damage.

Sandrone Kit at a Glance
Sandrone's kit revolves around managing Fagio, her companion automaton, through a tight Charged Attack and Elemental Skill loop. Her main damage comes from converting Cryo beam attacks into Stellar-Conduct DMG during the Radiance: Stellar-Conduct state.
- Charged Attack
Holding Normal Attack enters Decoding Mode, summoning her companion Fagio to fire condensed Cryo beams that deal AoE damage. While Sandrone is in the Radiance: Stellar-Conduct state, these beams become Stellar-Conduct DMG, making them her primary damage source. - Decoding Power
Firing beams builds Decoding Power. At 100 points, Fagio enters Power Overdrive, attacking at longer intervals for reduced damage. It cannot return to Decoding Mode until its power drops below 50 points. - Elemental Skill
Formule Phenomenale: Differential Analysis has Sandrone board the Tea Party Tactical Assault Hovermech and glide for 6s. During this state, Fagio's Decoding Power rapidly drains while a summoned Prismatic Resonance Cannon fires two Prism Shots. The second shot deals Stellar-Conduct DMG, creating her core one Charged Attack → one Skill loop. - Light of Rationalisme
Her passive converts the party's Superconduct into Stellar-Conduct and increases the party's Base Stellar-Conduct DMG based on Sandrone's ATK. Every 100 ATK grants +0.7%, up to a maximum of +14%. This makes her the reaction core of a Cryo/Electro team.
✦ Burst Rotation Note Sandrone's Elemental Burst, Formule Phenomenale: Q.E.D., costs 60 Energy and has a 15s cooldown, while her Skill has a 4s cooldown. The Burst hits hard and, during the Radiance: Stellar-Conduct state, clears her Refined Tactics stacks to massively boost the Convective Inhibition Ray. This makes it a meaningful part of her rotation, not just a finisher.
Should You Pull for Sandrone
Sandrone is a high-value pull if you want to invest early in the new Stellar-Conduct archetype. Her kit is not overly complex, her Charged Attack range makes positioning manageable, and she can already build functional teams with existing Cryo and Electro units.
Beta feedback positions her as one of the strongest Cryo DPS units since Lohen — see where she lands on our Genshin Impact tier list.
Easy rotation and practical range: Her gameplay loop is straightforward, and her Charged Attack has enough reach to make staying inside the Polestar Field manageable in real combat.
Flexible early team-building: As the first dedicated Stellar-Conduct DPS, she is easier to build around than many recent Nod-Krai characters. Existing 4-star Cryo and Electro units can already form a functional team around her.
Strong damage profile: Her high multipliers and consistent output make her one of the strongest Cryo DPS options since the Luna chapter began, with clear potential to anchor the meta heading into Snezhnaya.
Missing future support pieces: She releases before her tailored supports and a dedicated Stellar-Conduct artifact set, so her launch teams may feel weaker than her eventual finished setup.
Field-hungry playstyle: Sandrone takes most of the field time and rarely fits cleanly beside another on-field DPS.
Interruption risk: Long Charged Attack windows can leave her exposed, so a shielder or healer improves comfort significantly.
Some best teams rely on buffed older units: Several strong comps lean on characters who received reworks or buffs this patch, such as Yae Miko and Qiqi. If you do not own them, her current team options may feel more limited.
✦ Pull Verdict If you enjoy Cryo/Electro reaction teams, summoner-style mechanical gameplay, or want early access to the new Stellar-Conduct archetype, Sandrone is a strong main DPS pull this version. If you would rather wait for the 7.0 Snezhnaya roster, skipping her to save Primogems is also reasonable.
Best Build for Sandrone (Quick Reference)
| Category | Recommendation |
|---|---|
| Best Weapon | 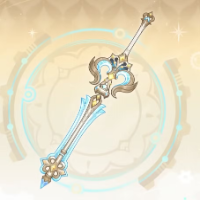 Signature: A Teaspoon of Transcendence Signature: A Teaspoon of Transcendence |
| Best Artifact Set | 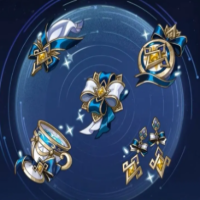 Disenchantment in Deep Shadow (4-piece) Disenchantment in Deep Shadow (4-piece) |
| Sands of Eon | ATK% or Energy Recharge |
| Goblet of Eonothem | ATK% |
| Circlet of Logos | CRIT Rate / CRIT DMG |
| Substat Priority | CRIT Rate/DMG > Energy Recharge until Burst every rotation > ATK% ≈ Elemental Mastery |
| Talent Priority | Normal Attack > Elemental Burst >>> Elemental Skill |
✦ Target Stats ATK around 2,400–2,600; CRIT Rate around 65–80%; CRIT DMG around 110–160%; Energy Recharge around 122–133%, depending on team energy needs; and Elemental Mastery up to around 300 if Stellar-Conduct ends up scaling with EM. Keep a roughly 1:2 CRIT Rate to CRIT DMG ratio.
⚠ Build Assumption Every build recommendation rests on one assumption: that Sandrone and Stellar-Conduct scale with ATK% and some Elemental Mastery, but not elemental DMG%, similar to how Lunar-Charged is calculated. This needs to be confirmed by testing after release.
Best Weapon for Sandrone
Sandrone is an ATK-scaling on-field DPS, so offensive Claymores with high ATK and CRIT suit her best. Crucially, pure "elemental DMG bonus%" passives do nothing for Stellar-Conduct DMG — that's the dividing line when evaluating her weapons.
| Rating | Weapon | How to Get | Notes |
|---|---|---|---|
| T0 — Signature | |||
| Best |  A Teaspoon of Transcendence A Teaspoon of Transcendence | Limited Banner |
|
| T1 — 5-Star Alternatives | |||
| 2nd |  A Thousand Blazing Suns A Thousand Blazing Suns | Limited Banner |
|
| 3rd |  Wolf's Gravestone Wolf's Gravestone | Weapon Banner |
|
| T2 — CRIT / ATK Stat Sticks | |||
| 4th |  Beacon of the Reed Sea Beacon of the Reed Sea | Limited Banner |
|
| 4th |  Redhorn Stonethresher Redhorn Stonethresher | Limited Banner |
|
| 4th |  Verdict Verdict | Limited Banner |
|
| 4th |  The Unforged The Unforged | Limited Banner |
|
| F2P / Budget Options | |||
| Best F2P |  Tidal Shadow Tidal Shadow | Fontaine Forgeable |
|
| 2nd F2P |  Mailed Flower Mailed Flower | Past Event Reward |
|
Most CRIT-based claymores should be serviceable for Sandrone as a traditional on-field DPS that wants as many offensive stats as possible. An ATK% increase on the passive is also ideal if her abilities scale with this stat.
⚠ Avoid: Serpent Spine is not great here. Its DMG% bonus does not apply to Stellar-Conduct damage, which makes it much weaker than it would be on a normal Claymore DPS.
Best Artifacts for Sandrone
Best set: Disenchantment in Deep Shadow (4-piece)
This is her clear best-in-slot and should be used in nearly all cases — even with mediocre substats it beats other sets.
| Artifact | Recommendation | Details |
|---|---|---|
| Best Set | ||
 Disenchantment in Deep Shadow Disenchantment in Deep Shadow | ★★★★★ |
|
| Transitional / Mixed Sets | ||
 Gladiator's Finale Gladiator's Finale  Wanderer's Troupe Wanderer's Troupe | ★★★・・ |
|
Run 2+2 ATK/EM combinations as filler before you complete the 4-piece set. The setup is flexible as long as the pieces provide Sandrone's preferred offensive stats.
| Slot | Main Stat | Substat Priority |
|---|---|---|
 Flower of Life Flower of Life | Flat HP | CRIT Rate / CRIT DMG / ATK% / Elemental Mastery / Energy Recharge |
 Plume of Death Plume of Death | Flat ATK | CRIT Rate / CRIT DMG / ATK% / Elemental Mastery / Energy Recharge |
 Sands of Eon Sands of Eon | ATK% or Energy Recharge | CRIT Rate / CRIT DMG / ATK% / Elemental Mastery / Energy Recharge |
 Goblet of Eonothem Goblet of Eonothem | ATK% | CRIT Rate / CRIT DMG / ATK% / Elemental Mastery / Energy Recharge |
 Circlet of Logos Circlet of Logos | CRIT Rate / CRIT DMG | CRIT Rate / CRIT DMG / ATK% / Elemental Mastery / Energy Recharge |
Substat priority: Energy Recharge until you can Burst every rotation > CRIT Rate > CRIT DMG > ATK% ≈ Elemental Mastery.
Put EM on only one of the Sands or Goblet, never both; the Circlet always goes CRIT. Like any other damage dealer, Sandrone prefers offensive artifact sets, and her dedicated Stellar-Conduct set is currently the clear best-in-slot.
Note: This assumes both Sandrone and the Stellar-Conduct reaction scale with ATK% and a bit of Elemental Mastery, but not elemental DMG%, similar to how Lunar-Charged is calculated. Some things can still change after release.

Best Teams for Sandrone
Sandrone is a Stellar-Conduct DPS, so she pairs best with Electro and Cryo characters: the team needs consistent application of both to keep triggering Stellar-Conduct, which favors off-field sub-DPS / elemental appliers.
Sandrone Is Meant For Stellar-Conduct Teams
| Team | Rating | Description |
|---|---|---|
| Premium Stellar-Conduct Team | ★★★★★ |
|
| F2P Stellar-Conduct Team | ★★★☆☆ |
|
| Lunar-Charged Stellar-Conduct Team | ★★★☆☆ |
|
Sandrone is our first introduction to Stellar-Conduct. It builds on Superconduct, requiring Electro and Cryo application, but instead of dealing direct reaction damage, it deploys the Polestar Field. Remaining inside this field enables Radiance: Stellar-Conduct for relevant characters.
Premium Stellar-Conduct Team
Note: Content is based on current available info and assumes Stellar-Conduct and Sandrone scale with ATK% and EM like Lunar-Charged. Things can still change following Sandrone's official release.
Team Composition & Equipment
| Character | Weapon | Artifacts & Stats |
|---|---|---|
 Sandrone Sandrone | A Teaspoon of Transcendence | Disenchantment in Deep Shadow x4 Main: ATK% or ER / ATK% / CRIT Rate or DMG Sub: CRIT Rate or DMG, ATK% or ER, EM |
 Yae Miko Yae Miko | Kagura's Verity | Disenchantment in Deep Shadow x4 Main: ATK% or ER / ATK% / CRIT Rate or DMG Sub: CRIT Rate or DMG, ATK% or ER, EM |
 Qiqi Qiqi | Favonius Sword | Tenacity of the Millelith x4 Main: ATK% / ATK% / CRIT Rate for Favonius Sub: CRIT Rate, ATK% |
 Escoffier Escoffier | Symphonist of Scents Favonius Lance if Energy is needed | Golden Troupe x4 Main: ATK% or ER / Cryo DMG% / CRIT Rate or DMG Sub: ER, CRIT Rate or DMG, ATK% |
Since Sandrone is a typical DPS, her ideal team follows the traditional formula of an elemental applicator plus complementary supports. Yae Miko is one of the few Cryo/Electro characters expected to receive Stellar-Conduct synergy, making her a strong premium Electro sub-DPS.
Premium Stellar-Conduct Team Rotation
| No. | Procedure |
|---|---|
| 1 | Start with Yae Miko. Use her Skill x3. |
| 2 | Switch to Escoffier. Deploy her Skill. Burst is optional if you need healing. |
| 3 | Swap to Qiqi for her Skill. You can dash after to cancel the long animation. |
| 4 | Deploy Sandrone. Hold Normal Attack to activate a Charged Attack, then use Skill to reset Fagio. Repeat until Miko's totems expire. End with Sandrone's Burst. |
| 5 | Repeat from Step 1. |
Substitute Characters
| Character | Sub | Details |
|---|---|---|
| Escoffier |  Beidou Beidou Diona Diona Rosaria Rosaria Nicole Nicole Sucrose Sucrose | Escoffier can be replaced by another Electro sub-DPS, Cryo support, RES Shred support, EM buffer, shield, or ATK buffer. |
| Qiqi | DionaBeidou | Qiqi's replaceability depends on her full buff details. Diona and Beidou are likely synergistic alternatives. |
| Yae Miko | Beidou Fischl Fischl | Beidou should be serviceable due to similar Stellar-Conduct buffs. Fischl works as an off-field Electro sub-DPS. |
Note: Sandrone's team is incomplete due to a lack of tailored supports. This team is likely to see upgrades in future versions.
F2P Stellar-Conduct Team
Note: Content is based on current available info and assumes Stellar-Conduct and Sandrone scale with ATK% and EM like Lunar-Charged.
Team Composition & Equipment
| Character | Weapon | Artifacts & Stats |
|---|---|---|
| Sandrone | A Teaspoon of Transcendence | Disenchantment in Deep Shadow x4 Main: ATK% or ER / ATK% / CRIT Rate or DMG Sub: CRIT Rate or DMG, ATK% or ER, EM |
| Beidou | Favonius Greatsword | Tenacity of the Millelith x4 Main: ATK% or ER / ATK% / CRIT Rate or DMG Sub: ER, CRIT Rate for Favonius, CRIT DMG or ATK% |
| Diona | Sacrificial Bow | Noblesse Oblige x4 Main: ATK% / ATK% / CRIT Rate for Favonius Sub: CRIT Rate, ATK% |
 Iansan Iansan | Symphonist of Scents Favonius Lance if Energy is needed | Instructor x4 Main: ATK% or ER / ATK% / ATK% or CRIT Rate Sub: ER, CRIT Rate for Favonius, ATK% |
A Free-to-Play Stellar-Conduct team should include at least one buffed 4-star Electro or Cryo character. The fourth slot can be a generic buffer, RES Shred support, or ATK% buffer depending on how Stellar-Conduct is calculated.
F2P Stellar-Conduct Team Rotation
| No. | Procedure |
|---|---|
| 1 | Start with Diona. Use Skill, then Burst. |
| 2 | Switch to Iansan. Use Skill, Normal Attack x1, then Burst. |
| 3 | Swap to Beidou. Use Skill, ideally timed as a parry for more Electro particles, then Burst. |
| 4 | Deploy Sandrone. Hold Normal Attack to activate a Charged Attack, then use Skill to reset Fagio. Repeat until Beidou's Electro application expires. End with Sandrone's Burst. |
| 5 | Repeat from Step 1. |
Substitute Characters
| Character | Sub | Details |
|---|---|---|
| Iansan | Rosaria BennettSucrose BennettSucrose | Iansan is the flexible slot. Rosaria adds Cryo, Bennett adds ATK, and Sucrose provides RES Shred and EM support. |
| Diona | Qiqi Layla Layla | Qiqi is the direct sustain alternative. Layla adds shield comfort for Sandrone's Charged Attack windows. |
| Beidou | Fischl Ororon Ororon Lisa Lisa Shinobu Shinobu | Fischl has better personal damage and range. Ororon, Lisa, and Shinobu are lower-output Electro applicators with modest utility. |
Lunar-Charged Stellar-Conduct Team
Note: Content is based on current available info and assumes Stellar-Conduct and Sandrone scale with ATK% and EM like Lunar-Charged.
Team Composition & Equipment
| Character | Weapon | Artifacts & Stats |
|---|---|---|
| Sandrone | A Teaspoon of Transcendence | Disenchantment in Deep Shadow x4 Main: ATK% or ER / ATK% / CRIT Rate or DMG Sub: CRIT Rate or DMG, ATK% or ER, EM |
 Columbina Columbina | Nocturne's Curtain Call | Silken Moon's Serenade x4 Main: ER or HP% / HP% / CRIT Rate or DMG Sub: ER, CRIT Rate or DMG, HP% |
 Ineffa Ineffa | Fractured Halo | Aubade of Morningstar and Moon x4 Main: ATK% / ATK% or EM / CRIT Rate or DMG Sub: CRIT Rate or DMG, ER, ATK%, EM |
| Sucrose | Wandering Evenstar | Viridescent Venerer x4 Main: EM / EM / EM Sub: ER, EM |
So long as post-release testing shows that Lunar-Charged does not disrupt Stellar-Conduct triggers, this team should be serviceable. Ineffa and Columbina already work as a sub-DPS core, and Sandrone adds Stellar-Conduct as a net DPS gain.
Lunar-Charged Stellar-Conduct Team Rotation
| No. | Procedure |
|---|---|
| 1 | Start with Ineffa. Use Skill. Burst can be used every other rotation. |
| 2 | Switch to Columbina. Deploy her Skill, followed by Burst. |
| 3 | Use Sucrose's Skill. |
| 4 | Deploy Sandrone. Hold Normal Attack to activate a Charged Attack, then use Skill to reset Fagio. Repeat until Ineffa's Electro application expires. End with Sandrone's Burst. |
| 5 | Swap back to Sucrose to reuse her Skill. |
| 6 | Repeat from Step 1. |
Substitute Characters
| Character | Sub | Details |
|---|---|---|
| Sucrose | QiqiEscoffierRosariaYae MikoBeidou | Sucrose is ideal for VV RES Shred and EM sharing, but she can be replaced by Cryo or Electro units from Sandrone's other team variants. |
| Ineffa | Yae MikoBeidouFischlOroron | If Columbina remains, other Electro sub-DPS units can replace Ineffa. Yae Miko and Beidou lean more toward Stellar-Conduct, while Fischl leans Lunar-Charged. |
| Columbina |  Furina Furina | Furina is the most reliable Hydro replacement, but her HP drain makes healer coverage important. |
She can also be played as a quickswap unit: do one Charged Attack combo, immediately cast her Burst, then swap to another Stellar-Conduct DPS like Cyno or Wriothesley.
| Other Stellar-Conduct DPS | Notes |
|---|---|
 Cyno Cyno Wriothesley Wriothesley | They need Sandrone to enable Stellar-Conduct abilities, but all are on-field DPS units, so the synergy beyond enabling is limited. |
Reminder: The buffed older units and Stellar-Conduct synergy details come from beta/livestream info. Whether Lunar-Charged and Stellar-Conduct interfere with each other still needs post-release testing.
Sandrone's Best Constellations
Sandrone's constellations are considered fairly modest overall. C6 and C4 are her strongest, while C2 is the best-value early stopping point. C1 and C5 are underwhelming and not recommended as stopping points.
| Constellation | % of C0 | % From Previous | Effect Summary |
|---|---|---|---|
| C0 | 100% | 100% | Base performance. |
| C1 | 109% | 109% | Decoding Power builds 50% slower; all party members deal +30% Stellar-Conduct DMG. Underwhelming as a stopping point. |
| C2 | 122% | 113% | Charged Attack condensed beam CRIT DMG +40%, plus +20% per beam fired, up to 3 stacks. Best early stopping point. |
| C3 | 136% | 111% | +3 levels to Normal Attack talent. |
| C4 | 158% | 116% | Dealing Stellar-Conduct DMG summons an extra cannon, dealing 125% ATK as Stellar-Conduct DMG once every 4s. One of her strongest constellations. |
| C5 | 165% | 105% | +3 levels to Elemental Burst talent. Low-value stopping point. |
| C6 | 217% | 132% | Third beam becomes a continuous Condensed Cluster Beam with extra AoE instances, and all Stellar-Conduct DMG is further increased by 20%. Her standout whale breakpoint. |
Note: Percentages are third-party beta estimates and should be treated as reference only.
Investment advice: At C0, many calculations suggest pulling her signature weapon and then investing in Yae Miko's constellations may be more valuable than Sandrone's own early constellations. A rough priority is often framed as Yae C2 > Sandrone signature > Sandrone C2. For whale investment, C6 is the standout ceiling breakpoint.
How to Play Sandrone
Sandrone's playstyle revolves around her Charged Attack, which lasts around 4 seconds. After a Charged Attack, she casts her Elemental Skill to immediately perform another Charged Attack while resetting Fagio's Decoding Power so it does not overload. She repeats this Charged Attack → Skill loop two or three times, then ends with her Elemental Burst.
Because the Burst deals more damage than a Charged Attack while taking less time to perform, it is worth building enough Energy Recharge to use it every rotation.
Standard Rotation
| No. | Procedure |
|---|---|
| 1 | Open with your off-field characters, ideally from longest ability duration to shortest, so their Cryo/Electro application and buffs cover Sandrone's whole on-field window. |
| 2 | Swap to Sandrone and hold Normal Attack to perform a Charged Attack, summoning Fagio into Decoding Mode. |
| 3 | When the flashing red indicator appears, signaling Fagio is about to enter Power Overdrive, use her Skill to drain Decoding Power and reset it. |
| 4 | Keep alternating Charged Attack → Skill until the Electro applier's effect expires. |
| 5 | Fire her Burst just before the Polestar Field disappears, then repeat from Step 1. |
Quickswap variant: Since her Burst is her single largest damage instance, Sandrone can also be played as a quickswap unit. Perform one Charged Attack combo, cast her Burst for a large damage burst, then swap to another Stellar-Conduct DPS like Cyno or Wriothesley.
Skill reminder: Her Skill does double duty. It resets Fagio's Decoding Power and also fires two Prism Shots at nearby enemies for extra Stellar-Conduct damage. The second shot, and at A1 a hugely amplified shot, are especially important.
Understanding Stellar-Conduct and the Polestar Field
Sandrone is the first dedicated on-field DPS for the new Stellar-Conduct reaction, an upgraded version of Superconduct. Like Lunar reactions, Stellar-Conduct only triggers when a character carrying a Stellar Linchpin, a special Snezhnaya Vision, is in the party. Sandrone is the first such character.
How Stellar-Conduct Works
| Mechanic | Explanation |
|---|---|
| Triggering | Apply both Cryo and Electro to an enemy. Order does not matter. This replaces what would have been a Superconduct trigger and creates a Polestar Field, the blue crystal-like construct on the ground. |
| Energy Storage | The Polestar Field stores elemental energy whenever a Cryo or Electro hit lands on an enemy inside it. After enough hits, that energy releases and grants the whole party a Cryo and Electro DMG% bonus while lowering enemies' Physical RES inside the field. |
| Radiance State | The field enables the Radiance: Stellar-Conduct state for characters standing inside it, marked by a special icon under their HP bar. |
Why Radiance Matters for Sandrone
The Radiance state itself does not directly buff Sandrone. Instead, it acts as the trigger condition that converts her damage. While in Radiance: Stellar-Conduct, her Charged Attack beams, her Skill's second Prism Shot, and her Burst's Convective Inhibition Ray all become Stellar-Conduct DMG instead of plain Cryo.
Staying inside the Polestar Field is therefore the core requirement of her kit. Because her Charged Attacks have decent range, holding position inside the field is manageable in practice.
The Decoding Power Loop
| State | What Happens |
|---|---|
| Decoding Mode | Fagio fires beams and builds Decoding Power while supporting Sandrone's Charged Attack loop. |
| Power Overdrive | At 100 Decoding Power, Fagio enters Power Overdrive, attacking more slowly and becoming unable to return to Decoding Mode until power drops below 50. |
| Skill Reset | Sandrone's Skill rapidly drains Fagio's Decoding Power, effectively performing maintenance so it can keep firing at full rate. |
| Off-Field Drain | While Sandrone is off-field, Decoding Power drains at 300% the normal rate, reinforcing her role as an on-field carry. |
Quality-of-life: With Sandrone in the party, you get bonus snack rewards when turning in Daily Commissions to Katheryne. She also has a unique "invite to tea" feature with full in-game conversations for certain characters.
Material and Farming Guide for Sandrone
All Sandrone Materials - Ascension and Talents
| Material | Items | Amount / Details |
|---|---|---|
| Recommended Levels: Maxed Level & Talents | ||
| Specialty |  Subdetection Unit Subdetection Unit | ×168 |
| Enemy |  Broken Drive Shaft Broken Drive Shaft Reinforced Drive Shaft Reinforced Drive Shaft Precision Drive Shaft Precision Drive Shaft | Broken ×36 / Reinforced ×96 / Precision ×69 |
| Talent |  Teachings of Vagrancy Teachings of Vagrancy Guide to Vagrancy Guide to Vagrancy Philosophies of Vagrancy Philosophies of Vagrancy | Teachings ×9 / Guide ×63 / Philosophies ×82 Domain: Wed / Sat / Sun |
| Boss |  Plume of the Fallen Watcher Plume of the Fallen Watcher | ×46 Watchers: Fallen Vigil |
| Gem |  Shivada Jade Sliver Shivada Jade Sliver Shivada Jade Fragment Shivada Jade Fragment Shivada Jade Chunk Shivada Jade Chunk Shivada Jade Gemstone Shivada Jade Gemstone | Sliver ×1 / Fragment ×9 / Chunk ×9 / Gemstone ×6 |
| Others |  Crown of Insight Crown of Insight Hero's Wit Hero's Wit Mora Mora | Crown ×1 / Hero's Wit around ×420 / Mora around 4.3 million |
Sandrone uses drops from Landcruisers found in Nod-Krai, especially around the Kuuvahki Experimental Design Bureau. Her Local Specialty is gathered in Fontaine, while her Ascension Materials are dropped by a boss found in Dornman Port, Mondstadt.
Sandrone Materials By Level and Talent
| Character Level | Materials Per Ascension Level |
|---|---|
| Lvl 20 | Shivada Jade Sliver ×1 / Subdetection Unit ×3 / Broken Drive Shaft ×3 |
| Lvl 40 | Shivada Jade Fragment ×3 / Plume of the Fallen Watcher ×2 / Subdetection Unit ×10 / Broken Drive Shaft ×15 |
| Lvl 50 | Shivada Jade Fragment ×9 / Plume of the Fallen Watcher ×4 / Subdetection Unit ×20 / Reinforced Drive Shaft ×12 |
| Lvl 60 | Shivada Jade Chunk ×6 / Plume of the Fallen Watcher ×8 / Subdetection Unit ×30 / Reinforced Drive Shaft ×18 |
| Lvl 70 | Shivada Jade Chunk ×3 / Plume of the Fallen Watcher ×12 / Subdetection Unit ×45 / Precision Drive Shaft ×12 |
| Lvl 80 | Shivada Jade Gemstone ×6 / Plume of the Fallen Watcher ×20 / Subdetection Unit ×60 / Precision Drive Shaft ×24 |
Get Materials By Clearing Story Quest: Finishing Sandrone's Story Quest within a limited time will give you enough materials to level her to 60. Clear the quest during the event period to reduce the amount of materials you need to farm.
Sandrone's Signature Weapon Materials
| Material Type | Items | Details |
|---|---|---|
| Coming Soon | ||
| Weapon Ascension Materials |  Depleted Lunar Iron Depleted Lunar Iron Fractured Lunar Iron Fractured Lunar Iron Oblation Oblation Sundered Glory Sundered Glory Aureate Radiance Aureate Radiance Unyielding Delusion Unyielding Delusion | No official information has been released yet. Check back later for updates. |
| Other Possible Weapon Drops |  Tattered Warrant Tattered Warrant Frost-etched Warrant Frost-etched Warrant Immaculate Warrant Immaculate Warrant Madman's Restraint Madman's Restraint | Use only after official weapon material requirements are confirmed. |
Leveling Priority For Sandrone
| Upgrade | Priority |
|---|---|
| Character Level | Level 90, since she is an On-Field DPS whose abilities have level-based scaling. |
| Normal Attack | Level 10, since her biggest source of damage appears to be her Charged Attacks. |
| Skill | Level 8 or 9 should suffice since her Skill still deals damage. Level to 10 if you have enough materials. |
| Burst | Level 8 or 9 should suffice unless you have enough materials to max it to 10. |
Recommended Sandrone Material Farming Schedule
| Day | Recommended Farming |
|---|---|
| Mon | Weekly Boss Material / Plume of the Fallen Watcher / Broken Drive Shaft / Subdetection Unit |
| Tue | Plume of the Fallen Watcher / Mora / Hero's Wit / Broken Drive Shaft |
| Wed | Plume of the Fallen Watcher / Mora / Hero's Wit / Broken Drive Shaft / Subdetection Unit / Vagrancy Talent Books |
| Thur | Plume of the Fallen Watcher / Mora / Hero's Wit / Broken Drive Shaft |
| Fri | Plume of the Fallen Watcher / Mora / Hero's Wit / Broken Drive Shaft / Subdetection Unit |
| Sat | Plume of the Fallen Watcher / Mora / Hero's Wit / Broken Drive Shaft / Vagrancy Talent Books |
| Sun | Plume of the Fallen Watcher / Mora / Hero's Wit / Broken Drive Shaft / Vagrancy Talent Books |
To farm all of Sandrone's materials up to Level 90 and 10/9/9 Talent levels from scratch, it will take at least around a week or up to a month without additional Resin.
When Do Materials Respawn?
| Material Type | Respawn Timer |
|---|---|
| Local Specialties | Respawn after 48 hours as soon as you collect them. |
| Elite Overworld Enemies | Respawn after server reset. |
How to Get Each Item?
| Item | Where to Get | Map / Details |
|---|---|---|
| Local Specialty | ||
| Subdetection Unit | Fontaine, especially Mont Esus and Fontaine Research Institute areas. |  Tip: You can collect more Subdetection Units from other Travelers' worlds through co-op. Tip: You can collect more Subdetection Units from other Travelers' worlds through co-op. |
| Enemy Materials | ||
| Broken Drive ShaftReinforced Drive ShaftPrecision Drive Shaft | Defeat Landcruisers in Nod-Krai, especially near the Kuuvahki Experimental Design Bureau. | You can track some Landcruiser locations using the Adventurer's Handbook, but not all locations will be shown. |
| Talent Domain | ||
| TeachingsGuidePhilosophies | Talent Books of Vagrancy. Available Wednesday / Saturday / Sunday. |  |
| World Boss | ||
| Plume of the Fallen Watcher | Watchers: Fallen Vigil, located in Dornman Port, Mondstadt. | 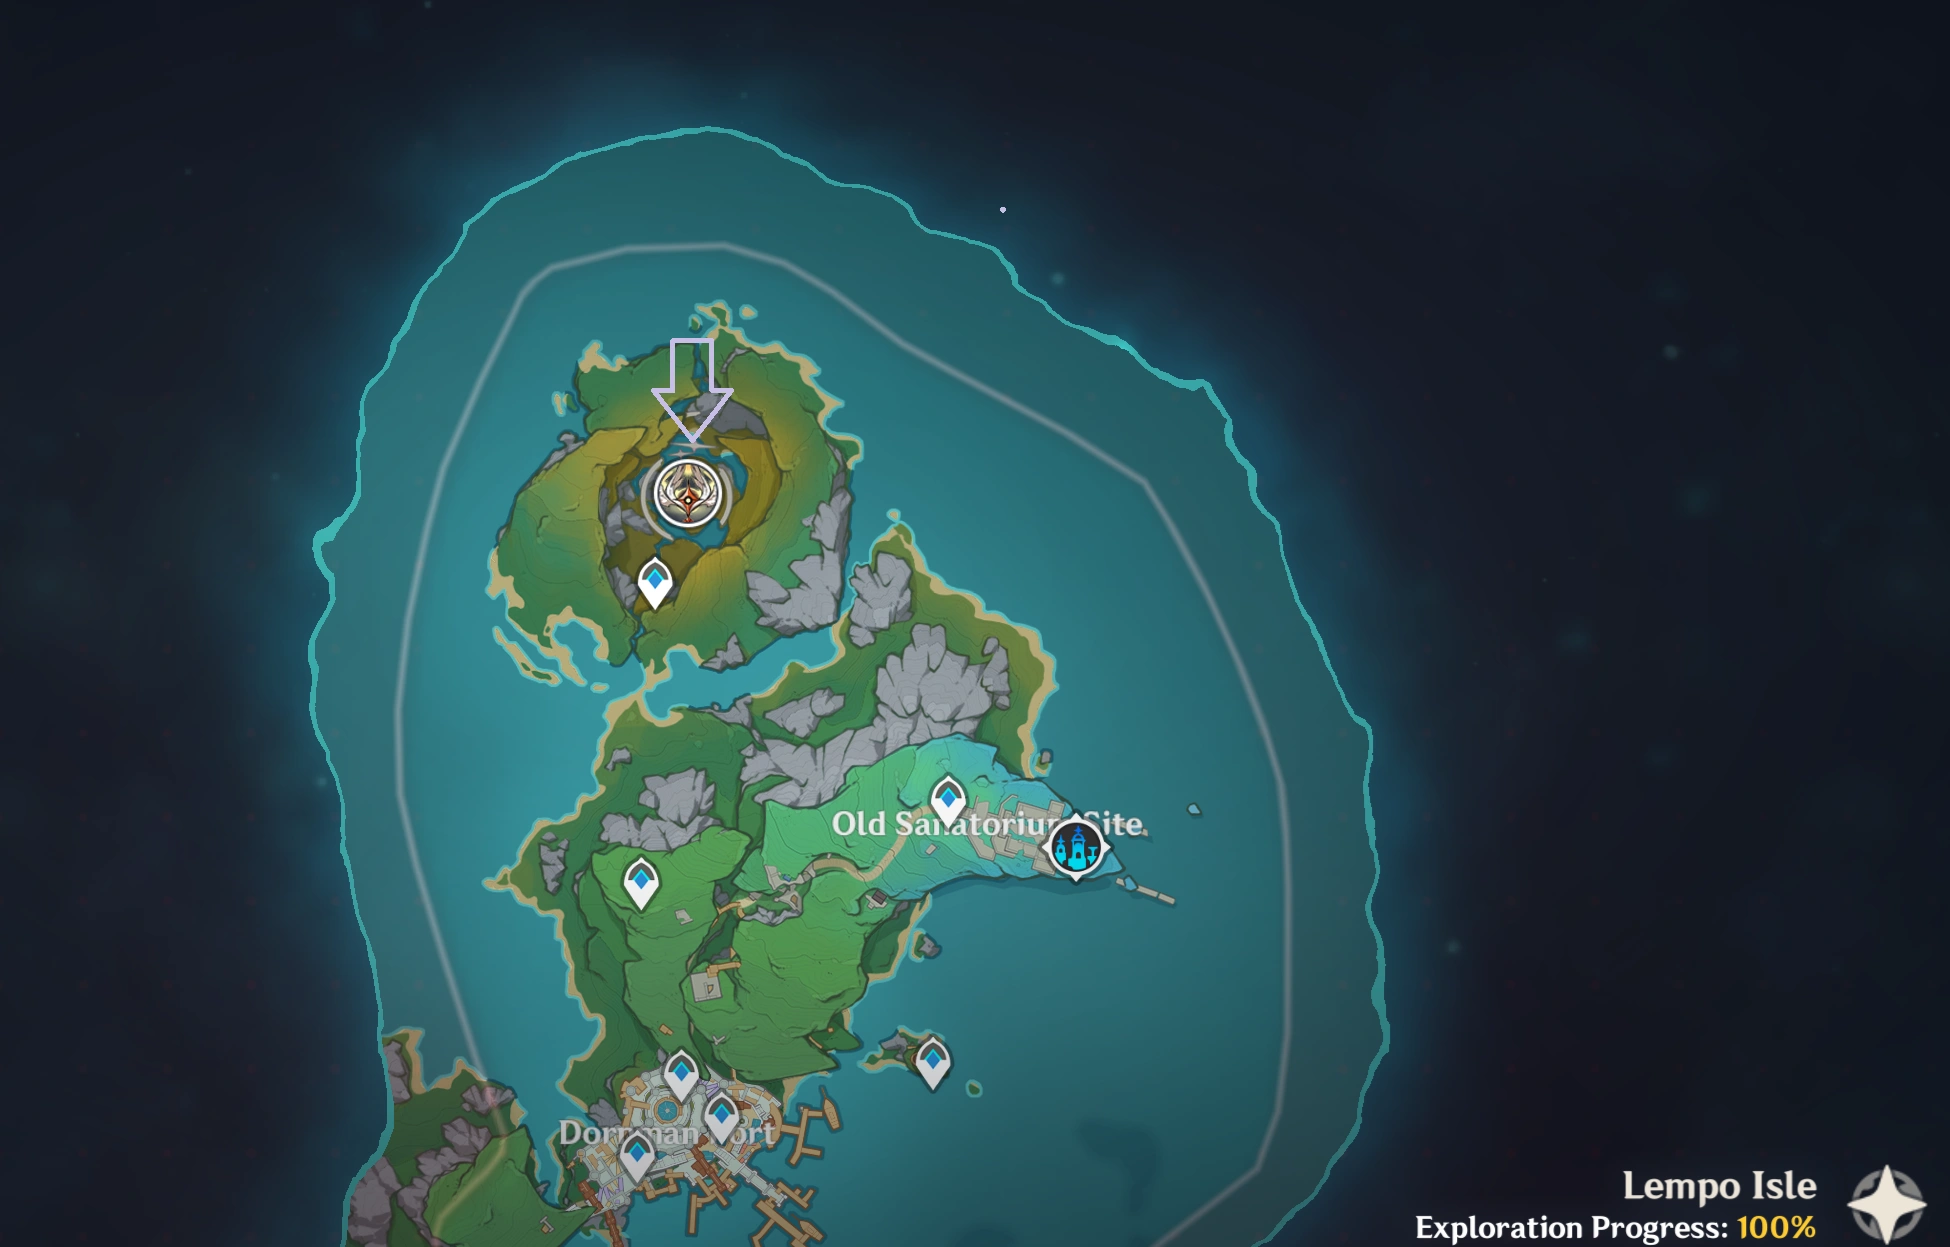 You can track the boss via the Adventurer's Handbook. You can track the boss via the Adventurer's Handbook. |
| Coming Soon | ||
| Weekly Boss Material | Coming Soon | Information regarding Sandrone's Weekly Boss material has yet to be released. |
| Signature Weapon Ascension Materials | Coming Soon | Information regarding Sandrone's signature weapon ascension materials has yet to be released. |
| Signature Weapon Domain | Coming Soon | Information regarding the weapon ascension domain has yet to be released. |
General Material Farming FAQs: Some of Sandrone's character materials are local specialties or rewards from enemies and domains found in Fontaine, Mondstadt, and Nod-Krai. Local Specialties respawn after 48 hours, while elite overworld enemies respawn after server reset.
Conclusion
Sandrone single-handedly opens up the new Stellar-Conduct archetype. She lacks the universality of a top-tier Mavuika build, but as the only character who enables the reaction, she's a must-have if you want this damage type at all.
If you're committed to Stellar-Conduct — or already own Yae Miko, Qiqi, or Escoffier — she's a top-priority pull. The best strategy is C0 + signature weapon (A Teaspoon of Transcendence); the panel boost outvalues her early constellations.
C0 clears the Spiral Abyss comfortably. If budget allows, C1 or C2 are the optimal stopping points afterward. If Stellar-Conduct doesn't appeal to you, saving for the Version 7.0 Snezhnaya roster is a smart alternative.
Best of luck with your 6.7 pulls! For more guides, meta updates, and the smartest ways to fund your gaming, stay tuned to GamsGo.
FAQ about Sandrone
Is Sandrone worth pulling at C0?
Yes. Her whole kit is unlocked at C0 — Stellar-Conduct conversion, the Decoding Power loop, the hovermech reset, and her Burst all work at base. Her constellations are modest, so C0 + signature is the value sweet spot.
Can she be played without her signature weapon?
Yes. A Teaspoon of Transcendence is a clear DPS jump, but 5-stars like A Thousand Blazing Suns and Wolf's Gravestone work well, and the forgeable Tidal Shadow (R5) is a strong F2P pick with a healer on the team.
What's the best F2P weapon for Sandrone?
Tidal Shadow, if she scales with ATK — craftable, with an ATK passive that's fully active alongside any healer. Mailed Flower (EM) is a close second but is no longer obtainable. Avoid Serpent Spine: its DMG bonus% doesn't apply to Stellar-Conduct.
Does Sandrone need a healer or shield?
She benefits a lot from one. Her long Charged Attack windows leave her open to interruption, so a shielder like Diona or a healer like Qiqi/Escoffier improves the experience. Recommended, but not mandatory.
Can she run double-DPS with Cyno or Wriothesley?
Only loosely. They need her to enable their Stellar-Conduct abilities, but all three are on-field DPS, so she mostly just turns the reaction on. She prefers off-field appliers and buffers over a second carry.
What's the best constellation to aim for?
C2 is the strongest damage breakpoint, adding up to +60% CRIT DMG to her Charged Attack beams. C1 is great value too — smoother pacing plus +30% party Stellar-Conduct DMG. Consensus still favors the signature weapon over C1.
🔍 You Might Also Like:
Wuthering Waves SuiSui: Kit Leak, Teams & Pre-Farming Materials
Arknights Endfield 1.4 Banner Leaks: Arcane, Idol Character and Schedule Guide
WuWa Yangyang: Xuanling Preview - Kit Leaks, Materials & Banner