Travelers, a new Spiral Abyss rotation is here! Still recovering from Floor 11 last time? Let’s see what the October 16, 2026 Floor 12 has waiting for us—and how to bring those nine stars home.
This guide breaks down the October 16–November 16 rotation, from the enemies and mechanics to complete teams for both halves. Whether you’re working with C0 characters and four-star weapons or a heavily invested roster, you’ll find recommended builds, stat targets, rotations, and support replacements to help make the most of your account.
Saving for a new carry and their supports can add up quickly. Before your next pull session, compare Genshin Impact top up on GamsGo and find an option that fits your Primogem budget.

In this guide
- Current enemies, buffs and requirements
- Three complete team pairs
- First-half teams and builds
- Second-half teams and builds
- Chamber-by-chamber walkthrough
- Fixing a missed nine-star clear
- FAQ
Current Floor 12 Enemies, Buffs and Requirements
This lineup starts at 04:00 server time on October 16 and lasts until the November 16 reset. The same local reset happens at different UTC times: Asia at 20:00 UTC the previous day, Europe at 03:00 UTC, and America at 09:00 UTC. Version maintenance and Abyss resets follow separate schedules.
Rule | What it means for your teams |
|---|---|
First-half Ley Line Disorder | Stellar Glimmer reaction damage increases by 75%. Stellar Swirl and Stellar-Conduct teams are natural fits. |
Second-half Ley Line Disorder | All party members gain 75% Cryo DMG Bonus. This does not automatically increase every type of Stellar reaction damage. |
Stardread Moon | Superconduct, Stellar-Conduct, Cryo Swirl, Stellar Swirl, Frozen, Shatter, and direct Stellar-Conduct or Stellar Swirl damage can trigger a True DMG shockwave, at most once every 2 seconds. |
Three-star timing | Finish both halves of each chamber with more than 420 seconds remaining. You have just under three minutes combined; leave a few seconds of margin. |
The reaction list matters: ordinary Cryo Swirl and Frozen can trigger the Blessing, while Melt is not on the list. Also, a 75% Cryo bonus is not a 75% increase to your final team damage.[1]
What Each Half Needs
Use the enemy list to choose your eight characters before comparing artifact rolls. This rotation has the following six half-chambers.
Chamber | First half | Second half |
|---|---|---|
12-1 · Lv. 95 | Battle-Hardened Chimeric Volkodlak Archer ×1 | Iniquitous Baptist ×1, then Shadowy Husk: Standard Bearer ×1 + Defender ×1 |
12-2 · Lv. 98 | Radiant Moonfly ×1 | Battle-Hardened Elite Treasure Hoarder ×1 |
12-3 · Lv. 100 | Chimeric Winged Lion ×1 | Secret Source Automaton: Overseer Device ×1 |
Team-building priority: give the first half reliable mechanic hits and healing. Give the second half sustained Cryo damage plus Hydro application. A character’s role in those jobs matters more than their position on a general tier list.
Best Floor 12 Team Pairs at a Glance
Each row below gives you eight different characters. These are matchup-based recommendations, not a speedrun ranking. Pair C is an existing-roster fallback with the toughest boss damage check; it should not be treated as an established low-investment clear.
Pair | First-half team | Second-half team | Choose it when… |
|---|---|---|---|
A · Established premium roster | You own both cores. C0 five-stars and four-star weapons remain the baseline; the roster itself is expensive. | ||
B · Fewer limited first-half slots | Your built carry is Wriothesley, and you want to reserve Furina and Escoffier for his half. | ||
C · Reuse an older Freeze roster | You already have a strong Ayaka team and lack Sandrone, Skirk or Escoffier. This still uses limited five-stars. |
Keeping Escoffier on the second half lets her healing, repeated Cryo hits, and resistance reduction help in all three chambers. Qiqi handles first-half healing without competing for that slot. Keep four Cryo/Hydro characters in Escoffier’s pure-element teams to retain her strongest resistance reduction.
Before reading the build tables: C0 means no Constellations; R1 means Refinement Rank 1 of the named weapon. All listed weapons are Level 90. ATK, HP, EM and CRIT figures are unbuffed build-planning targets, excluding temporary weapon effects, Abyss cards and conditional CRIT bonuses. They are not measured nine-star thresholds. Prioritize a working second rotation over reaching every upper number.
Skill and Burst recommendations are base Talent Levels before Constellation bonuses. Complete the relevant Witch’s Revelation upgrades for Mizuki and Qiqi before using their updated mechanics. In rotation shorthand, E = Skill, Q = Burst, N = Normal Attack, C = Charged Attack.
Best First-Half Teams and Builds
Mizuki Stellar Swirl: A First Half With Fewer Limited Characters
 Yumemizuki Mizuki On-field Stellar Swirl Yumemizuki Mizuki On-field Stellar Swirl |  Cryo Traveler Reaction access and Cryo Cryo Traveler Reaction access and Cryo |  Qiqi Healing and Cryo Qiqi Healing and Cryo |  Sucrose EM support and resistance shred Sucrose EM support and resistance shred |
Cryo Traveler enables Stellar Swirl, Qiqi supplies healing, and Sucrose supports the Cryo damage and shares EM. Mizuki takes the field after their setup. This gives Pair B and Pair C an upper team without needing Odette, Sandrone or Vesna.
For Stellar Swirl Mizuki, use EM Sands, EM Goblet and usually a CRIT Circlet at low Constellations. Her direct Stellar Swirl damage can use CRIT, so the familiar triple-EM regular-Swirl build is not an automatic best choice. Give Sucrose Viridescent Venerer, leaving Mizuki free to use strong EM mixed sets.[3]
Character | Baseline investment | Weapon and artifacts | Build-planning targets |
|---|---|---|---|
| C0; Lv. 80/90–90 |
| 550–750 EM; around 60% CR / 120% CD |
| Available Constellations; Lv. 80/90 |
| Around 1,700–2,100 ATK; 50% CR helps Favonius. |
| C0; Lv. 80/90 |
| Around 1,800–2,200 ATK; aim near 50% CR if relying on Favonius. |
| C0; Lv. 90 |
| Around 700–900 EM. |
 The Widsith
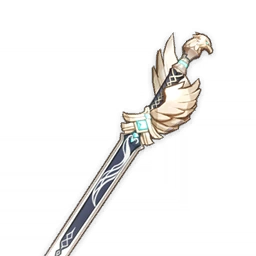 Favonius Sword
 Sacrificial Fragments
Opening: Qiqi E → Sucrose N1 E, with Q if useful → Traveler E → Mizuki E. In later rotations, add Traveler’s resource-dependent Charged Attack/Burst actions when available.
Traveler’s Heart of the Furnace buff needs its qualifying Stellar damage trigger; an E-only opening does not automatically grant the full set effect. Check that trigger before assuming the buff is active.
Energy and recovery: land a hit while each Favonius wielder is on-field if you need their clear particles. Do not budget a Sacrificial reset as guaranteed at R1. At 12-2, let Qiqi heal the affected damage dealer to full; if several teammates need recovery, Qiqi can attack during her Skill to heal the party. Restart Mizuki’s field time once the important damage contributors are ready.
Higher investment: Mizuki’s C1/C2 add offensive value, while C6 changes her CRIT and EM evaluation substantially. Rebalance the build at that point. Traveler’s C2 and C6 add support value, but neither is silently included in the baseline above.
| Replace | Possible alternative | What changes |
|---|---|---|
| Cryo Traveler | Odette | Preserves Stellar access and adds a different Cryo/buff package. Change the setup and reserve any characters used by your other team. |
| Sucrose | C6 Faruzan | Adds Anemo support but has different Energy and Burst-duration requirements. Pre-C6 Faruzan is not the same replacement. |
| Qiqi | A suitable full-HP healer | Preserves Cocoon recovery, but check Cryo coverage and Burst availability. Mizuki’s low-Constellation snacks alone are not a reliable full-HP plan. |
Watch out: Mizuki cannot perform Normal Attacks while floating in her Skill. Replacing a teammate with Yelan or Xingqiu does not make their Normal-Attack-triggered follow-ups work during that state.
Sandrone Stellar-Conduct: Keep the Cryo-Hydro Core for Your Other Side
 Sandrone On-field damage Sandrone On-field damage |  Yae Miko Off-field Electro Yae Miko Off-field Electro |  Odette Cryo and Stellar support Odette Cryo and Stellar support | Qiqi Healing and support |
This upper core leaves Furina, Escoffier and Shenhe available for Pair A’s lower team. Keep Yae’s turrets and Odette’s Double in range, then give Sandrone a clean field window after the roots or Winged Lion mechanic has been handled.
Use an ATK Goblet on Sandrone’s Stellar-Conduct build: ordinary Cryo DMG Bonus does not increase her direct Stellar-Conduct damage. Her recommended combo also changes at C1, so low- and high-Constellation players should not copy identical beam timings.[4]
Character | Baseline investment | Weapon and artifacts | Build-planning targets |
|---|---|---|---|
| C0; Lv. 90 |
| Around 2,100–2,500 ATK; roughly 60% CR / 140%+ CD. |
| C0; Lv. 80/90–90 |
| Around 1,800–2,200 ATK; 60% CR / 120%+ CD. |
| C0; Lv. 80/90–90 |
| Around 2,000–2,400 ATK; 60% CR / 120%+ CD. |
| C0; Lv. 80/90 |
| Around 1,800–2,200 ATK; near 50% CR for Favonius. |
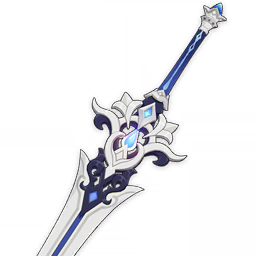 Tidal Shadow
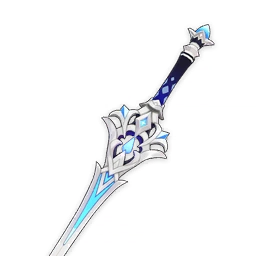 Finale of the Deep
Opening: Yae 3E → Odette E, then its follow-up E within the allowed window → Qiqi E → Sandrone’s C/E sequence. At C0, start from 3[C E]; at C1+, the longer beams generally use 2[C E].
Second rotation: refresh the off-field setup before another full beam window. Burst when it fits your resources and buffs; do not stop the rotation to fund every optional Q. For 12-2, recover the affected main damage dealer first. Sandrone’s weapon also needs actual healing to activate its ATK effect.
Higher investment: C1 changes beam length and field-time planning; C6 adds a much larger personal damage package. A Teaspoon of Transcendence is a weapon upgrade, while C6 Qiqi calls for a separate Burst-and-ATK support setup. A low-Constellation Qiqi should not inherit that rotation automatically.
Replace | Possible alternative | What changes |
|---|---|---|
Yae Miko | Alyosha or Fischl | Keeps off-field Electro, but changes buffs, damage, healing and Energy. Alyosha’s stronger support Constellations must be identified. |
Odette | Cryo Traveler | Keeps a Stellar route and Cryo support; loses Odette’s particular damage and buff package. Recheck weapon triggers and field timing. |
Qiqi | C6 Diona, or another appropriate healer | C6 Diona offers specific reaction support and shielding. C0 Diona does not provide the same offensive package. Recheck full-HP recovery. |
For the individual gear choices, see our Sandrone build guide and Odette weapons and team guide. If you use the four-star Electro route, the Alyosha build guide covers his support setup.
Already Have Vesna or a Strong Mavuika Team?
 Vesna: an existing Vesna account can build an upper Stellar Swirl route around her instead. Use the Vesna build and team guide for her own stat and skill requirements. She and Mizuki have different scaling and rotations; changing the carry means rebuilding the plan.
 Mavuika / Xilonen / Bennett / Citlali: this is an existing-roster alternative, with a current-cycle player report but incomplete configuration details. The Moonfly’s Pyro resistance, manual mechanic handling, and limited use of this Blessing make it a demanding choice. Use Xilonen’s healing when needed after the Cocoon, rather than assuming Bennett always reaches full HP. Keep the Mavuika build guide as a character reference; this is not the route to build from scratch for this rotation.
Best Second-Half Teams and Builds
Skirk Cryo-Hydro: The Most Complete Core Here
 Skirk Continuous Cryo carry Skirk Continuous Cryo carry |  Furina Hydro and damage buff Furina Hydro and damage buff |  Escoffier Cryo, healing and RES shred Escoffier Cryo, healing and RES shred |  Shenhe Cryo buffs and support Shenhe Cryo buffs and support |
Skirk supplies the repeated Cryo hits, Furina handles Hydro, Escoffier combines healing with resistance reduction, and Shenhe adds Cryo support. Their elements also preserve the pure Cryo-Hydro conditions. This covers the three lower chambers without borrowing Qiqi or Odette from Pair A.
Skirk does not need Energy Recharge. Her resource is Serpent’s Subtlety. Keep particle planning focused on Furina, Escoffier and Shenhe instead.[5]
Character | Baseline investment | Weapon and artifacts | Build-planning targets |
|---|---|---|---|
| C0; Lv. 80/90–90 |
| Around 1,800–2,200 ATK; 65–75% CR / 150%+ CD. |
| C0; Lv. 90 |
| Around 30,000–36,000 HP; 60% CR / 120% CD after Energy needs. |
| C0; Lv. 80/90–90 |
| Around 1,800–2,200 ATK; near 50–60% CR for Favonius. |
| C0; Lv. 80/90 |
| Around 2,200–2,600 ATK when Energy allows. |
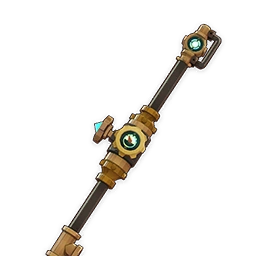 Fleuve Cendre Ferryman
 Favonius Lance
Energy conditions: the opening below uses one Furina E, one Escoffier E and one Shenhe E. Escoffier catches her own particles with E→Q. Budget one successful Favonius trigger from each Lance user only if you actually land an on-field CRIT. The quoted Escoffier range is a guide reference that includes assumed Favonius and particle income, not a no-drop guarantee. If a second Burst is late, add ER or alter the particle route before adding CRIT DMG.[6][7]
Opening: Furina E Q → Escoffier E Q → Shenhe hold E Q → Skirk tap E and her enhanced Normal Attack sequence. Use Skirk’s Charged Attack/special Burst resource tools as needed during her field time.
At 12-1, adapt to the shield color instead of spending the entire Skirk window into the wrong shield. At 12-3, start Cryo damage promptly; a shorter setup can be better if the full setup leaves the device spinning. Finish with enough support Energy for the next attempt rather than trying to battery Skirk.
Higher investment: Skirk C2 changes her resource and special-Burst incentives. Furina C2 accelerates Fanfare generation, and Escoffier C1 strengthens the Cryo damage package. Keep the mechanic jobs covered even when extra damage shortens a phase. Azurelight and Symphonist of Scents are upgrades, not entry requirements.
Optional weapon upgrade | Use it when… |
|---|---|
| You already own it or are comparing an existing Skirk build. Recheck effective CRIT Rate, especially with Marechaussee Hunter. |
| Escoffier can use her Burst and maintain the healing-dependent effect. Replacing Favonius also changes the team’s Energy budget. |
| You are upgrading the upper Sandrone team. Re-evaluate her stats and timing instead of copying the Tidal Shadow benchmark. |
 Azurelight · R1
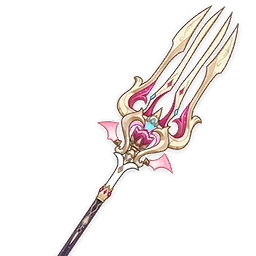 Symphonist of Scents · R1
 A Teaspoon of Transcendence · R1
Replace | Possible alternative | What changes |
|---|---|---|
Shenhe | Rosaria, Kaeya or Yelan | Rosaria/Kaeya preserve more Cryo coverage; Yelan changes this into double Hydro and needs Normal Attack follow-ups. Escoffier’s ER changes too. |
Furina | Yelan or Xingqiu | Preserves Hydro and coordinated attacks but loses Furina’s teamwide buff. Keep a healer for the craftable Sword. |
Escoffier | Charlotte or Mika, with a rebuilt support plan | Keeps healing and Cryo, but loses her resistance reduction and personal damage. Do not expect the same clear time. |
A further pure-element option is replacing Shenhe with Vodyanitsa. Her Skill supplies healing to the active character; her Burst is not an instant party heal. See the Vodyanitsa build guide for that support role. Our Skirk build guide and Escoffier build guide cover their wider equipment choices.
Wriothesley Freeze: A Familiar Carry With Reliable Hydro
 Wriothesley Cryo driver Wriothesley Cryo driver |  Yelan Normal Attack follow-ups Yelan Normal Attack follow-ups | Furina Hydro and team buff | Escoffier Cryo and healing |
Use this lower team with Mizuki’s upper team in Pair B. Wriothesley’s Normal Attacks drive Yelan, the two Hydro characters help maintain reactions, and Escoffier sustains his field time. Keep attacking through useful windows, but leave room to dodge: getting launched loses both Cryo hits and Yelan follow-ups.
Character | Baseline investment | Weapon and artifacts | Build-planning targets |
|---|---|---|---|
| C0; Lv. 90 |
| Around 1,800–2,200 ATK; about 40–49% displayed CR / 160%+ CD. |
| C0; Lv. 90 |
| Around 30,000–35,000 HP; 60% CR / 120% CD after ER. |
| C0; Lv. 90 |
| Around 30,000–36,000 HP. |
| C0; Lv. 80/90–90 |
| Around 1,800–2,200 ATK; near 50–60% CR for Favonius. |
 Favonius Warbow
Energy conditions: these references use one Yelan E, with Yelan catching her particles and triggering Favonius once. Escoffier uses E→Q and catches her own Cryo particles. Extra Lance procs or a second Yelan E can change the result; do not copy the lower ER values from a two-E calculation into this opening. Confirm the second rotation without depending on a last-second enemy drop.[6][7][8]
Opening: Furina E Q → Yelan E Q → Escoffier E Q → Wriothesley E and Normal Attack strings. Add Charged Attacks according to his HP and passive availability; use Q when it fits rather than forcing extra field time.
C0 versus C1: C0 needs sustained healing and HP-aware attacks; do not assume every Charged Attack gets his enhanced version. C1 changes the enhanced Charged Attack pattern and field window. Strong healing may also keep C0 above the HP threshold for his special Charged Attack, so the combo must reflect what is actually available.[9]
Replace | Possible alternative | What changes |
|---|---|---|
Yelan | Xingqiu | Keeps Normal Attack-driven Hydro and adds defensive utility, while losing Yelan’s ramping damage buff. Recheck his Burst Energy. |
Furina | A second Cryo support or suitable Hydro support | Reduces HP drain but loses her team buff. Changing element count and particle income changes the build. |
Escoffier | A Cryo healer such as Charlotte | Keeps healing/Cryo but loses resistance reduction and damage. This is especially costly at the Overseer Device. |
Ayaka Freeze: An Existing-Roster Fallback
 Kamisato Ayaka Burst Cryo damage Kamisato Ayaka Burst Cryo damage |  Sangonomiya Kokomi Hydro, healing and TTDS Sangonomiya Kokomi Hydro, healing and TTDS |  Kazuha Grouping and Cryo support Kazuha Grouping and Cryo support |  Rosaria Cryo battery and buffs Rosaria Cryo battery and buffs |
Pair C reuses a traditional Freeze roster while keeping the upper team independent. Kokomi supplies stationary Hydro, Rosaria helps fund Ayaka, and Kazuha supports Cryo damage. It asks more of your positioning and damage window than the Escoffier cores; a boss walking out of Ayaka’s Burst is a major loss.
Character | Baseline investment | Weapon and artifacts | Build-planning targets |
|---|---|---|---|
| C0; Lv. 90 |
| Around 1,900–2,300 ATK; 45–50% displayed CR / 170%+ CD as a boss-oriented starting point. |
| C0; Lv. 80/90–90 |
| Around 35,000–40,000 HP. |
| C0; Lv. 90 |
| Around 600–800 EM; test near 180–220% ER. |
| C0; Lv. 80/90 |
| Around 60–80% CR for Favonius and her CRIT share. |
 Amenoma Kageuchi
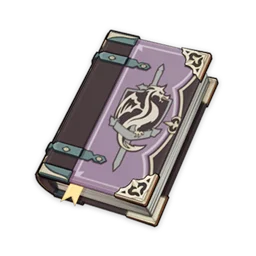 Thrilling Tales of Dragon Slayers
Build around the bosses: Blizzard Strayer loses its extra Frozen-target CRIT bonus when a boss cannot be Frozen. Include Rosaria’s actual CRIT share and conditional Cryo bonuses in the total. A boss-oriented build can overcap on the freezable Husks; choose the compromise that saves time in your slowest chamber.[10]
Opening: Rosaria E Q → Kazuha applies Cryo support → Kokomi E → Ayaka dash, E and Q. Switching directly from Kokomi to Ayaka gives Ayaka Thrilling Tales. Finish with infused attacks and useful battery actions.
Energy conditions: the starting test ranges assume an extended rotation with two Ayaka Skills, two Rosaria Skills, two Kazuha Skills and successful Favonius triggers from the two holders. Funnel a later Rosaria E to Ayaka. Amenoma’s refund depends on actual seeds before Q; do not assume multiple seeds in the first opening. If you cannot fit these actions, increase ER or simplify the rotation.
Higher investment: Ayaka C2 adds extra Burst components, whose value depends on them hitting the target. A suitable five-star Sword can improve damage, but losing Amenoma’s refund means checking ER again. Kokomi’s TTDS R1-to-R5 buff and Rosaria C2 duration are separate upgrades; neither should be hidden in a “C0 team” label.
Replace | Possible alternative | What changes |
|---|---|---|
Kazuha | Sucrose or another appropriate Anemo support | Keeps a resistance-shred route with VV, but changes grouping, buffing and Energy. Sucrose cannot move here if she is already on Pair C’s upper team. |
Rosaria | Kaeya or Shenhe | Keeps a second Cryo slot, but changes particle routing and buffs. Do not keep Rosaria’s CRIT-share assumption. |
Kokomi | Mona with a separate healing solution | Changes Hydro uptime and survival. Simply removing the healer can undermine the entire run. |
How to Clear Each Floor 12 Chamber
Treat the following as a sequence of jobs rather than a fixed stopwatch script. Starting positions and enemy actions can change how much setup is worth using. Save your longest damage window for a target you can actually hit.
Floor 12-1: Roots, Elemental Shields and a Second Wave
First half: watch for the Archer’s Hindering Roots. They can appear high up; Stellar reactions make them easier to reach. Destroy every root, then use the roughly 12-second weakened window. Keep the camera on the roots and the boss instead of chasing each movement with your full setup.[11]
Second half: this Baptist uses Electro, Pyro and Hydro shields. Match the current shield: Cryo handles Electro/Hydro, while Hydro is your clean answer to Pyro. Let off-field effects and efficient hits do the shield work, then commit your expensive damage during vulnerability. Hydro damage alone will not solve a Hydro shield.
After the Baptist, refresh Hydro and Cryo for the two Husks. Try to place both inside the same damage area. Freeze them when possible; if the Defender blocks your frontal hits, move around it. The Standard Bearer can create enemy protection after hitting a shielded character. Bringing a shield is not itself the trigger, but standing still behind it can add work.[12]
Before leaving: if a cheap Skill will finish the wave, use it and collect particles with the support who needs Q next. Avoid spending your last healing Burst merely to shorten a nearly finished wave by a second.
Floor 12-2: Heal the Cocoon, Then Stop the Armor
First half: the Moonfly’s Cocoon reduces damage, incoming healing and CRIT Rate. An affected character escapes when their own HP reaches maximum. Heal your main damage dealer first; recover important off-field damage dealers too when their contribution matters. A party heal is faster, but four simultaneous full HP bars are not the condition for one character’s recovery.[13]
Use the heal after the debuff is applied, then start the main damage window. With Qiqi, stay close enough for her support to connect; if needed, put her on-field briefly to heal the party through attacks. Keep enough room to dodge the next area attack. The Moonfly’s high Pyro and Dendro resistance makes brute-force teams less forgiving.
Second half: during the Elite Treasure Hoarder’s seven-second armor preparation, trigger Frozen on the body three times. The alternative is Overloaded on the separate armor. These are different targets. Three Cryo hits do not automatically count as three Frozen reactions, and one long Freeze is not three reactions.[14]
For the recommended lower teams, maintain Hydro and repeated Cryo on the body. Keep the enemy within your application area rather than letting automatic targeting pull key attacks elsewhere. If the interruption fails, recover a complete application window; spending every Burst into the strengthened state can leave the next rotation empty.
Floor 12-3: Winged Lion Windows and Continuous Cryo Hits
First half: separate the Winged Lion’s two jobs. Its Electro ward needs the appropriate elemental damage; Stellar reactions can interrupt its special attack and help remove the ward. During its Anemo Orb phase, Pyro, Hydro, Electro or Cryo hits can destroy the orbs, while Stellar reactions provide a much quicker interruption route.[15]
Keep the necessary application available before the phase begins. Once the mechanic produces a weakened window, use your complete carry setup. Without the Stellar route, bring attacks that can actually reach the orbs; having the right element somewhere in the party is only the first step.
Second half: the Overseer Device starts with severe resistance and a momentum mechanic. Cryo damage hits reduce momentum; this is not the same question as how often a skill applies Cryo. Establish repeated Cryo hits promptly, then use the lower-resistance window. Do not spend the whole opening running after it while every Cryo source is idle.[16]
Skirk and Wriothesley provide continuous on-field hits. Ayaka’s Burst can supply a dense sequence, but using too much of it before the device slows wastes damage. Start supporting Cryo early and judge the moment to Q from the enemy state. Nightsoul interactions follow a different response path; they should not be treated as instant paralysis.
Time budgeting: both halves together must finish in under three minutes. If your lower half takes 100 seconds, the upper half needs less than 80 seconds, with a little margin. Measure your actual split instead of forcing a 90/90 target.
Why You Are Missing Nine Stars
Change one thing that addresses the observed failure. A rotation that loses ten seconds to the wrong shield will not be fixed by a little extra CRIT DMG.
What you see | How to check it | First adjustment |
|---|---|---|
Archer keeps dragging out the fight | Check whether every root was destroyed before the carry started. | Clear the roots with reliable hits, then begin the full damage window. |
Baptist’s shield barely moves | Watch its current element and which attacks actually apply the counter-element. | Use Cryo for the Electro/Hydro shields and Hydro for Pyro; save the nuke. |
Moonfly damage suddenly collapses | Check the active damage dealer’s HP and Cocoon status. | Heal that character to maximum after the debuff, then restart. |
Healing stops short of full HP | Watch the healing threshold, target and damage taken between ticks. | Improve effective healing or change who receives it; avoid the next hit. |
Treasure Hoarder still equips armor | Check body Freeze reactions versus hits on the armor. | Maintain body Hydro/Cryo, or move the Overloaded reaction to the armor. |
Overseer keeps spinning | Look for gaps or missed Cryo hits, not just active skill icons. | Restore continuous contact and combine Cryo sources. |
First rotation works; second rotation fails | Record E casts, particle receivers, Favonius procs and required Qs. | Use ER gear, correct the funnel, or remove optional Bursts. |
Frequent knockbacks eat the timer | Count interrupted field time and missed follow-ups. | Dodge earlier, shorten greedy strings, or adjust defensive utility. |
Mechanics and rotations work but the clear is late | Compare full, repeatable windows with the same cards and lineup. | Upgrade key Talents/weapons, then improve useful artifact stats. |
For farming, finish the required passives and useful Talent Levels first, then fix Energy and healing, then improve damage rolls. If you are comparing another character’s equipment, use the matching build article or the Genshin Impact guide hub rather than a stat target from an unrelated team.
Final Thoughts
There is no universal panel that does. The tables give useful build-planning targets, while weapons, Constellations, cards, shield handling and hit uptime determine what happens in the chamber. If the team misses the timer, use the diagnostic table before chasing a larger damage screenshot.
Choose your eight characters first, make their second rotation work, and learn the two or three moments where each chamber lets you deal meaningful damage. Those changes usually make your next attempt much more informative.
If you have already set a budget for Wishes, compare the available Genshin Impact top-up options on GamsGo. Keep that decision separate from fixing a missed rotation or an unfinished support build.

Spiral Abyss Floor 12 FAQ
Can You Clear Floor 12 Without Signature Weapons?
A signature weapon is not a mechanic requirement. The craftable and four-star options above preserve the basic roles, but their Energy, healing and passive conditions still matter. Start by checking a second complete rotation; upgrade weapons after the team can perform its jobs consistently.
Do You Need Vesna, Sandrone or the Latest Characters?
You need a workable mechanic route and enough damage for the timer. The Mizuki upper team avoids those limited cores, and Pair C reuses older lower-half characters. That reduces roster requirements, but does not prove every low-investment account can meet the damage check.
Should You Bring a Healer or a Shielder?
Healing is especially useful against the Moonfly and in Furina teams. Shields and interruption resistance help preserve field time, but they do not restore HP to clear the Cocoon. Against the Husks, avoid letting their attacks repeatedly connect with your shielded character.
Can You Use Different Teams for Different Chambers?
Your best star result for each chamber is retained within the same cycle. You can leave, choose another lineup, and replay the floor to target a missing chamber. Prepare Energy in earlier chambers when necessary. This is a different plan from clearing all three chambers consecutively with the same eight characters.